- How to Convert Speech to Text in Python
Step up your coding game with AI-powered Code Explainer . Get insights like never before!
Speech recognition is the ability of computer software to identify words and phrases in spoken language and convert them to human-readable text. In this tutorial, you will learn how you can convert speech to text in Python using the SpeechRecognition library .
As a result, we do not need to build any machine learning model from scratch, this library provides us with convenient wrappers for various well-known public speech recognition APIs (such as Google Cloud Speech API, IBM Speech To Text, etc.).
Note that if you do not want to use APIs, and directly perform inference on machine learning models instead, then definitely check this tutorial , in which I'll show you how you can use the current state-of-the-art machine learning model to perform speech recognition in Python.
Also, if you want other methods to do ASR, then check this speech recognition comprehensive tutorial .
Learn also: How to Translate Text in Python .

Getting Started
Alright, let's get started, installing the library using pip :
Okay, open up a new Python file and import it:
The nice thing about this library is it supports several recognition engines:
- CMU Sphinx (offline)
- Google Speech Recognition
- Google Cloud Speech API
- Microsoft Bing Voice Recognition
- Houndify API
- IBM Speech To Text
- Snowboy Hotword Detection (offline)
We gonna use Google Speech Recognition here, as it's straightforward and doesn't require any API key.
Transcribing an Audio File
Make sure you have an audio file in the current directory that contains English speech (if you want to follow along with me, get the audio file here ):
This file was grabbed from the LibriSpeech dataset, but you can use any audio WAV file you want, just change the name of the file, let's initialize our speech recognizer:
The below code is responsible for loading the audio file, and converting the speech into text using Google Speech Recognition:
This will take a few seconds to finish, as it uploads the file to Google and grabs the output, here is my result:
The above code works well for small or medium size audio files. In the next section, we gonna write code for large files.
Transcribing Large Audio Files
If you want to perform speech recognition of a long audio file, then the below function handles that quite well:
Note: You need to install Pydub using pip for the above code to work.
The above function uses split_on_silence() function from pydub.silence module to split audio data into chunks on silence. The min_silence_len parameter is the minimum length of silence in milliseconds to be used for a split.
silence_thresh is the threshold in which anything quieter than this will be considered silence, I have set it to the average dBFS minus 14 , keep_silence argument is the amount of silence to leave at the beginning and the end of each chunk detected in milliseconds.
These parameters won't be perfect for all sound files, try to experiment with these parameters with your large audio needs.
After that, we iterate over all chunks and convert each speech audio into text, and then add them up altogether, here is an example run:
Note : You can get 7601-291468-0006.wav file here .
So, this function automatically creates a folder for us and puts the chunks of the original audio file we specified, and then it runs speech recognition on all of them.
In case you want to split the audio file into fixed intervals, we can use the below function instead:
The above function splits the large audio file into chunks of 5 minutes. You can change the minutes parameter to fit your needs. Since my audio file isn't that large, I'm trying to split it into chunks of 10 seconds:
Reading from the Microphone
This requires PyAudio to be installed on your machine, here is the installation process depending on your operating system:
You can just pip install it:
You need to first install the dependencies:
You need to first install portaudio , then you can just pip install it:
Now let's use our microphone to convert our speech:
This will hear from your microphone for 5 seconds and then try to convert that speech into text!
It is pretty similar to the previous code, but we are using the Microphone() object here to read the audio from the default microphone, and then we used the duration parameter in the record() function to stop reading after 5 seconds and then upload the audio data to Google to get the output text.
You can also use the offset parameter in the record() function to start recording after offset seconds.
Also, you can recognize different languages by passing the language parameter to the recognize_google() function. For instance, if you want to recognize Spanish speech, you would use:
Check out supported languages in this StackOverflow answer .
As you can see, it is pretty easy and simple to use this library for converting speech to text. This library is widely used out there in the wild. Check the official documentation .
If you want to convert text to speech in Python as well, check this tutorial .
Read Also: How to Recognize Optical Characters in Images in Python .
Happy Coding ♥
Take the stress out of learning Python. Meet our Python Code Assistant – your new coding buddy. Give it a whirl!

How to Translate Languages in Python
Learn how to make a language translator and detector using Googletrans library (Google Translation API) for translating more than 100 languages with Python.

Speech Recognition using Transformers in Python
Learn how to perform speech recognition using wav2vec2 and whisper transformer models with the help of Huggingface transformers library in Python.

How to Play and Record Audio in Python
Learn how to play and record sound files using different libraries such as playsound, Pydub and PyAudio in Python.
Comment panel
Got a coding query or need some guidance before you comment? Check out this Python Code Assistant for expert advice and handy tips. It's like having a coding tutor right in your fingertips!

Join 50,000+ Python Programmers & Enthusiasts like you!
- Ethical Hacking
- Machine Learning
- General Python Tutorials
- Web Scraping
- Computer Vision
- Python Standard Library
- Application Programming Interfaces
- Game Development
- Web Programming
- Digital Forensics
- Natural Language Processing
- PDF File Handling
- Python for Multimedia
- GUI Programming
- Cryptography
- Packet Manipulation Using Scapy
New Tutorials
- How to Validate Credit Card Numbers in Python
- How to Make a Clickjacking Vulnerability Scanner with Python
- How to Perform Reverse DNS Lookups Using Python
- How to Check Password Strength with Python
- How to Build a Breakout Game with PyGame in Python
Popular Tutorials
- How to Read Emails in Python
- How to Extract Tables from PDF in Python
- How to Make a Keylogger in Python
- How to Encrypt and Decrypt Files in Python

Claim your Free Chapter!


The Ultimate Guide To Speech Recognition With Python
Table of Contents
How Speech Recognition Works – An Overview
Picking a python speech recognition package, installing speechrecognition, the recognizer class, supported file types, using record() to capture data from a file, capturing segments with offset and duration, the effect of noise on speech recognition, installing pyaudio, the microphone class, using listen() to capture microphone input, handling unrecognizable speech, putting it all together: a “guess the word” game, recap and additional resources, appendix: recognizing speech in languages other than english.
Watch Now This tutorial has a related video course created by the Real Python team. Watch it together with the written tutorial to deepen your understanding: Speech Recognition With Python
Have you ever wondered how to add speech recognition to your Python project? If so, then keep reading! It’s easier than you might think.
Far from a being a fad, the overwhelming success of speech-enabled products like Amazon Alexa has proven that some degree of speech support will be an essential aspect of household tech for the foreseeable future. If you think about it, the reasons why are pretty obvious. Incorporating speech recognition into your Python application offers a level of interactivity and accessibility that few technologies can match.
The accessibility improvements alone are worth considering. Speech recognition allows the elderly and the physically and visually impaired to interact with state-of-the-art products and services quickly and naturally—no GUI needed!
Best of all, including speech recognition in a Python project is really simple. In this guide, you’ll find out how. You’ll learn:
- How speech recognition works,
- What packages are available on PyPI; and
- How to install and use the SpeechRecognition package—a full-featured and easy-to-use Python speech recognition library.
In the end, you’ll apply what you’ve learned to a simple “Guess the Word” game and see how it all comes together.
Free Bonus: Click here to download a Python speech recognition sample project with full source code that you can use as a basis for your own speech recognition apps.
Before we get to the nitty-gritty of doing speech recognition in Python, let’s take a moment to talk about how speech recognition works. A full discussion would fill a book, so I won’t bore you with all of the technical details here. In fact, this section is not pre-requisite to the rest of the tutorial. If you’d like to get straight to the point, then feel free to skip ahead.
Speech recognition has its roots in research done at Bell Labs in the early 1950s. Early systems were limited to a single speaker and had limited vocabularies of about a dozen words. Modern speech recognition systems have come a long way since their ancient counterparts. They can recognize speech from multiple speakers and have enormous vocabularies in numerous languages.
The first component of speech recognition is, of course, speech. Speech must be converted from physical sound to an electrical signal with a microphone, and then to digital data with an analog-to-digital converter. Once digitized, several models can be used to transcribe the audio to text.
Most modern speech recognition systems rely on what is known as a Hidden Markov Model (HMM). This approach works on the assumption that a speech signal, when viewed on a short enough timescale (say, ten milliseconds), can be reasonably approximated as a stationary process—that is, a process in which statistical properties do not change over time.
In a typical HMM, the speech signal is divided into 10-millisecond fragments. The power spectrum of each fragment, which is essentially a plot of the signal’s power as a function of frequency, is mapped to a vector of real numbers known as cepstral coefficients. The dimension of this vector is usually small—sometimes as low as 10, although more accurate systems may have dimension 32 or more. The final output of the HMM is a sequence of these vectors.
To decode the speech into text, groups of vectors are matched to one or more phonemes —a fundamental unit of speech. This calculation requires training, since the sound of a phoneme varies from speaker to speaker, and even varies from one utterance to another by the same speaker. A special algorithm is then applied to determine the most likely word (or words) that produce the given sequence of phonemes.
One can imagine that this whole process may be computationally expensive. In many modern speech recognition systems, neural networks are used to simplify the speech signal using techniques for feature transformation and dimensionality reduction before HMM recognition. Voice activity detectors (VADs) are also used to reduce an audio signal to only the portions that are likely to contain speech. This prevents the recognizer from wasting time analyzing unnecessary parts of the signal.
Fortunately, as a Python programmer, you don’t have to worry about any of this. A number of speech recognition services are available for use online through an API, and many of these services offer Python SDKs .
A handful of packages for speech recognition exist on PyPI. A few of them include:
- google-cloud-speech
- pocketsphinx
- SpeechRecognition
- watson-developer-cloud
Some of these packages—such as wit and apiai—offer built-in features, like natural language processing for identifying a speaker’s intent, which go beyond basic speech recognition. Others, like google-cloud-speech, focus solely on speech-to-text conversion.
There is one package that stands out in terms of ease-of-use: SpeechRecognition.
Recognizing speech requires audio input, and SpeechRecognition makes retrieving this input really easy. Instead of having to build scripts for accessing microphones and processing audio files from scratch, SpeechRecognition will have you up and running in just a few minutes.
The SpeechRecognition library acts as a wrapper for several popular speech APIs and is thus extremely flexible. One of these—the Google Web Speech API—supports a default API key that is hard-coded into the SpeechRecognition library. That means you can get off your feet without having to sign up for a service.
The flexibility and ease-of-use of the SpeechRecognition package make it an excellent choice for any Python project. However, support for every feature of each API it wraps is not guaranteed. You will need to spend some time researching the available options to find out if SpeechRecognition will work in your particular case.
So, now that you’re convinced you should try out SpeechRecognition, the next step is getting it installed in your environment.
SpeechRecognition is compatible with Python 2.6, 2.7 and 3.3+, but requires some additional installation steps for Python 2 . For this tutorial, I’ll assume you are using Python 3.3+.
You can install SpeechRecognition from a terminal with pip:
Once installed, you should verify the installation by opening an interpreter session and typing:
Note: The version number you get might vary. Version 3.8.1 was the latest at the time of writing.
Go ahead and keep this session open. You’ll start to work with it in just a bit.
SpeechRecognition will work out of the box if all you need to do is work with existing audio files. Specific use cases, however, require a few dependencies. Notably, the PyAudio package is needed for capturing microphone input.
You’ll see which dependencies you need as you read further. For now, let’s dive in and explore the basics of the package.
All of the magic in SpeechRecognition happens with the Recognizer class.
The primary purpose of a Recognizer instance is, of course, to recognize speech. Each instance comes with a variety of settings and functionality for recognizing speech from an audio source.
Creating a Recognizer instance is easy. In your current interpreter session, just type:
Each Recognizer instance has seven methods for recognizing speech from an audio source using various APIs. These are:
- recognize_bing() : Microsoft Bing Speech
- recognize_google() : Google Web Speech API
- recognize_google_cloud() : Google Cloud Speech - requires installation of the google-cloud-speech package
- recognize_houndify() : Houndify by SoundHound
- recognize_ibm() : IBM Speech to Text
- recognize_sphinx() : CMU Sphinx - requires installing PocketSphinx
- recognize_wit() : Wit.ai
Of the seven, only recognize_sphinx() works offline with the CMU Sphinx engine. The other six all require an internet connection.
A full discussion of the features and benefits of each API is beyond the scope of this tutorial. Since SpeechRecognition ships with a default API key for the Google Web Speech API, you can get started with it right away. For this reason, we’ll use the Web Speech API in this guide. The other six APIs all require authentication with either an API key or a username/password combination. For more information, consult the SpeechRecognition docs .
Caution: The default key provided by SpeechRecognition is for testing purposes only, and Google may revoke it at any time . It is not a good idea to use the Google Web Speech API in production. Even with a valid API key, you’ll be limited to only 50 requests per day, and there is no way to raise this quota . Fortunately, SpeechRecognition’s interface is nearly identical for each API, so what you learn today will be easy to translate to a real-world project.
Each recognize_*() method will throw a speech_recognition.RequestError exception if the API is unreachable. For recognize_sphinx() , this could happen as the result of a missing, corrupt or incompatible Sphinx installation. For the other six methods, RequestError may be thrown if quota limits are met, the server is unavailable, or there is no internet connection.
Ok, enough chit-chat. Let’s get our hands dirty. Go ahead and try to call recognize_google() in your interpreter session.
What happened?
You probably got something that looks like this:
You might have guessed this would happen. How could something be recognized from nothing?
All seven recognize_*() methods of the Recognizer class require an audio_data argument. In each case, audio_data must be an instance of SpeechRecognition’s AudioData class.
There are two ways to create an AudioData instance: from an audio file or audio recorded by a microphone. Audio files are a little easier to get started with, so let’s take a look at that first.
Working With Audio Files
Before you continue, you’ll need to download an audio file. The one I used to get started, “harvard.wav,” can be found here . Make sure you save it to the same directory in which your Python interpreter session is running.
SpeechRecognition makes working with audio files easy thanks to its handy AudioFile class. This class can be initialized with the path to an audio file and provides a context manager interface for reading and working with the file’s contents.
Currently, SpeechRecognition supports the following file formats:
- WAV: must be in PCM/LPCM format
- FLAC: must be native FLAC format; OGG-FLAC is not supported
If you are working on x-86 based Linux, macOS or Windows, you should be able to work with FLAC files without a problem. On other platforms, you will need to install a FLAC encoder and ensure you have access to the flac command line tool. You can find more information here if this applies to you.
Type the following into your interpreter session to process the contents of the “harvard.wav” file:
The context manager opens the file and reads its contents, storing the data in an AudioFile instance called source. Then the record() method records the data from the entire file into an AudioData instance. You can confirm this by checking the type of audio :
You can now invoke recognize_google() to attempt to recognize any speech in the audio. Depending on your internet connection speed, you may have to wait several seconds before seeing the result.
Congratulations! You’ve just transcribed your first audio file!
If you’re wondering where the phrases in the “harvard.wav” file come from, they are examples of Harvard Sentences. These phrases were published by the IEEE in 1965 for use in speech intelligibility testing of telephone lines. They are still used in VoIP and cellular testing today.
The Harvard Sentences are comprised of 72 lists of ten phrases. You can find freely available recordings of these phrases on the Open Speech Repository website. Recordings are available in English, Mandarin Chinese, French, and Hindi. They provide an excellent source of free material for testing your code.
What if you only want to capture a portion of the speech in a file? The record() method accepts a duration keyword argument that stops the recording after a specified number of seconds.
For example, the following captures any speech in the first four seconds of the file:
The record() method, when used inside a with block, always moves ahead in the file stream. This means that if you record once for four seconds and then record again for four seconds, the second time returns the four seconds of audio after the first four seconds.
Notice that audio2 contains a portion of the third phrase in the file. When specifying a duration, the recording might stop mid-phrase—or even mid-word—which can hurt the accuracy of the transcription. More on this in a bit.
In addition to specifying a recording duration, the record() method can be given a specific starting point using the offset keyword argument. This value represents the number of seconds from the beginning of the file to ignore before starting to record.
To capture only the second phrase in the file, you could start with an offset of four seconds and record for, say, three seconds.
The offset and duration keyword arguments are useful for segmenting an audio file if you have prior knowledge of the structure of the speech in the file. However, using them hastily can result in poor transcriptions. To see this effect, try the following in your interpreter:
By starting the recording at 4.7 seconds, you miss the “it t” portion a the beginning of the phrase “it takes heat to bring out the odor,” so the API only got “akes heat,” which it matched to “Mesquite.”
Similarly, at the end of the recording, you captured “a co,” which is the beginning of the third phrase “a cold dip restores health and zest.” This was matched to “Aiko” by the API.
There is another reason you may get inaccurate transcriptions. Noise! The above examples worked well because the audio file is reasonably clean. In the real world, unless you have the opportunity to process audio files beforehand, you can not expect the audio to be noise-free.
Noise is a fact of life. All audio recordings have some degree of noise in them, and un-handled noise can wreck the accuracy of speech recognition apps.
To get a feel for how noise can affect speech recognition, download the “jackhammer.wav” file here . As always, make sure you save this to your interpreter session’s working directory.
This file has the phrase “the stale smell of old beer lingers” spoken with a loud jackhammer in the background.
What happens when you try to transcribe this file?
So how do you deal with this? One thing you can try is using the adjust_for_ambient_noise() method of the Recognizer class.
That got you a little closer to the actual phrase, but it still isn’t perfect. Also, “the” is missing from the beginning of the phrase. Why is that?
The adjust_for_ambient_noise() method reads the first second of the file stream and calibrates the recognizer to the noise level of the audio. Hence, that portion of the stream is consumed before you call record() to capture the data.
You can adjust the time-frame that adjust_for_ambient_noise() uses for analysis with the duration keyword argument. This argument takes a numerical value in seconds and is set to 1 by default. Try lowering this value to 0.5.
Well, that got you “the” at the beginning of the phrase, but now you have some new issues! Sometimes it isn’t possible to remove the effect of the noise—the signal is just too noisy to be dealt with successfully. That’s the case with this file.
If you find yourself running up against these issues frequently, you may have to resort to some pre-processing of the audio. This can be done with audio editing software or a Python package (such as SciPy ) that can apply filters to the files. A detailed discussion of this is beyond the scope of this tutorial—check out Allen Downey’s Think DSP book if you are interested. For now, just be aware that ambient noise in an audio file can cause problems and must be addressed in order to maximize the accuracy of speech recognition.
When working with noisy files, it can be helpful to see the actual API response. Most APIs return a JSON string containing many possible transcriptions. The recognize_google() method will always return the most likely transcription unless you force it to give you the full response.
You can do this by setting the show_all keyword argument of the recognize_google() method to True.
As you can see, recognize_google() returns a dictionary with the key 'alternative' that points to a list of possible transcripts. The structure of this response may vary from API to API and is mainly useful for debugging.
By now, you have a pretty good idea of the basics of the SpeechRecognition package. You’ve seen how to create an AudioFile instance from an audio file and use the record() method to capture data from the file. You learned how to record segments of a file using the offset and duration keyword arguments of record() , and you experienced the detrimental effect noise can have on transcription accuracy.
Now for the fun part. Let’s transition from transcribing static audio files to making your project interactive by accepting input from a microphone.
Working With Microphones
To access your microphone with SpeechRecognizer, you’ll have to install the PyAudio package . Go ahead and close your current interpreter session, and let’s do that.
The process for installing PyAudio will vary depending on your operating system.
Debian Linux
If you’re on Debian-based Linux (like Ubuntu) you can install PyAudio with apt :
Once installed, you may still need to run pip install pyaudio , especially if you are working in a virtual environment .
For macOS, first you will need to install PortAudio with Homebrew, and then install PyAudio with pip :
On Windows, you can install PyAudio with pip :
Testing the Installation
Once you’ve got PyAudio installed, you can test the installation from the console.
Make sure your default microphone is on and unmuted. If the installation worked, you should see something like this:
Shell A moment of silence, please... Set minimum energy threshold to 600.4452854381937 Say something! Copied! Go ahead and play around with it a little bit by speaking into your microphone and seeing how well SpeechRecognition transcribes your speech.
Note: If you are on Ubuntu and get some funky output like ‘ALSA lib … Unknown PCM’, refer to this page for tips on suppressing these messages. This output comes from the ALSA package installed with Ubuntu—not SpeechRecognition or PyAudio. In all reality, these messages may indicate a problem with your ALSA configuration, but in my experience, they do not impact the functionality of your code. They are mostly a nuisance.
Open up another interpreter session and create an instance of the recognizer class.
Now, instead of using an audio file as the source, you will use the default system microphone. You can access this by creating an instance of the Microphone class.
If your system has no default microphone (such as on a Raspberry Pi ), or you want to use a microphone other than the default, you will need to specify which one to use by supplying a device index. You can get a list of microphone names by calling the list_microphone_names() static method of the Microphone class.
Note that your output may differ from the above example.
The device index of the microphone is the index of its name in the list returned by list_microphone_names(). For example, given the above output, if you want to use the microphone called “front,” which has index 3 in the list, you would create a microphone instance like this:
For most projects, though, you’ll probably want to use the default system microphone.
Now that you’ve got a Microphone instance ready to go, it’s time to capture some input.
Just like the AudioFile class, Microphone is a context manager. You can capture input from the microphone using the listen() method of the Recognizer class inside of the with block. This method takes an audio source as its first argument and records input from the source until silence is detected.
Once you execute the with block, try speaking “hello” into your microphone. Wait a moment for the interpreter prompt to display again. Once the “>>>” prompt returns, you’re ready to recognize the speech.
If the prompt never returns, your microphone is most likely picking up too much ambient noise. You can interrupt the process with Ctrl + C to get your prompt back.
To handle ambient noise, you’ll need to use the adjust_for_ambient_noise() method of the Recognizer class, just like you did when trying to make sense of the noisy audio file. Since input from a microphone is far less predictable than input from an audio file, it is a good idea to do this anytime you listen for microphone input.
After running the above code, wait a second for adjust_for_ambient_noise() to do its thing, then try speaking “hello” into the microphone. Again, you will have to wait a moment for the interpreter prompt to return before trying to recognize the speech.
Recall that adjust_for_ambient_noise() analyzes the audio source for one second. If this seems too long to you, feel free to adjust this with the duration keyword argument.
The SpeechRecognition documentation recommends using a duration no less than 0.5 seconds. In some cases, you may find that durations longer than the default of one second generate better results. The minimum value you need depends on the microphone’s ambient environment. Unfortunately, this information is typically unknown during development. In my experience, the default duration of one second is adequate for most applications.
Try typing the previous code example in to the interpeter and making some unintelligible noises into the microphone. You should get something like this in response:
Audio that cannot be matched to text by the API raises an UnknownValueError exception. You should always wrap calls to the API with try and except blocks to handle this exception .
Note : You may have to try harder than you expect to get the exception thrown. The API works very hard to transcribe any vocal sounds. Even short grunts were transcribed as words like “how” for me. Coughing, hand claps, and tongue clicks would consistently raise the exception.
Now that you’ve seen the basics of recognizing speech with the SpeechRecognition package let’s put your newfound knowledge to use and write a small game that picks a random word from a list and gives the user three attempts to guess the word.
Here is the full script:
Let’s break that down a little bit.
The recognize_speech_from_mic() function takes a Recognizer and Microphone instance as arguments and returns a dictionary with three keys. The first key, "success" , is a boolean that indicates whether or not the API request was successful. The second key, "error" , is either None or an error message indicating that the API is unavailable or the speech was unintelligible. Finally, the "transcription" key contains the transcription of the audio recorded by the microphone.
The function first checks that the recognizer and microphone arguments are of the correct type, and raises a TypeError if either is invalid:
The listen() method is then used to record microphone input:
The adjust_for_ambient_noise() method is used to calibrate the recognizer for changing noise conditions each time the recognize_speech_from_mic() function is called.
Next, recognize_google() is called to transcribe any speech in the recording. A try...except block is used to catch the RequestError and UnknownValueError exceptions and handle them accordingly. The success of the API request, any error messages, and the transcribed speech are stored in the success , error and transcription keys of the response dictionary, which is returned by the recognize_speech_from_mic() function.
You can test the recognize_speech_from_mic() function by saving the above script to a file called “guessing_game.py” and running the following in an interpreter session:
The game itself is pretty simple. First, a list of words, a maximum number of allowed guesses and a prompt limit are declared:
Next, a Recognizer and Microphone instance is created and a random word is chosen from WORDS :
After printing some instructions and waiting for 3 three seconds, a for loop is used to manage each user attempt at guessing the chosen word. The first thing inside the for loop is another for loop that prompts the user at most PROMPT_LIMIT times for a guess, attempting to recognize the input each time with the recognize_speech_from_mic() function and storing the dictionary returned to the local variable guess .
If the "transcription" key of guess is not None , then the user’s speech was transcribed and the inner loop is terminated with break . If the speech was not transcribed and the "success" key is set to False , then an API error occurred and the loop is again terminated with break . Otherwise, the API request was successful but the speech was unrecognizable. The user is warned and the for loop repeats, giving the user another chance at the current attempt.
Once the inner for loop terminates, the guess dictionary is checked for errors. If any occurred, the error message is displayed and the outer for loop is terminated with break , which will end the program execution.
If there weren’t any errors, the transcription is compared to the randomly selected word. The lower() method for string objects is used to ensure better matching of the guess to the chosen word. The API may return speech matched to the word “apple” as “Apple” or “apple,” and either response should count as a correct answer.
If the guess was correct, the user wins and the game is terminated. If the user was incorrect and has any remaining attempts, the outer for loop repeats and a new guess is retrieved. Otherwise, the user loses the game.
When run, the output will look something like this:
In this tutorial, you’ve seen how to install the SpeechRecognition package and use its Recognizer class to easily recognize speech from both a file—using record() —and microphone input—using listen(). You also saw how to process segments of an audio file using the offset and duration keyword arguments of the record() method.
You’ve seen the effect noise can have on the accuracy of transcriptions, and have learned how to adjust a Recognizer instance’s sensitivity to ambient noise with adjust_for_ambient_noise(). You have also learned which exceptions a Recognizer instance may throw— RequestError for bad API requests and UnkownValueError for unintelligible speech—and how to handle these with try...except blocks.
Speech recognition is a deep subject, and what you have learned here barely scratches the surface. If you’re interested in learning more, here are some additional resources.
For more information on the SpeechRecognition package:
- Library reference
- Troubleshooting page
A few interesting internet resources:
- Behind the Mic: The Science of Talking with Computers . A short film about speech processing by Google.
- A Historical Perspective of Speech Recognition by Huang, Baker and Reddy. Communications of the ACM (2014). This article provides an in-depth and scholarly look at the evolution of speech recognition technology.
- The Past, Present and Future of Speech Recognition Technology by Clark Boyd at The Startup. This blog post presents an overview of speech recognition technology, with some thoughts about the future.
Some good books about speech recognition:
- The Voice in the Machine: Building Computers That Understand Speech , Pieraccini, MIT Press (2012). An accessible general-audience book covering the history of, as well as modern advances in, speech processing.
- Fundamentals of Speech Recognition , Rabiner and Juang, Prentice Hall (1993). Rabiner, a researcher at Bell Labs, was instrumental in designing some of the first commercially viable speech recognizers. This book is now over 20 years old, but a lot of the fundamentals remain the same.
- Automatic Speech Recognition: A Deep Learning Approach , Yu and Deng, Springer (2014). Yu and Deng are researchers at Microsoft and both very active in the field of speech processing. This book covers a lot of modern approaches and cutting-edge research but is not for the mathematically faint-of-heart.
Throughout this tutorial, we’ve been recognizing speech in English, which is the default language for each recognize_*() method of the SpeechRecognition package. However, it is absolutely possible to recognize speech in other languages, and is quite simple to accomplish.
To recognize speech in a different language, set the language keyword argument of the recognize_*() method to a string corresponding to the desired language. Most of the methods accept a BCP-47 language tag, such as 'en-US' for American English, or 'fr-FR' for French. For example, the following recognizes French speech in an audio file:
Only the following methods accept a language keyword argument:
- recognize_bing()
- recognize_google()
- recognize_google_cloud()
- recognize_ibm()
- recognize_sphinx()
To find out which language tags are supported by the API you are using, you’ll have to consult the corresponding documentation . A list of tags accepted by recognize_google() can be found in this Stack Overflow answer .
🐍 Python Tricks 💌
Get a short & sweet Python Trick delivered to your inbox every couple of days. No spam ever. Unsubscribe any time. Curated by the Real Python team.

About David Amos

David is a writer, programmer, and mathematician passionate about exploring mathematics through code.
Each tutorial at Real Python is created by a team of developers so that it meets our high quality standards. The team members who worked on this tutorial are:

Master Real-World Python Skills With Unlimited Access to Real Python
Join us and get access to thousands of tutorials, hands-on video courses, and a community of expert Pythonistas:
Join us and get access to thousands of tutorials, hands-on video courses, and a community of expert Pythonistas:
What Do You Think?
What’s your #1 takeaway or favorite thing you learned? How are you going to put your newfound skills to use? Leave a comment below and let us know.
Commenting Tips: The most useful comments are those written with the goal of learning from or helping out other students. Get tips for asking good questions and get answers to common questions in our support portal . Looking for a real-time conversation? Visit the Real Python Community Chat or join the next “Office Hours” Live Q&A Session . Happy Pythoning!
Keep Learning
Related Topics: advanced data-science machine-learning
Recommended Video Course: Speech Recognition With Python
Keep reading Real Python by creating a free account or signing in:
Already have an account? Sign-In
Almost there! Complete this form and click the button below to gain instant access:
Get a Full Python Speech Recognition Sample Project (Source Code / .zip)
🔒 No spam. We take your privacy seriously.
- Português – Brasil
Using the Speech-to-Text API with Python
1. overview.

The Speech-to-Text API enables developers to convert audio to text in over 125 languages and variants, by applying powerful neural network models in an easy to use API.
In this tutorial, you will focus on using the Speech-to-Text API with Python.
What you'll learn
- How to set up your environment
- How to transcribe audio files in English
- How to transcribe audio files with word timestamps
- How to transcribe audio files in different languages
What you'll need
- A Google Cloud project
- A browser, such as Chrome or Firefox
- Familiarity using Python
How will you use this tutorial?
How would you rate your experience with python, how would you rate your experience with google cloud services, 2. setup and requirements, self-paced environment setup.
- Sign-in to the Google Cloud Console and create a new project or reuse an existing one. If you don't already have a Gmail or Google Workspace account, you must create one .

- The Project name is the display name for this project's participants. It is a character string not used by Google APIs. You can always update it.
- The Project ID is unique across all Google Cloud projects and is immutable (cannot be changed after it has been set). The Cloud Console auto-generates a unique string; usually you don't care what it is. In most codelabs, you'll need to reference your Project ID (typically identified as PROJECT_ID ). If you don't like the generated ID, you might generate another random one. Alternatively, you can try your own, and see if it's available. It can't be changed after this step and remains for the duration of the project.
- For your information, there is a third value, a Project Number , which some APIs use. Learn more about all three of these values in the documentation .
- Next, you'll need to enable billing in the Cloud Console to use Cloud resources/APIs. Running through this codelab won't cost much, if anything at all. To shut down resources to avoid incurring billing beyond this tutorial, you can delete the resources you created or delete the project. New Google Cloud users are eligible for the $300 USD Free Trial program.
Start Cloud Shell
While Google Cloud can be operated remotely from your laptop, in this codelab you will be using Cloud Shell , a command line environment running in the Cloud.
Activate Cloud Shell

If this is your first time starting Cloud Shell, you're presented with an intermediate screen describing what it is. If you were presented with an intermediate screen, click Continue .

It should only take a few moments to provision and connect to Cloud Shell.

This virtual machine is loaded with all the development tools needed. It offers a persistent 5 GB home directory and runs in Google Cloud, greatly enhancing network performance and authentication. Much, if not all, of your work in this codelab can be done with a browser.
Once connected to Cloud Shell, you should see that you are authenticated and that the project is set to your project ID.
- Run the following command in Cloud Shell to confirm that you are authenticated:
Command output
- Run the following command in Cloud Shell to confirm that the gcloud command knows about your project:
If it is not, you can set it with this command:
3. Environment setup
Before you can begin using the Speech-to-Text API, run the following command in Cloud Shell to enable the API:
You should see something like this:
Now, you can use the Speech-to-Text API!
Navigate to your home directory:
Create a Python virtual environment to isolate the dependencies:
Activate the virtual environment:
Install IPython and the Speech-to-Text API client library:
Now, you're ready to use the Speech-to-Text API client library!
In the next steps, you'll use an interactive Python interpreter called IPython , which you installed in the previous step. Start a session by running ipython in Cloud Shell:
You're ready to make your first request...
4. Transcribe audio files
In this section, you will transcribe an English audio file.
Copy the following code into your IPython session:
Take a moment to study the code and see how it uses the recognize client library method to transcribe an audio file*.* The config parameter indicates how to process the request and the audio parameter specifies the audio data to be recognized.
Send a request:
You should see the following output:
Update the configuration to enable automatic punctuation and send a new request:
In this step, you were able to transcribe an audio file in English, using different parameters, and print out the result. You can read more about transcribing audio files .
5. Get word timestamps
Speech-to-Text can detect time offsets (timestamps) for the transcribed audio. Time offsets show the beginning and end of each spoken word in the supplied audio. A time offset value represents the amount of time that has elapsed from the beginning of the audio, in increments of 100ms.
To transcribe an audio file with word timestamps, update your code by copying the following into your IPython session:
Take a moment to study the code and see how it transcribes an audio file with word timestamps*.* The enable_word_time_offsets parameter tells the API to return the time offsets for each word (see the doc for more details).
In this step, you were able to transcribe an audio file in English with word timestamps and print the result. Read more about getting word timestamps .
6. Transcribe different languages
The Speech-to-Text API recognizes more than 125 languages and variants! You can find a list of supported languages here .
In this section, you will transcribe a French audio file.
To transcribe the French audio file, update your code by copying the following into your IPython session:
In this step, you were able to transcribe a French audio file and print the result. You can read more about the supported languages .
7. Congratulations!
You learned how to use the Speech-to-Text API using Python to perform different kinds of transcription on audio files!
To clean up your development environment, from Cloud Shell:
- If you're still in your IPython session, go back to the shell: exit
- Stop using the Python virtual environment: deactivate
- Delete your virtual environment folder: cd ~ ; rm -rf ./venv-speech
To delete your Google Cloud project, from Cloud Shell:
- Retrieve your current project ID: PROJECT_ID=$(gcloud config get-value core/project)
- Make sure this is the project you want to delete: echo $PROJECT_ID
- Delete the project: gcloud projects delete $PROJECT_ID
- Test the demo in your browser: https://cloud.google.com/speech-to-text
- Speech-to-Text documentation: https://cloud.google.com/speech-to-text/docs
- Python on Google Cloud: https://cloud.google.com/python
- Cloud Client Libraries for Python: https://github.com/googleapis/google-cloud-python
This work is licensed under a Creative Commons Attribution 2.0 Generic License.
Except as otherwise noted, the content of this page is licensed under the Creative Commons Attribution 4.0 License , and code samples are licensed under the Apache 2.0 License . For details, see the Google Developers Site Policies . Java is a registered trademark of Oracle and/or its affiliates.
- Data Science
- Data Analysis
- Data Visualization
- Machine Learning
- Deep Learning
- Computer Vision
- Artificial Intelligence
- AI ML DS Interview Series
- AI ML DS Projects series
- Data Engineering
- Web Scrapping
Speech Recognition Module Python
Speech recognition, a field at the intersection of linguistics, computer science, and electrical engineering, aims at designing systems capable of recognizing and translating spoken language into text. Python, known for its simplicity and robust libraries, offers several modules to tackle speech recognition tasks effectively. In this article, we’ll explore the essence of speech recognition in Python, including an overview of its key libraries, how they can be implemented, and their practical applications.
Key Python Libraries for Speech Recognition
- SpeechRecognition : One of the most popular Python libraries for recognizing speech. It provides support for several engines and APIs, such as Google Web Speech API, Microsoft Bing Voice Recognition, and IBM Speech to Text. It’s known for its ease of use and flexibility, making it a great starting point for beginners and experienced developers alike.
- PyAudio : Essential for audio input and output in Python, PyAudio provides Python bindings for PortAudio, the cross-platform audio I/O library. It’s often used alongside SpeechRecognition to capture microphone input for real-time speech recognition.
- DeepSpeech : Developed by Mozilla, DeepSpeech is an open-source deep learning-based voice recognition system that uses models trained on the Baidu’s Deep Speech research project. It’s suitable for developers looking to implement more sophisticated speech recognition features with the power of deep learning.
Implementing Speech Recognition with Python
A basic implementation using the SpeechRecognition library involves several steps:
- Audio Capture : Capturing audio from the microphone using PyAudio.
- Audio Processing : Converting the audio signal into data that the SpeechRecognition library can work with.
- Recognition : Calling the recognize_google() method (or another available recognition method) on the SpeechRecognition library to convert the audio data into text.
Here’s a simple example:
Practical Applications
Speech recognition has a wide range of applications:
- Voice-activated Assistants: Creating personal assistants like Siri or Alexa.
- Accessibility Tools: Helping individuals with disabilities interact with technology.
- Home Automation: Enabling voice control over smart home devices.
- Transcription Services: Automatically transcribing meetings, lectures, and interviews.
Challenges and Considerations
While implementing speech recognition, developers might face challenges such as background noise interference, accents, and dialects. It’s crucial to consider these factors and test the application under various conditions. Furthermore, privacy and ethical considerations must be addressed, especially when handling sensitive audio data.
Speech recognition in Python offers a powerful way to build applications that can interact with users in natural language. With the help of libraries like SpeechRecognition, PyAudio, and DeepSpeech, developers can create a range of applications from simple voice commands to complex conversational interfaces. Despite the challenges, the potential for innovative applications is vast, making speech recognition an exciting area of development in Python.
FAQ on Speech Recognition Module in Python
What is the speech recognition module in python.
The Speech Recognition module, often referred to as SpeechRecognition, is a library that allows Python developers to convert spoken language into text by utilizing various speech recognition engines and APIs. It supports multiple services like Google Web Speech API, Microsoft Bing Voice Recognition, IBM Speech to Text, and others.
How can I install the Speech Recognition module?
You can install the Speech Recognition module by running the following command in your terminal or command prompt: pip install SpeechRecognition For capturing audio from the microphone, you might also need to install PyAudio. On most systems, this can be done via pip: pip install PyAudio
Do I need an internet connection to use the Speech Recognition module?
Yes, for most of the supported APIs like Google Web Speech, Microsoft Bing Voice Recognition, and IBM Speech to Text, an active internet connection is required. However, if you use the CMU Sphinx engine, you do not need an internet connection as it operates offline.
Please Login to comment...
Similar reads.
- AI-ML-DS With Python
- Python Framework
- Python-Library
Improve your Coding Skills with Practice
What kind of Experience do you want to share?
Your Gateway to Python Mastery!
How to Convert Speech to Text in Python
- 29 June 2021
- Cool Python Programs

Introduction
Have you seen any movies in the Iron Man series? If your answer is Yes, then you may have noticed that Tony Stark had a personal assistant named Jarvis . Jarvis is a computer program and it can recognize human voices. But how is this possible, right? At the end of this tutorial, you’ll get your answer hopefully. So, be patient and keep reading the article.
Python offers a library called SpeechRecognition . It helps to convert speech to text using some engines or API s. In this section, we will discuss how to convert speech to text in Python .
This topic is an example of speech recognition in python. In artificial intelligence, data science, machine learning, or deep learning it’s widely useful content. For instance, you may heard about Alexa , Siri , or “ Hey Google “.

These tools are very intelligent in their field. We are not going to build such a tool here. But the reason I’m giving those examples is just because of the motive of learning this topic that we are going to learn in this tutorial.
🤫Visit Also : Communicate with Your Friends Secretly using Python
1. Engine/API supports
- Google Speech Recognition
- Google Cloud Speech
- Microsoft Bing Voice Recognition
- Houndify API
- IBM Speech to Text
- Snowboy Hotword Detection
All these engines work online except CPU Sphinx and Snowboy Hotword Detection. In this tutorial, we will use Google Speech Recognition because it’s easy to use for beginner level and free somehow.
Except for Google Speech Recognition, other APIs need either subscription or limited use or authentication.
Note: Google Speech Recognition uses the default API Key if the user doesn’t enter a personal key.
2. Requirements
- python 2.6 , python 2.7 , or Python 3.3+
- PyAudio 0.2.11+ (For using the microphone)
- FLAC encoder (If your system is x86 architecture-based, otherwise it’s not required)
3. Installation
- pip install SpeechRecognition
4. The First thing to do after installing the SpeechRecognition library
Run this command to check if the library is working or not. Do this at the very first step to make sure the microphone of your system can read your voice. I hope you’ll enjoy this.
A moment of silence, please… Set minimum energy threshold to 2798.913063769431 Say something! Got it! Now to recognize it… You said hi how are you all Say something! Got it! Now to recognize it… Oops! Didn’t catch that Say something!
The line is written in the yellow space I said to the program by the microphone of my laptop. You try too.
5. Convert speech to text in Python
5.1. look before.
SpeechRecognition doesn’t support mp3 format. I strongly suggest you use the WAV format to get the result satisfied.
5.2. Audio File

6. Capture a specific segment of a speech
You can convert a specific segment instead of the entire speech. You have to mention how long you want to capture, by passing the time length in seconds, to the duration parameter.
You can set an offset value to capture the speech from a specific time length.
7. Capturing speech from a microphone
To work with a microphone You must install PyAudio in your system as described earlier. Run this command to install this library.
🔹pip install PyAudio
7.1. List of all mic
Maybe You’re using a desktop or an external microphone device. Run the code below to check the list of microphones installed in your system.
[‘HDA Intel MID: 92HD81B1X5 Analog (hw:0,0)’, ‘HDA Intel MID: HDMI 0 (hw:0,3)’, ‘sysdefault’, ‘hdmi’, ‘samplerate’, ‘speexrate’, ‘pulse’, ‘upmix’, ‘vdownmix’, ‘default’]
Here, the output of a list of all microphones in my system(I’m using a laptop here). We’ll use the default mic of our system. You can choose another option by passing the device_index= parameter to the Microphone() class. I suggest you use the default mic for laptop users.
If You’re using a desktop, you need to install an external microphone device to run this code.
Now capture your voice from the microphone of your system. The Python program will read your voice and convert that into text.
🎥Visit Also : Create a Screen Recorder📽 using Python – Very Easy to Use
I hope you have a basic idea of how Jarvis or a computer program can read human voices. Google Speech Recognition is good for developing small projects because it can be used for free somehow.
But if you’re developing a real-world project using speech recognition then it could be best to use this feature authentically. For example, you can use an API key or by using a username and password, etc.
In this tutorial, you learned how to convert speech to text using Python SpeechRecognition tool. Build your virtual assistant using this feature of Python. I hope you got the idea. Please share your love and leave comments below.
Thanks for reading!💙

Subhankar Rakshit
Hey there! I’m Subhankar Rakshit, the brains behind PySeek. I’m a Post Graduate in Computer Science. PySeek is where I channel my love for Python programming and share it with the world through engaging and informative blogs.
You may also like

Access Your Mobile Camera as a Webcam Using a Python Script
- 25 June 2024

Steganography: Hide Your Text Behind an Image using Python
- 3 June 2024

Secure Your Folders: Encrypt & Decrypt in Python with AES
- 25 May 2024

Plain Text to Secret Code: Encrypt Your Message in Python
- 13 May 2024
Trending now


Speech Recognition Python – Converting Speech to Text
Are you surprised about how the modern devices that are non-living things listen your voice, not only this but they responds too. Yes,Its looks like a fantasy, but now-a-days technology are doing the surprising things that were not possible in past. So guys, welcome to my new tutorial Speech Recognition Python .This is a very awesome tutorial having lots of interesting stuffs. In this tutorial we will learn about concept of speech recognition and it’s implementation in python. So let’s gets started.
As the technologies are growing more rapidly and new features are emerging in this way speech recognition is one of them. Speech recognition is a technology that have evolved exponentially over the past few years. Speech recognition is one of the popular and best feature in computer world. It have numerous applications that can boost convenience, enhance security, help law enforcement efforts, that are the few examples. Let’s start understanding the concept of speech recognition, it’s working and applications.
What is Speech Recognition?
- Speech Recognition is a process in which a computer or device record the speech of humans and convert it into text format.
- It is also known as A utomatic Speech Recognition ( ASR ), computer speech recognition or S peech To Text ( STT ).
- Linguistics, computer science, and electrical engineering are some fields that are associated with Speech Recognition.

Working Nature of Speech Recognition
Now we will discuss how it actually works?

The above pictures shows the working principle of Speech Recognition very clearly.Now let’s understand the concept behind it.
It is based on the algorithm of acoustic and language modeling. So now the question is -what is acoustic and language modeling?
- Acoustic modeling represents the relationship between linguistic units of speech and audio signals.
- Language modeling matches sounds with word sequences to help distinguish between words that sound similar.
Any speech recognition program is evaluated using two factors:
- Accuracy (percentage error in converting spoken words to digital data).
- Speed (extent to which the program can keep up with a human speaker).
Applications
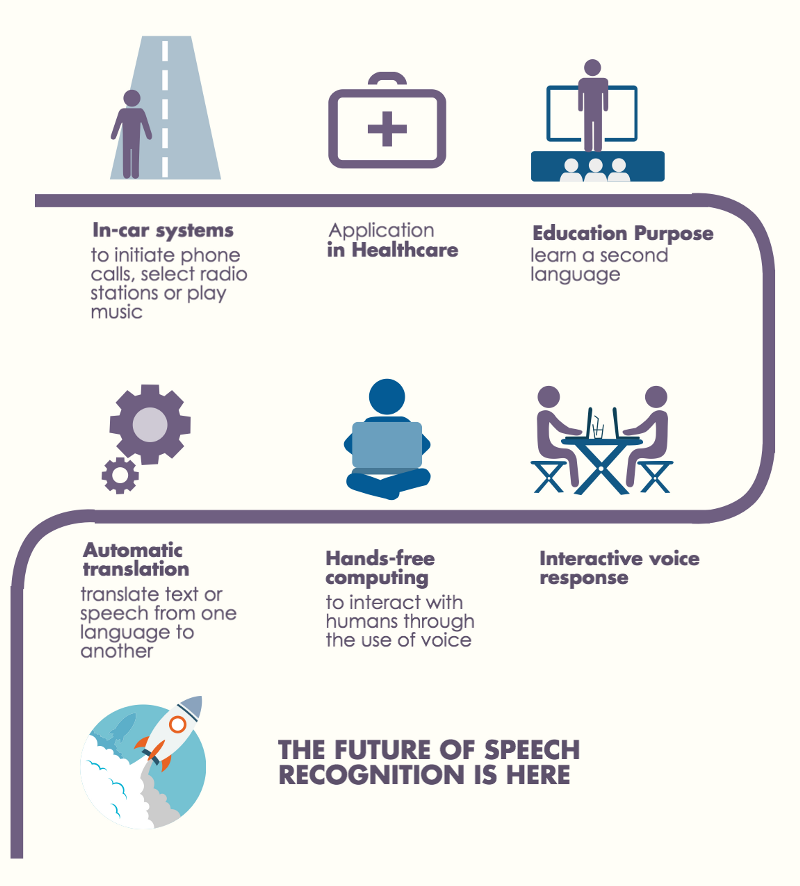
The most frequent applications of speech recognition are following:
- In-car systems.
- Health care – Medical documentation and Therapeutic use
- Military – High performance fighter aircraft ,Helicopters,Training air traffic controllers.
- Telephony and other domains
- Usage in Education and Daily life
Speech Recognition Python
Have you ever wondered how to add speech recognition to your Python project? If so, then keep reading! It’s easier than you might think.
Implementing Speech Recognition in Python is very easy and simple. Here we will be using two libraries which are Speech Recognition and PyAudio.
Creating new project
Create a new project and name it as SpeechRecognitionExample (Though the name doesn’t matter at all it can be anything). And then create a python file inside the project. I hope you already know about creating new project in python.
Installing Libraries
we have to install two library for implementing speech recognition.
- SpeechRecognition
Installing SpeechRecognition
- Go to terminal and type
| install SpeechRecognition |
SpeechRecognition is a library that helps in performing speech recognition in python. It support for several engines and APIs, online and offline e.g. Google Cloud Speech API, Microsoft Bing Voice Recognition, IBM Speech to Text etc.
Installing PyAudio
| install pyaudio |
PyAudio provides Python bindings for PortAudio , the cross-platform audio I/O library. With PyAudio, you can easily use Python to play and record audio on a variety of platforms, such as GNU/Linux, Microsoft Windows, and Apple Mac OS X / macOS.
Performing Speech Recognition
Now let’s jump into the coding part.
So this is the code for speech recognition in python.As you are seeing, it is quite simple and easy.
| speech_recognition as sr # import the library = sr.Recognizer() # initialize recognizer sr.Microphone() as source: # mention source it will be either Microphone or audio files. print("Speak Anything :") audio = r.listen(source) # listen to the source try: text = r.recognize_google(audio) # use recognizer to convert our audio into text part. print("You said : {}".format(text)) except: print("Sorry could not recognize your voice") # In case of voice not recognized clearly |
Explanation of code
So now we will start understanding the code line-by-line.
- first of all we will import speech_recognition as sr.
- Notice that we have speech_recognition in such format whereas earlier we have installed it in this way SpeechRecognition , so you need to have a look around the cases because this is case sensitive.
- Now we have used as notation because writing speech_recognition whole every time is not a good way.
- Now we have to initialize r = sr.Recognizer() , this will work as a recognizer to recognize our voice.
- So, with sr.Microphone() as source: which means that we are initialising our source to sr.Microphone ,we can also use some audio files to convert into text but in this tutorial i am using Microphone voice.
- Next we will print a simple statement that recommend the user to speak anything.
- Now we have to use r.listen(source) command and we have to listen the source.So, it will listen to the source and store it in the audio.
- It may happen some time the audio is not clear and you might not get it correctly ,so we can put it inside the try and except block .
- So inside the try block, our text will be text = r.recognize_google(audio) , now we have various options like recognize_bing(),recognize_google_cloud(),recognize_ibm(), etc.But for this one i am using recognize_google().And lastly we have to pass our audio.
- And this will convert our audio into text.
- Now we just have to print print(“You said : {}”.format(text)) ,this will print whatever you have said.
- In the except block we can just write print(“Sorry could not recognize your voice”) , this will message you if your voice is not recorded clearly.
The output of the above code will be as below.

So, its working fine.Obviously You must have enjoyed it, yeah am i right or not?
If you are working on a desktop that do not have a mic you can try some android apps like Wo Mic , from play store to use your smartphone as a mic. And if you’ve got a real mic or headphones with mic then you can try them too.
Finally Speech Recognition Python Tutorial completed successfully. So friends If you have any question, then leave your comments. If you found this tutorial helpful, then please SHARE it with your friends. Thank You 🙂
25 thoughts on “Speech Recognition Python – Converting Speech to Text”
Errors on pip install pyaudio
[1] Easily install SpeechRecognition 3.8.1 with !pip install SpeechRecognition the leading ! since I am within a cell in Jupyter Notebook on Microsoft Azure ( http://www.notebooks.azure.com )
[2] Errors on !pip install pyaudio Looks like it gcc build failed since there is no portaudio.h Any hints about pyaudio? DETAILS: Collecting pyaudio Downloading https://files.pythonhosted.org/packages/ab/42/b4f04721c5c5bfc196ce156b3c768998ef8c0ae3654ed29ea5020c749a6b/PyAudio-0.2.11.tar.gz Building wheels for collected packages: pyaudio Running setup.py bdist_wheel for pyaudio … error Complete output from command /home/nbuser/anaconda3_501/bin/python -u -c “import setuptools, tokenize;__file__=’/tmp/pip-install-hgcg4y3h/pyaudio/setup.py’;f=getattr(tokenize, ‘open’, open)(__file__);code=f.read().replace(‘\r\n’, ‘\n’);f.close();exec(compile(code, __file__, ‘exec’))” bdist_wheel -d /tmp/pip-wheel-xnk_drv5 –python-tag cp36: running bdist_wheel running build running build_py creating build creating build/lib.linux-x86_64-3.6 copying src/pyaudio.py -> build/lib.linux-x86_64-3.6 running build_ext building ‘_portaudio’ extension creating build/temp.linux-x86_64-3.6 creating build/temp.linux-x86_64-3.6/src gcc -pthread -B /home/nbuser/anaconda3_501/compiler_compat -Wl,–sysroot=/ -Wsign-compare -DNDEBUG -g -fwrapv -O3 -Wall -Wstrict-prototypes -fPIC -I/home/nbuser/anaconda3_501/include/python3.6m -c src/_portaudiomodule.c -o build/temp.linux-x86_64-3.6/src/_portaudiomodule.o src/_portaudiomodule.c:29:23: fatal error: portaudio.h: No such file or directory compilation terminated. error: command ‘gcc’ failed with exit status 1 <<<<<<<<<<<<<<<<<<<< build/lib.linux-x86_64-3.6 running build_ext building ‘_portaudio’ extension creating build/temp.linux-x86_64-3.6 creating build/temp.linux-x86_64-3.6/src gcc -pthread -B /home/nbuser/anaconda3_501/compiler_compat -Wl,–sysroot=/ -Wsign-compare -DNDEBUG -g -fwrapv -O3 -Wall -Wstrict-prototypes -fPIC -I/home/nbuser/anaconda3_501/include/python3.6m -c src/_portaudiomodule.c -o build/temp.linux-x86_64-3.6/src/_portaudiomodule.o src/_portaudiomodule.c:29:23: fatal error: portaudio.h: No such file or directory compilation terminated. error: command ‘gcc’ failed with exit status 1
—————————————- Command “/home/nbuser/anaconda3_501/bin/python -u -c “import setuptools, tokenize;__file__=’/tmp/pip-install-hgcg4y3h/pyaudio/setup.py’;f=getattr(tokenize, ‘open’, open)(__file__);code=f.read().replace(‘\r\n’, ‘\n’);f.close();exec(compile(code, __file__, ‘exec’))” install –record /tmp/pip-record-ftuiec6_/install-record.txt –single-version-externally-managed –compile” failed with error code 1 in /tmp/pip-install-hgcg4y3h/pyaudio/
which operating system you are using?
You can try this, I think it will help. https://stackoverflow.com/questions/5921947/pyaudio-installation-error-command-gcc-failed-with-exit-status-1 And again if you get something like unmet dependencies then you should run sudo apt-get install -f and then try to install pyaudio.
Your real problem is with portaudio.h which has no available python wheel or libraries and this is currently not available on Python 3.7 so to remove that error downgrade the python version to 3.6 and run the same command pip install pyAudio it will work
Just install python 3.6 and pip install PyAudio will work
This is on some Microsoft server that hosts Microsoft Azure and Jupyter Notebooks.
I am using using Chrome browser on Windows 10, but that should not matter.
I login at https://notebooks.azure.com/
In a Jupyter Notebook, the 2 Python commands:
‘posix’
Hope that helps.
Edward Bujak
This is awesome update in Python
Thanks for the post, it is very helpful. I tried and it worked fine for me. But it converted only the first 4-5s of the audio file. (1 short sentence) What if I want to convert longer audio files? Do you have any recommendations?
Thanks in advance.
hello sir thank you so much i tried with this code its working fine…i have one query that with this code its taking some time to give response(text) back .can i add loop in this code if(can u tell me the code) or any other methods how best i can improve the speed .please help f=me for this sir….WAITING FOR RESPONSE Thanks in advance.
First of all thanks for your comment.Yes it takes some time to response.It may be depends upon your internet speed or speaker’s quality.
it shows the error message “module ‘speech_recognition’ has no attribute ‘Recognizer’ “
May be your file name is speech_recognition.py .You need simple to rename your module (file) like speech-recog.py.
Thanks for sharing it worked for me
If voice is unclear to read , how can it eliminate around noisy things to get distinguished voice for returning text. Do you have any way?
hello sir! I run the code and it show no error but when i try to say something it can’t hear me, I try this in my laptop vaio sony core i3. It can’t record my voice, I am really in a trouble please help me. to solve this shit.. Thanks
Hi i am unable to install pyaudio i am getting the following error:
ERROR: Command “‘c:\users\ganesh.marella\appdata\local\programs\python\python37\python.exe’ -u -c ‘import setuptools, tokenize;__file__='”‘”‘C:\\Users\\GANESH~1.MAR\\AppData\\Local\\Temp\\pip-install-afndru1v\\pyaudio\\setup.py'”‘”‘;f=getattr(tokenize, ‘”‘”‘open'”‘”‘, open)(__file__);code=f.read().replace(‘”‘”‘\r\n'”‘”‘, ‘”‘”‘\n'”‘”‘);f.close();exec(compile(code, __file__, ‘”‘”‘exec'”‘”‘))’ install –record ‘C:\Users\GANESH~1.MAR\AppData\Local\Temp\pip-record-lqg1dul4\install-record.txt’ –single-version-externally-managed –compile” failed with error code 1 in C:\Users\GANESH~1.MAR\AppData\Local\Temp\pip-install-afndru1v\pyaudio\
Please help me with this.
I want to use this functionality on web application using django, how can I do it? Please reply
Since we are using speech speech to text API, is this free cost?
First install portaudio and then install ‘pyaudio’ on any OS that works as expected.
on MAC : brew install portaudio pip install pyaudio
While installing speech recognition it is showing that pip is not an internal or external command .why it is showing that
Because you have not installed pip on your system. Search on youtube how to install pip according to your system type. Thanks
It is easy to write “import SpeechRecognition”, but it only works if you have your system set up to provide it. The hard part is to tell people precisely how to collect the libraries on all those platforms. Its not just “pip install SpeechRecognition”.
Leave a Comment Cancel reply
Save my name, email, and website in this browser for the next time I comment.
Speech to Text Conversion Using Python
In this tutorial from Subhasish Sarkar, learn how to build a very basic speech to text engine using simple Python script
URL Copied to clipboard
- Copy post link -->
- Share via Email
- Share on Facebook
- Tweet this post
- Share on Linkedin
- Share on Reddit
- Share on WhatsApp
In today’s world, voice technology has become very prevalent. The technology has grown, evolved and matured at a tremendous pace. Starting from voice shopping on Amazon to routine (and growingly complex) tasks performed by the personal voice assistant devices/speakers such as Amazon’s Alexa at the command of our voice, voice technology has found many practical uses in different spheres of life.
One of the most important and critical functionalities involved with any voice technology implementation is a speech to text (STT) engine that performs voice recognition and conversion of the voice into text. We can build a very basic STT engine using a simple Python script. Let’s go through the sequence of steps required.
NOTE : I worked on this proof-of-concept (PoC) project on my local Windows machine and therefore, I assume that all instructions pertaining to this PoC are tried out by the readers on a system running Microsoft Windows OS.
Step 1: Installation of Specific Python Libraries
We will start by installing the Python libraries, namely: speechrecognition, wheel, pipwin and pyaudio. Open your Windows command prompt or any other terminal that you are comfortable using and execute the following commands in sequence, with the next command executed only after the previous one has completed its successful execution.
Step 2: Code the Python Script That Implements a Very Basic STT Engine
Let’s name the Python Script file STT.py . Save the file anywhere on your local Windows machine. The Python script code looks like the one referenced below in Figure 1.
Figure 1 Code:
Figure 1 Visual:

The while loop makes the script run infinitely, waiting to listen to the user voice. A KeyboardInterrupt (pressing CTRL+C on the keyboard) terminates the program gracefully. Your system’s default microphone is used as the source of the user voice input. The code allows for ambient noise adjustment.
Depending on the surrounding noise level, the script can wait for a miniscule amount of time which allows the Recognizer to adjust the energy threshold of the recording of the user voice. To handle ambient noise, we use the adjust_for_ambient_noise() method of the Recognizer class. The adjust_for_ambient_noise() method analyzes the audio source for the time specified as the value of the duration keyword argument (the default value of the argument being one second). So, after the Python script has started executing, you should wait for approximately the time specified as the value of the duration keyword argument for the adjust_for_ambient_noise() method to do its thing, and then try speaking into the microphone.
The SpeechRecognition documentation recommends using a duration no less than 0.5 seconds. In some cases, you may find that durations longer than the default of one second generate better results. The minimum value you need for the duration keyword argument depends on the microphone’s ambient environment. The default duration of one second should be adequate for most applications, though.
The translation of speech to text is accomplished with the aid of Google Speech Recognition ( Google Web Speech API ), and for it to work, you need an active internet connection.
Step 3: Test the Python Script
The Python script to translate speech to text is ready and it’s now time to see it in action. Open your Windows command prompt or any other terminal that you are comfortable using and CD to the path where you have saved the Python script file. Type in python “STT.py” and press enter. The script starts executing. Speak something and you will see your voice converted to text and printed on the console window. Figure 2 below captures a few of my utterances.
Figure 2 . A few of the utterances converted to text; the text “hai” corresponds to the actual utterance of “hi,” whereas “hay” corresponds to “hey.”
Figure 3 below shows another instance of script execution wherein user voice was not detected for a certain time interval or that unintelligible noise/audio was detected/recognized which couldn’t be matched/converted to text, resulting in outputting the message “No User Voice detected OR unintelligible noises detected OR the recognized audio cannot be matched to text !!!”
Figure 3 . The “No User Voice detected OR unintelligible noises detected OR the recognized audio cannot be matched to text !!!” output message indicates that our STT engine didn’t recognize any user voice for a certain interval of time or that unintelligible noise/audio was detected/recognized which couldn’t be matched/converted to text.
Note : The response from the Google Speech Recognition engine can be quite slow at times. One thing to note here is, so long as the script executes, your system’s default microphone is constantly in use and the message “Python is using your microphone” depicted in Figure 4 below confirms the fact.

Finally, press CTRL+C on your keyboard to terminate the execution of the Python script. Hitting CTRL+C on the keyboard generates a KeyboardInterrupt exception that has been handled in the first except block in the script which results in a graceful exit of the script. Figure 5 below shows the script’s graceful exit.
Figure 5 . Pressing CTRL+C on your keyboard results in a graceful exit of the executing Python script.
Note : I noticed that the script fails to work when the VPN is turned on. The VPN had to be turned off for the script to function as expected. Figure 6 below demonstrates the erroring out of the script with the VPN turned on.
Figure 6 . The Python script fails to work when the VPN is turned on.
When the VPN is turned on, it seems that the Google Speech Recognition API turns down the request. Anybody able to fix the issue is most welcome to get in touch with me here and share the resolution.
Related Articles See more
How to set up the robot framework for test automation.
June 13, 2024
A Next-Generation Mainframer Finds Her Way
Reg Harbeck
May 20, 2024
Video: Supercharge Your IBM i Applications With Generative AI
Patrick Behr
January 10, 2024
- Español – América Latina
- Português – Brasil
- Cloud Speech-to-Text
- Documentation
Speech-to-Text Client Libraries
This page shows how to get started with the Cloud Client Libraries for the Speech-to-Text API. Client libraries make it easier to access Google Cloud APIs from a supported language. Although you can use Google Cloud APIs directly by making raw requests to the server, client libraries provide simplifications that significantly reduce the amount of code you need to write.
Read more about the Cloud Client Libraries and the older Google API Client Libraries in Client libraries explained .
Install the client library
If you are using .NET Core command-line interface tools to install your dependencies, run the following command:
For more information, see Setting Up a C# Development Environment .
For more information, see Setting Up a Go Development Environment .
If you are using Maven , add the following to your pom.xml file. For more information about BOMs, see The Google Cloud Platform Libraries BOM .
If you are using Gradle , add the following to your dependencies:
If you are using sbt , add the following to your dependencies:
If you're using Visual Studio Code, IntelliJ, or Eclipse, you can add client libraries to your project using the following IDE plugins:
- Cloud Code for VS Code
- Cloud Code for IntelliJ
- Cloud Tools for Eclipse
The plugins provide additional functionality, such as key management for service accounts. Refer to each plugin's documentation for details.
For more information, see Setting Up a Java Development Environment .
For more information, see Setting Up a Node.js Development Environment .
For more information, see Using PHP on Google Cloud .
For more information, see Setting Up a Python Development Environment .
For more information, see Setting Up a Ruby Development Environment .
Set up authentication
For production environments, the way you set up ADC depends on the service and context. For more information, see Set up Application Default Credentials .
For a local development environment, you can set up ADC with the credentials that are associated with your Google Account:
Install and initialize the gcloud CLI .
When you initialize the gcloud CLI, be sure to specify a Google Cloud project in which you have permission to access the resources your application needs.
Configure ADC:
A sign-in screen appears. After you sign in, your credentials are stored in the local credential file used by ADC .
Use the client library
The following example shows how to use the client library.
Additional resources
The following list contains links to more resources related to the client library for C#:
- API reference
- Client libraries best practices
- Issue tracker
- google-cloud-speech on Stack Overflow
- Source code
The following list contains links to more resources related to the client library for Go:
The following list contains links to more resources related to the client library for Java:
The following list contains links to more resources related to the client library for Node.js:
The following list contains links to more resources related to the client library for PHP:
The following list contains links to more resources related to the client library for Python:
The following list contains links to more resources related to the client library for Ruby:
Except as otherwise noted, the content of this page is licensed under the Creative Commons Attribution 4.0 License , and code samples are licensed under the Apache 2.0 License . For details, see the Google Developers Site Policies . Java is a registered trademark of Oracle and/or its affiliates.
Last updated 2024-07-09 UTC.

Get notified in your email when a new post is published to this blog
Open AI Whisper

Developer Support
July 9th, 2024 0 0
Monu Bambroo explores Whisper, a speech to text model from OpenAI that you can use to transcribe audio files. The model is trained on a large dataset of English audio and text. The model is optimized for transcribing audio files that contain speech in English. The model can also be used to transcribe audio files that contain speech in other languages.
Whisper is an advanced automatic speech recognition (ASR) system, developed using 680,000 hours of supervised multilingual and multitask data from the web. This extensive and diverse data set enhances its ability to handle various accents, background noise, and technical jargon. Whisper not only transcribes multiple languages but also translates them into English. We are making the models and inference code open source to provide a robust foundation for developing practical applications and advancing research in speech processing.
The Whisper model, developed by OpenAI, converts speech to text and is ideal for transcribing audio files. Trained on an extensive dataset of English audio and text, it excels at transcribing English speech but can also handle other languages, producing English text as output.
We have Whisper models accessible through the Azure Open AI service. The Whisper model by Azure OpenAI provides varied solutions for different scenarios. It excels in transcribing and analyzing prerecorded audio and video files. It is also ideal for the quick processing of individual audio files. It can transcribe phone call recordings and provide analytics such as call summary, sentiment, key topics, and custom insights. Similarly, it can transcribe meeting recordings and provide analytics like meeting summary, meeting chapters, and action item extraction. The Whisper model also supports contact center voice agent services like call routing and interactive voice response and is suitable for application-specific voice assistants in various scenarios such as set-top boxes, mobile apps, in-car systems, and more. However, it does not support real-time transcription, pronunciation assessment, or translation of live or prerecorded audio. It is recommended for translating prerecorded audio from other languages into English.
Developers using Whisper in Azure AI Speech benefit from additional capabilities such as processing of large file sizes up to 1GB, speaker diarization, and the ability to fine-tune the Whisper model using audio plus human-labeled transcripts.
For accessing Whisper, developers can use the Azure OpenAI Studio. The Whisper REST API supports translation services from a growing list of languages to English. The Whisper model is a significant addition to Azure AI’s broad portfolio of capabilities, offering innovative ways to improve business productivity and user experience.
Here is a code snippet on how to use Azure Open AI Whisper API in python.
Best Practices for using Whisper API in Azure.
Whisper API does offer a variety of parameters that can be utilized for more specific transcriptions. The prompt parameter in the OpenAI Whisper API allows you to guide the transcription process by providing specific instructions or conditions. For example, you could use the prompt parameter to instruct the API to ignore or exclude certain words or phrases from the transcription. This can be particularly useful when you want to filter out specific content or when handling sensitive information. By using the prompt parameter, you’re able to customize the transcription output to better suit your specific needs or requirements
Preprocessing
Preprocessing in the context of audio transcription involves preparing the audio data to improve the quality and accuracy of the transcription. It’s a crucial step that can significantly impact the results. Here are the main steps involved in audio preprocessing:
- Trimming: This involves removing unnecessary parts of the audio, such as silences at the beginning or end of the audio file. Trimming can help reduce the size of the audio file and also eliminate sections that might cause inaccuracies in the transcription.
- Segmentation: For long audio files, it can be beneficial to break them down into smaller, manageable segments. This can make the transcription process more efficient and also improve accuracy as it’s easier to manage and process shorter audio clips.
- Audio Quality Enhancement: This may involve tasks like noise reduction, volume normalization, and echo cancellation. Improving the audio quality can significantly enhance the accuracy of the transcription.
- Audio Format Conversion: The audio files need to be in a format that is compatible with the transcription service. If they are not, they must be converted into a compatible format.These preprocessing steps are primarily aimed at reducing potential sources of error in the transcription and making the audio data more manageable for the transcription service.
You can use PyDub is a simple and easy-to-use Python library for audio processing tasks such as slicing, concatenating, and exporting audio files.
Post Processing
In the context of audio transcription, the output from the initial transcription process can be further refined using Language Models like GPT-3.5. This step is known as post-processing.
In post-processing, the initial transcript, which could potentially contain errors or inconsistencies, is passed to the language model. The language model, guided by its training and potentially a system prompt, generates a corrected or refined version of the transcript.
This process allows for the correction of errors, better context understanding, and even the rephrasing or summarization of the content, depending on the specific system prompt provided. It is an effective way to leverage the capabilities of language models to improve the quality and usefulness of audio transcriptions.
You can learn more about Azure Whisper Open AI models here.
Speech to text with Azure OpenAI Service – Azure OpenAI | Microsoft Learn
Developer Support Cloud Solution Architects, Microsoft Customer Success

Leave a comment Cancel reply
Log in to start the discussion.

Insert/edit link
Enter the destination URL
Or link to existing content
- Artificial Intelligence
- Generative AI
- Cloud Computing
- Data Management
- Emerging Technology
- Technology Industry
- Software Development
- Microsoft .NET
- Development Tools
- Open Source
- Programming Languages
- Enterprise Buyer’s Guides
- Newsletters
- Foundry Careers
- Terms of Service
- Privacy Policy
- Cookie Policy
- Copyright Notice
- Member Preferences
- About AdChoices
- E-commerce Affiliate Relationships
- Your California Privacy Rights
Our Network
- Computerworld
- Network World

8 great Python libraries for natural language processing
With so many nlp resources in python, how to choose discover the best python libraries for analyzing text and how to use them..

Natural language processing , or NLP for short, is best described as “AI for speech and text.” The magic behind voice commands, speech and text translation, sentiment analysis, text summarization, and many other linguistic applications and analyses, natural language processing has been improved dramatically through deep learning .
The Python language provides a convenient front-end to all varieties of machine learning including NLP. In fact, there is an embarrassment of NLP riches to choose from in the Python ecosystem. In this article we’ll explore each of the NLP libraries available for Python—their use cases, their strengths, their weaknesses, and their general level of popularity.
Note that some of these libraries provide higher-level versions of the same functionality exposed by others, making that functionality easier to use at the cost of some precision or performance. You’ll want to choose a library well-suited both to your level of expertise and to the nature of the project.
The CoreNLP library — a product of Stanford University — was built to be a production-ready natural language processing solution, capable of delivering NLP predictions and analyses at scale. CoreNLP is written in Java, but multiple Python packages and APIs are available for it, including a native Python NLP library called Stanza .
CoreNLP includes a broad range of language tools —grammar tagging, named entity recognition, parsing, sentiment analysis, and plenty more. It was designed to be human language agnostic, and currently supports Arabic, Chinese, French, German, and Spanish in addition to English (with Russian, Swedish, and Danish support available from third parties ). CoreNLP also includes a web API server , a convenient way to serve predictions without too much additional work.
The easiest place to start with CoreNLP’s Python wrappers is Stanza , the reference implementation created by the Stanford NLP Group. In addition to being well-documented, Stanza is also maintained regularly; many of the other Python libraries for CoreNLP were not updated for some time.
CoreNLP also supports the use of NLTK, a major Python NLP library discussed below. As of version 3.2.3, NLTK includes interfaces to CoreNLP in its parser. Just be sure to use the correct API .
The obvious downside of CoreNLP is that you’ll need some familiarity with Java to get it up and running, but that’s nothing a careful reading of the documentation can’t achieve. Another hurdle could be CoreNLP’s licensing. The whole toolkit is licensed under the GPLv3, meaning any use in proprietary software that you distribute to others will require a commercial license .
Gensim does just two things, but does them exceedingly well. Its focus is statistical semantics—analyzing documents for their structure, then scoring other documents based on their similarity.
Gensim can work with very large bodies of text by streaming documents to its analysis engine and performing unsupervised learning on them incrementally. It can create multiple types of models, each suited to different scenarios: Word2Vec, Doc2Vec, FastText, and Latent Dirichlet Allocation.
Gensim’s detailed documentation includes tutorials and how-to guides that explain key concepts and illustrate them with hands-on examples. Common recipes are also available on the Gensim GitHub repo .
The latest version, Gensim 4, supports Python 3 only but brings major optimizations to common algorithms such as Word2Vec, a less complex OOP model, and many other modernizations.
The Natural Language Toolkit , or NLTK for short, is among the best-known and most powerful of the Python natural language processing libraries. Many corpora (data sets) and trained models are available to use with NLTK out of the box, so you can start experimenting with NLTK right away.
As the documentation states, NLTK provides a wide variety of tools for working with text: “classification, tokenization, stemming, tagging, parsing, and semantic reasoning.” It can also work with some third-party tools to enhance its functionality, such as the Stanford Tagger, TADM, and MEGAM.
Keep in mind that NLTK was created by and for an academic research audience. It was not designed to serve NLP models in a production environment. The documentation is also somewhat sparse; even the how-tos are thin. Also, there is no 64-bit binary; you’ll need to install the 32-bit edition of Python to use it. Finally, NLTK is not the fastest library either, but it can be sped up with parallel processing .
If you are determined to leverage what’s inside NLTK, you might start instead with TextBlob (discussed below).
If all you need to do is scrape a popular website and analyze what you find, reach for Pattern . This natural language processing library is far smaller and narrower than other libraries covered here, but that also means it’s focused on doing one common job really well.
Pattern comes with built-ins for scraping a number of popular web services and sources (Google, Wikipedia, Twitter, Facebook, generic RSS, etc.), all of which are available as Python modules (e.g., from pattern.web import Twitter ). You don’t have to reinvent the wheels for getting data from those sites, with all of their individual quirks. You can then perform a variety of common NLP operations on the data, such as sentiment analysis.
Pattern exposes some of its lower-level functionality, allowing you to to use NLP functions, n-gram search, vectors, and graphs directly if you like. It also has a built-in helper library for working with common databases (MySQL, SQLite, and MongoDB in the future), making it easy to work with tabular data stored from previous sessions or obtained from third parties.
Polyglot , as the name implies, enables natural language processing applications that deal with multiple languages at once.
The NLP features in Polyglot echo what’s found in other NLP libraries: tokenization, named entity recognition, part-of-speech tagging, sentiment analysis, word embeddings, etc. For each of these operations, Polyglot provides models that work with the needed languages.
Note that Polyglot’s language support differs greatly from feature to feature. For instance, the language detection system supports almost 200 languages, tokenization supports 165 languages (largely because it uses the Unicode Text Segmentation algorithm), and sentiment analysis supports 136 languages, while part-of-speech tagging supports only 16.
PyNLPI (pronounced “pineapple”) has only a basic roster of natural language processing functions, but it has some truly useful data-conversion and data-processsing features for NLP data formats.
Most of the NLP functions in PyNLPI are for basic jobs like tokenization or n-gram extraction, along with some statistical functions useful in NLP like Levenshtein distance between strings or Markov chains. Those functions are implemented in pure Python for convenience, so they’re unlikely to have production-level performance.
But PyNLPI shines for working with some of the more exotic data types and formats that have sprung up in the NLP space. PyNLPI can read and process GIZA, Moses++, SoNaR, Taggerdata, and TiMBL data formats, and devotes an entire module to working with FoLiA , the XML document format used to annotate language resources like corpora (bodies of text used for translation or other analysis).
You’ll want to reach for PyNLPI whenever you’re dealing with those data types.
SpaCy , which taps Python for convenience and Cython for speed, is billed as “industrial-strength natural language processing.” Its creators claim it compares favorably to NLTK, CoreNLP, and other competitors in terms of speed, model size, and accuracy. SpaCy contains models for multiple languages, although only 16 of the 64 supported have full data pipelines available for them.
SpaCy includes most every feature found in those competing frameworks: speech tagging, dependency parsing, named entity recognition, tokenization, sentence segmentation, rule-based match operations, word vectors, and tons more. SpaCy also includes optimizations for GPU operations—both for accelerating computation, and for storing data on the GPU to avoid copying.
The documentation for SpaCy is excellent. A setup wizard generates command-line installation actions for Windows, Linux, and macOS and for different Python environments (pip, conda, etc.) as well. Language models install as Python packages, so they can be tracked as part of an application’s dependency list.
The latest version of the framework, SpaCy 3.0, provides many upgrades. In addition to using the Ray framework for performing distributed training on multiple machines, it offers a new transformer-based pipeline system for better accuracy, a new training system and workflow configuration model, end-to-end workflow managament, and a good deal more.
TextBlob is a friendly front-end to the Pattern and NLTK libraries, wrapping both of those libraries in high-level, easy-to-use interfaces. With TextBlob, you spend less time struggling with the intricacies of Pattern and NLTK and more time getting results.
TextBlob smooths the way by leveraging native Python objects and syntax. The quickstart examples show how texts to be processed are simply treated as strings, and common NLP methods like part-of-speech tagging are available as methods on those string objects.
Another advantage of TextBlob is you can “lift the hood” and alter its functionality as you grow more confident. Many default components, like the sentiment analysis system or the tokenizer, can be swapped out as needed. You can also create high-level objects that combine components—this sentiment analyzer, that classifier, etc.—and re-use them with minimal effort. This way, you can prototype something quickly with TextBlob, then refine it later.
Related content
Google, udacity offer free course on gemini api, judge dismisses lawsuit over github copilot ai coding assistant, all the brilliance of ai on minimalist platforms, researchers reveal flaws in ai agent benchmarking.

Serdar Yegulalp is a senior writer at InfoWorld, covering software development and operations tools, machine learning, containerization, and reviews of products in those categories. Before joining InfoWorld, Serdar wrote for the original Windows Magazine, InformationWeek, the briefly resurrected Byte, and a slew of other publications. When he's not covering IT, he's writing SF and fantasy published under his own personal imprint, Infinimata Press.
More from this author
How to get started with graphql, cool for you: python polars swims through dataframes, how to install python the smart way, 4 keys to writing modern python, python pick: monkeytype automates type hints, 5 popular rust web frameworks—which one is right for you, 5 newer data science tools you should be using with python, the python report: news for python developers, most popular authors.

Show me more
Rust leaps forward in language popularity index.

FTC’s non-compete ban almost certainly dead, based on a Texas federal court decision

8 reasons developers love Go—and 8 reasons they don't

How to use dbm to stash data quickly in Python

How to auto-generate Python type hints with Monkeytype

How to make HTML GUIs in Python with NiceGUI

Sponsored Links
- Get Cisco UCS X-Series Chassis and Fabric Interconnects offer.
- Stack Overflow for Teams Where developers & technologists share private knowledge with coworkers
- Advertising & Talent Reach devs & technologists worldwide about your product, service or employer brand
- OverflowAI GenAI features for Teams
- OverflowAPI Train & fine-tune LLMs
- Labs The future of collective knowledge sharing
- About the company Visit the blog
Collectives™ on Stack Overflow
Find centralized, trusted content and collaborate around the technologies you use most.
Q&A for work
Connect and share knowledge within a single location that is structured and easy to search.
Get early access and see previews of new features.
How to make Python speak
How could I make Python say some text?
I could use Festival with subprocess but I won't be able to control it (or maybe in interactive mode, but it won't be clean).
Is there a Python TTS library? Like an API for Festival, eSpeak, ... ?
- text-to-speech
- does "Festival" have a public API? – jldupont Commented Oct 23, 2009 at 15:04
- For text to speech I found this package called " gTTS " in Python. You can try this out. It does work with Python 3.5. The github repo for this package is gTTS-github . – Harshdeep Sokhey Commented Jan 21, 2017 at 21:47
14 Answers 14
A bit cheesy, but if you use a mac you can pass a terminal command to the console from python.
Try typing the following in the terminal:
And there will be a voice from the mac that will speak that. From python such a thing is relatively easy:
- 9 I don't want the say command to block my Python code, so I add an ampersand like this: os.system("say 'hello world' &") – VinceFior Commented May 17, 2016 at 22:51
- On ubuntu, the terminal command to use is spd-say – natka_m Commented Nov 26, 2019 at 10:10
You should try using the PyTTSx package since PyTTS is outdated. PyTTSx works with Python 2. For Python 3, install the PyTTSx3 package.
http://pypi.python.org/pypi/pyttsx/
https://pypi.org/project/pyttsx3/
- 6 Does not work for python 3. This answer was up to date as of 2009 – Jonathan Commented Feb 6, 2015 at 11:36
- 5 Despite being available through pip, still does not work as of 2015 – OxCantEven Commented Jun 7, 2015 at 15:57
- I confirm it does not work with python3 and easy fixes (printf as a function, fixing exception handling syntax and fixing imports) don't make it work, it simply fails silently. Interfacing with espeak (what it does on Linux) is as simple as spawning a subprocess, so that's what I ended up doing. – Léo Germond Commented Mar 13, 2016 at 10:47
- 1 Just added a comment eat the top of the question to note this only works with Python 2.x – Eligio Becerra Commented Mar 22, 2016 at 23:45
- PYTTSX3 works in python 3 too. Its a cool module – Pear Commented Apr 30, 2021 at 10:12
install pip install pypiwin32
How to use the text to speech features of a Windows PC
Using google text-to-speech api to create an mp3 and hear it.
After you installed the gtts module in cmd: pip install gtts
- 2 You can install required module in your system by running pip install pypiwin32 as administartor. – Kamil Szot Commented Dec 21, 2016 at 12:35
- 2 Google solution seems to be one of the best : allows to change of language, it is also really fast. – snoob dogg Commented May 2, 2018 at 23:05
- Strangely, the first code example works on some Windows 10 PCs but not others. Why is that? – ColorCodin Commented Jul 9, 2018 at 1:06
- 1 @ColorCodin I am not sure, but you should check in the control panel, the syntetized voice (I don't remember the exact name of this options) and see if it has been set... there is a button you can press to see if it works. If it works in the settings, should work with the code, because I think it uses the windows synthesized voice, I think. – PythonProgrammi Commented Jul 9, 2018 at 17:24
- It's been set, but when the command is run through CMD it says "Access is denied." – ColorCodin Commented Jul 9, 2018 at 22:41
The python-espeak package is available in Debian, Ubuntu, Redhat, and other Linux distributions. It has recent updates, and works fine.
Jonathan Leaders notes that it also works on Windows, and you can install the mbrola voices as well. See the espeak website at http://espeak.sourceforge.net
A simple Google led me to pyTTS , and a few documents about it . It looks unmaintained and specific to Microsoft's speech engine, however.
On at least Mac OS X, you can use subprocess to call out to the say command, which is quite fun for messing with your coworkers but might not be terribly useful for your needs.
It sounds like Festival has a few public APIs, too:
Festival offers a BSD socket-based interface. This allows Festival to run as a server and allow client programs to access it. Basically the server offers a new command interpreter for each client that attaches to it. The server is forked for each client but this is much faster than having to wait for a Festival process to start from scratch. Also the server can run on a bigger machine, offering much faster synthesis. linky
There's also a full-featured C++ API , which you might be able to make a Python module out of (it's fun!). Festival also offers a pared-down C API -- keep scrolling in that document -- which you might be able to throw ctypes at for a one-off.
Perhaps you've identified a hole in the market?
There are a number of ways to make Python speak in both Python3 and Python2, two great methods are:
If you are on mac you will have the os module built into your computer. You can import the os module using:
You can then use os to run terminal commands using the os.system command:
In terminal, the way you make your computer speak is using the "say" command, thus to make the computer speak you simply use:
If you want to use this to speak a variable you can use:
The second way to get python to speak is to use
- The pyttsx module
You will have to install this using
or for Python3
You can then use the following code to get it to speak:
I hope this helps! :)
Pyttsx3 is a python module which is a modern clone of pyttsx, modified to work with the latest versions of Python 3!
- GitHub: https://github.com/nateshmbhat/pyttsx3
- Read the documentation : https://pyttsx3.readthedocs.org
It is multi-platform , works offline , and works with any python version .
It can be installed with pip install pyttsx3 and usage is the same as pyttsx:
- Is there a recommended way to make saying async? – Anatoly Alekseev Commented Nov 6, 2020 at 19:42
- @AnatolyAlekseev No there doesn't seem to be one. Just use asyncio or however you do that in python I guess. – Toby56 Commented Nov 7, 2020 at 23:14
You can use espeak using python for text to speech converter. Here is an example python code
P.S : if espeak isn't installed on your linux system then you need to install it first. Open terminal(using ctrl + alt + T) and type
I prefer to use the Google Text To Speech library because it has a more natural voice.
There is one limitation. gTTS can only convert text to speech and save. So you will have to find another module or function to play that file. (Ex: playsound)
Playsound is a very simple module that has one function, which is to play sound.
You can call playsound.playsound() directly after saving the mp3 file.
There may not be anything 'Python specific', but the KDE and GNOME desktops offer text-to-speech as a part of their accessibility support, and also offer python library bindings. It may be possible to use the python bindings to control the desktop libraries for text to speech.
If using the Jython implementation of Python on the JVM, the FreeTTS system may be usable.
Finally, OSX and Windows have native APIs for text to speech. It may be possible to use these from python via ctypes or other mechanisms such as COM.
If you are using python 3 and windows 10, the best solution that I found to be working is from Giovanni Gianni. This played for me in the male voice:
I also found this video on youtube so if you really want to, you can get someone you know and make your own DIY tts voice.
- Is there a way to get this to work with other languages (Japanese or Chinese?) – Moondra Commented May 7, 2018 at 21:02
This is what you are looking for. A complete TTS solution for the Mac. You can use this standalone or as a co-location Mac server for web apps:
http://wolfpaulus.com/jounal/mac/ttsserver/
Combining the following sources, the following code works on Windows, Linux and macOS using just the platform and os modules:
- cantdutchthis' answer for the mac command
- natka_m's comment for the Ubuntu command
- BananaAcid's answer for the Windows command
- Louis Brandy's answer for how to detect the OS
- nc3b's answer for how to detect the Linux distribution
Note: This method is not secure and could be exploited by malicious text.
Just use this simple code in python.
Works only for windows OS.
I personally use this.
Your Answer
Reminder: Answers generated by artificial intelligence tools are not allowed on Stack Overflow. Learn more
Sign up or log in
Post as a guest.
Required, but never shown
By clicking “Post Your Answer”, you agree to our terms of service and acknowledge you have read our privacy policy .
Not the answer you're looking for? Browse other questions tagged python text-to-speech or ask your own question .
- Featured on Meta
- We spent a sprint addressing your requests — here’s how it went
- Upcoming initiatives on Stack Overflow and across the Stack Exchange network...
- What makes a homepage useful for logged-in users
Hot Network Questions
- Using grout that had hardened in the bag
- When, if ever, is bribery legal?
- Why is this outlet required to be installed on at least 10 meters of wire?
- Is it alright to display mean CPU usage of algorithm instead of CPU cores available?
- French Election 2024 - seat share based on first round only
- Must integer lattice have vector of norm equal to determinant?
- How to choose between 3/4 and 6/8 time?
- Search and replace multiple characters simultaneously
- Can a MicroSD card help speed up my Mini PC?
- Breaking down a command to install Ros2
- Canon PowerShot A80 keeps shutting down and asking to change the battery pack. What should I do?
- Why is this transformer placed on rails?
- An adjective for something peaceful but sad?
- Is a "single" cpu safer than multiple cores?
- Help understanding the implications of Security Breach section of an NDA
- Is infinity a number?
- The center of gravity of a triangle on a parabola lies on the axis of symmetry
- How do I increase the vertex size in the interface?
- Does accreditation matter in Computer Science (UK)?
- Are you radical enough to solve this SURDOKU?
- Sci fi book that has a tunnel. Depending on where you go through wall, go to different planet
- Are there countries where only voters affected by a given policy get to vote on it?
- Is the variance of the mean of a set of possibly dependent random variables less than the average of their respective variances?
- Error concerning projectile motion in respected textbook?
- TECHNOLOGIES
- An Interview Question

Convert Speech into Text using Python

- Kautilya Utkarsh
- Jul 09, 2024
- Other Artcile
Speech-to-text conversion is a fascinating area of technology that allows computers to understand and transcribe spoken language into text. This capability has numerous applications, from virtual assistants and transcription services to accessibility tools and hands-free device operation.
Introduction
Speech-to-text conversion is a fascinating area of technology that allows computers to understand and transcribe spoken language into text. This capability has numerous applications, from virtual assistants and transcription services to accessibility tools and hands-free device operation. Python, with its rich ecosystem of libraries, offers several tools to implement speech-to-text functionality efficiently. This article will guide you through the process of building a basic speech-to-text converter using Python.
Prerequisites
Before we dive into the code, ensure you have the following prerequisites.
- Python: Make sure you have Python installed. You can download it from python.org.
- SpeechRecognition Library: This library will help us recognize and transcribe speech. Install it using pip. pip install SpeechRecognition
- pyttsx3 Library: This library will be required in the project. pip install pyttsx3
- PyAudio Library: This library is necessary for capturing audio from the microphone. Install it using pip. pip install PyAudio
Speech-to-text conversion is a powerful tool with diverse applications. Python, with libraries like SpeechRecognition and PyAudio, makes it straightforward to implement basic speech-to-text functionality. With further exploration and enhancement, you can create more robust and feature-rich applications tailored to your specific needs.
- Audio Transcription
- Automatic Transcription
- Python Programming
- Python Speech API
- Speech Recognition

Coding Principles
Text to Speech API Python: A Comprehensive Guide

Looking for our Text to Speech Reader ?
Featured In
Table of contents, prerequisites, installing dependencies, google cloud text-to-speech setup, using google cloud text-to-speech, using gtts (google text-to-speech), real-time text-to-speech, language support, audio encoding, configuring voice parameters, linux and windows, source code and documentation.
Text-to-speech ( TTS ) technology has significantly advanced, allowing developers to create high-quality audio from text inputs using various programming languages, including Python. This article will guide you through the process of setting up and using a TTS API in Python, covering installation, configuration, and usage with code examples. We will explore various APIs, including Google Cloud Text-to-Speech and open-source alternatives like gTTS. Whether you need English, French, German, Chinese, or Hindi, this tutorial has got you covered.
Before we start, ensure you have Python 3 installed on your system. You can download it from the official Python website . Additionally, you'll need pip, the Python package installer, which is included with Python 3.
To begin, you'll need to install the required Python libraries. Open your command-line interface (CLI) and run the following command:
These libraries will allow you to interact with the Google Cloud Text-to-Speech API and the open-source gTTS library.
- Step 1 : Create a Google Cloud Project: First, create a project on the Google Cloud Console .
- Step 2 : Enable the Text-to-Speech API: Navigate to the API Library and enable the Google Cloud Text-to-Speech API.
- Step 3 : Create Service Account and API Key: Create a service account and download the JSON key file. Set the GOOGLE_APPLICATION_CREDENTIALS environment variable to point to this file:
Here's a "Hello World" example using the Google Cloud Text-to-Speech API:
This code synthesizes speech from text and saves it as an MP3 file.
For a simpler and open-source alternative, you can use gTTS. Here's a basic example:
To achieve real-time TTS, you can integrate the TTS API with applications that require instant feedback, such as voice assistants or chatbots.
Advanced Configuration and Parameters
Google Cloud Text-to-Speech supports various languages, including English (en-US), French (fr-FR), German (de-DE), Chinese (zh-CN), and Hindi (hi-IN). You can change the language_code parameter in the synthesize_text function to use different languages.
The audio_encoding parameter supports different formats such as MP3, WAV, and FLAC. Modify the AudioConfig accordingly.
You can customize voice parameters such as pitch, speaking rate, and volume gain. For example:
Using the TTS API with Other Platforms
You can integrate the TTS API with Android applications using HTTP requests to the Google Cloud Text-to-Speech API.
The provided Python examples work seamlessly on both Linux and Windows platforms.
Find the complete source code and detailed documentation on GitHub and Google Cloud Text-to-Speech documentation .
In this tutorial, we've covered the basics of setting up and using Text-to-Speech APIs in Python, including Google Cloud Text-to-Speech and gTTS. Whether you need high-quality speech synthesis for English, French, German, Chinese, or Hindi, these tools provide robust solutions. Explore further configurations and parameters to enhance your applications and achieve real-time TTS integration.
By following this guide, you should now be able to convert text to high-quality audio files using Python, enabling you to create engaging and accessible applications.
The free text-to-speech API for Python is gTTS (Google Text-to-Speech), an open-source library that allows you to convert text to speech using Google's TTS API.
Yes, Python can perform text-to-speech using libraries such as gTTS and the Google Cloud Text-to-Speech API, which utilize speech recognition and artificial intelligence technologies.
To use Google Text to Speech API in Python, install the client library, set up your API key, and use the texttospeech SDK to synthesize speech; refer to the quickstart guide for detailed steps.
Google Text to Speech API offers a free tier with limited usage, but for extensive use, pricing terms apply; it provides low latency and high-quality speech synthesis suitable for various machine learning and artificial intelligence applications.
Celebrity Voice Generators: A How to
Read Aloud: Transforming the Way We Experience Text

Cliff Weitzman
Cliff Weitzman is a dyslexia advocate and the CEO and founder of Speechify, the #1 text-to-speech app in the world, totaling over 100,000 5-star reviews and ranking first place in the App Store for the News & Magazines category. In 2017, Weitzman was named to the Forbes 30 under 30 list for his work making the internet more accessible to people with learning disabilities. Cliff Weitzman has been featured in EdSurge, Inc., PC Mag, Entrepreneur, Mashable, among other leading outlets.
voicebox-tts 0.0.11
pip install voicebox-tts Copy PIP instructions
Released: May 28, 2024
Python text-to-speech library with built-in voice effects and support for multiple TTS engines.
Verified details
Maintainers.

Unverified details
Project links, github statistics.
- Open issues:
License: MIT License (MIT License Copyright (c) 2023 Austin Bowen Permission is hereby granted, free of charge, to any p...)
Author: Austin Bowen
Requires: Python >=3.8
Provides-Extra: all , amazon-polly , dev , docs , elevenlabs , google-cloud-tts , gtts , pyttsx3 , test
Classifiers
- OSI Approved :: MIT License
- OS Independent
- Python :: 3
- Python :: 3 :: Only
- Python :: 3.8
- Python :: 3.9
- Python :: 3.10
- Python :: 3.11
- Python :: 3.12
Project description

| GitHub | Documentation 📘 | Audio Samples 🔉 |
- pip install voicebox-tts
- On Debian/Ubuntu: sudo apt install libportaudio2
- Install dependencies for whichever TTS engine(s) you want to use (see section below).
Supported Text-to-Speech Engines
Classes for supported TTS engines are located in the voicebox.tts package.
Amazon Polly 🌐
Online TTS engine from AWS.
- Class: voicebox.tts.AmazonPolly
- Setup: pip install "voicebox-tts[amazon-polly]"
ElevenLabs 🌐
Online TTS engine with very realistic voices and support for voice cloning.
- Class: voicebox.tts.ElevenLabsTTS
- pip install "voicebox-tts[elevenlabs]"
- Install ffmpeg or libav for pydub ( docs )
- (Optional) Use an API key : from elevenlabs.client import ElevenLabs from voicebox.tts import ElevenLabsTTS tts = ElevenLabsTTS ( client = ElevenLabs ( api_key = 'your-api-key' ))
eSpeak NG 🌐
Offline TTS engine with a good number of options.
- Class: voicebox.tts.ESpeakNG
- On Debian/Ubuntu: sudo apt install espeak-ng
Google Cloud Text-to-Speech 🌐
Powerful online TTS engine offered by Google Cloud.
- Class: voicebox.tts.GoogleCloudTTS
- Setup: pip install "voicebox-tts[google-cloud-tts]"
Online TTS engine used by Google Translate.
- Class: voicebox.tts.gTTS
- pip install "voicebox-tts[gtts]"
🤗 Parler TTS 🌐
Offline TTS engine released by Hugging Face that uses a promptable deep learning model to generate speech.
- Class: voicebox.tts.ParlerTTS
- Setup: pip install git+https://github.com/huggingface/parler-tts.git
Very basic offline TTS engine.
- Class: voicebox.tts.PicoTTS
- On Debian/Ubuntu: sudo apt install libttspico-utils
Offline TTS engine wrapper with support for the built-in TTS engines on Windows (SAPI5) and macOS (NSSpeechSynthesizer), as well as espeak on Linux. By default, it will use the most appropriate engine for your platform.
- Class: voicebox.tts.Pyttsx3TTS
- pip install "voicebox-tts[pyttsx3]"
- On Debian/Ubuntu: sudo apt install espeak
Built-in effect classes are located in the voicebox.effects package, and can be imported like:
Here is a non-exhaustive list of fun effects:
- Glitch creates a glitchy sound by randomly repeating small chunks of audio.
- RingMod can be used to create choppy, Doctor Who Dalek-like effects.
- Vocoder is useful for making monotone, robotic voices.
There is also support for all the awesome audio plugins in Spotify's pedalboard library using the special PedalboardEffect wrapper, e.g.:
Some pre-built voiceboxes are available in the voicebox.examples package. They can be imported into your own code, and you can run them to demo:
Command Line Demo
Project details, release history release notifications | rss feed.
May 28, 2024
May 27, 2024
Dec 28, 2023
Dec 22, 2023
Dec 18, 2023
Nov 21, 2023
Nov 20, 2023
Download files
Download the file for your platform. If you're not sure which to choose, learn more about installing packages .
Source Distribution
Uploaded May 28, 2024 Source
Built Distribution
Uploaded May 28, 2024 Python 3
Hashes for voicebox_tts-0.0.11.tar.gz
| Algorithm | Hash digest | |
|---|---|---|
| SHA256 | ||
| MD5 | ||
| BLAKE2b-256 |
Hashes for voicebox_tts-0.0.11-py3-none-any.whl
| Algorithm | Hash digest | |
|---|---|---|
| SHA256 | ||
| MD5 | ||
| BLAKE2b-256 |
- português (Brasil)
Supported by


Top 5 Tools and Libraries for Efficient Voice Capture and Noise Reduction in Python Conversational Bots
Abstract: Learn about the best tools and libraries for voice capture and noise reduction in Python conversational bots. Enhance user experience with clear and precise voice input.
When developing conversational bots, accurate voice input and noise reduction are crucial for a smooth user experience. Python offers a variety of libraries and tools to help you achieve this. Here are the top 5 tools and libraries for efficient voice capture and noise reduction in Python conversational bots.
1. SpeechRecognition
SpeechRecognition is a popular Python library for performing speech recognition. It supports several engines and APIs, including Google Speech Recognition, Microsoft Azure Speech Services, and IBM Speech to Text. The library allows you to convert audio data into text, making it ideal for conversational bots.
PyAudio is a cross-platform audio I/O library for Python. It allows you to record and play audio data, making it an ideal tool for voice capture in conversational bots. PyAudio supports several audio formats, including WAV and FLAC.
3. noiseReduce
noiseReduce is a Python library for reducing noise in audio data. It uses the wavelet denoising technique to remove noise from audio signals. The library is ideal for improving the quality of voice data captured in noisy environments.
PyDub is a Python library for audio manipulation. It provides a simple and efficient way to edit audio data, including trimming, concatenating, and splitting audio files. PyDub supports several audio formats, including WAV, MP3, and FLAC.
Resampy is a Python library for audio resampling. It allows you to change the sample rate of audio data, making it an ideal tool for converting audio data to the required format for your conversational bot.
- SpeechRecognition is a Python library for performing speech recognition.
- PyAudio is a cross-platform audio I/O library for Python.
- noiseReduce is a Python library for reducing noise in audio data.
- PyDub is a Python library for audio manipulation.
- Resampy is a Python library for audio resampling.
- SpeechRecognition
- noiseReduce
Explore top Python libraries for voice capture and noise reduction in conversational bots, ensuring accurate and efficient user interaction.
Unable to fetch private repos using ansible galaxy github actions workflow: a solution.
This article explores a solution to an issue where Ansible Galaxy fails to fetch private repositories using GitHub Actions workflow. We discuss the use of self-signed certificates and suggest an alternative approach.
Tags: : Python VoiceCapture NoiseReduction ConversationalBots
Latest news
- Automating Delete Cells Autofit Columns Default Size in Multiple Sheets
- Using Salesforce Features: Angular Website with C# Backend and SQL Server on Azure
- Filtering and Sorting Data with Multiple Columns and Row Criteria in ProductShop
- Implementing TextAppearance in BottomNavigationToggle for Android
- Windows 11 Integrated Virtual Keyboard and QLineEdit in QtWidgets Applications
- Creating Curved Images with Jetpack Compose
- Adding Prefix Values to Status Linechart in PineScript
- Springdoc Integration with Spring Boot 3.3.1: Expected Behavior Not Working
- Error Using PCALSTM Model with Imbalanced 20-Class Timeseries Dataset
- Android App Crashes Due to New Splash Screen API Implementation in Play Store
- Session Field Not Deleted in Django: Server-side Event?
- Key Error Trying to Scrape Facebook with Selenium: A Solution
- Angular Local Storage Issues on Linux Server with Laravel API
- ALB and Internal Nginx-Ingress: Failure in Health Checks
- Integrating International Phone Number Format Plugin with WooCommerce
- Extracting Non-Zero Coefficients with mlr3's `surv.penalized' Lasso Penalized Cox Regression Learner
- Unable to Register Log4j Shutdown Hook in JVM: A Detailed Look
- Rendering 3D Models in a React Native App: A Step-by-Step Guide
- Spring Boot Application: Running on Different Ports with Multiple Property Files
- Resolving Linking Error with Gtest and FFF during Unittesting in CMake
- CORS with Strapi v4.24.2: Sub-domains/Domains Access Issue
- Resolving Error: Resource Not Found When Sending Emails with PHPMailer
- HotFix not detecting AddOn setups: BaseProduct vs AddOnsetup
- Unable to Activate Conda Environment in VSCode: A Solution
- Adding XML Elements to WIX: configfile.xml
- STM32MP157DK: I2C Detect Error during Yocto Project Build
- Using Azure Text Analytics for Sentence-Level Language Detection
- Running Batch Mode DOORS with Command Line
- Creating a Letterhead PDF Format with Python, PDFminer, Regex, and Canvas or ReportLab
- Running Two Single Containers for JS React Frontend and Rust Actix-Web Backend Locally
- Calling an Asynchronous JavaScript Function and Getting its Returned Value using Robot Framework
- Resolving Alphabetical Order Issue in Superset's Bar Chart with Last Year's Data
- Preventing Unauthorized Access in Firebase Functions: URL Security Best Practices
- Personal Access Token for GitLab and DockerHub Not Working
- Trying to Use IFrame with Data Passing in Dart: A Look at the Issue
IMAGES
VIDEO
COMMENTS
As you can see, it is pretty easy and simple to use this library for converting speech to text. This library is widely used out there in the wild. Check the official documentation. If you want to convert text to speech in Python as well, check this tutorial. Read Also: How to Recognize Optical Characters in Images in Python. Happy Coding ♥
IBM Speech to Text; Snowboy Hotword Detection (works offline) Tensorflow; Vosk API (works offline) OpenAI whisper (works offline) Whisper API; Quickstart: pip install SpeechRecognition. See the "Installing" section for more details. ... Google Cloud Speech Library for Python (for Google Cloud Speech API users) ...
pyttsx is a cross-platform text to speech library which is platform independent. The major advantage of using this library for text-to-speech conversion is that it works offline. However, pyttsx supports only Python 2.x. Hence, we will see pyttsx3 which is modified to work on both Python 2.x and Python 3.x with the same code. Use this command for I
How to install and use the SpeechRecognition package—a full-featured and easy-to-use Python speech recognition library. ... To decode the speech into text, groups of vectors are matched to one or more phonemes—a fundamental unit of speech. This calculation requires training, since the sound of a phoneme varies from speaker to speaker, and ...
pyttsx3 is a text-to-speech conversion library in Python. Unlike alternative libraries, it works offline, and is compatible with both Python 2 and 3. Installation pip install pyttsx3. If you recieve errors such as No module named win32com.client, No module named win32, or No module named win32api, you will need to additionally install pypiwin32.. Usage :
Text to Speech (TTS) library for Python 3. Works without internet connection or delay. Supports multiple TTS engines, including Sapi5, nsss, and espeak. ... ivona, pyttsx for python3, TTS for python3, pyttsx4, text to speech for python, tts, text to speech, speech, speech synthesis, offline text to speech, offline tts, gtts . Classifiers ...
The Speech-to-Text API enables developers to convert audio to text in over 125 languages and variants, by applying powerful neural network models in an easy to use API. In this tutorial, you will focus on using the Speech-to-Text API with Python. What you'll learn. How to set up your environment; How to transcribe audio files in English
Learn how to use the Speech Recognition API and the PyAudio library to convert speech to text in Python. See the history, problems, and examples of speech to text conversion.
The Speech Recognition module, often referred to as SpeechRecognition, is a library that allows Python developers to convert spoken language into text by utilizing various speech recognition engines and APIs. It supports multiple services like Google Web Speech API, Microsoft Bing Voice Recognition, IBM Speech to Text, and others.
Python offers a library called SpeechRecognition. It helps to convert speech to text using some engines or APIs. In this section, we will discuss how to convert speech to text in Python. This topic is an example of speech recognition in python. In artificial intelligence, data science, machine learning, or deep learning it's widely useful ...
In this blog, I am demonstrating how to convert speech to text using Python. This can be done with the help of the "Speech Recognition" API and "PyAudio" library. Speech Recognition API supports several API's, in this blog I used Google speech recognition API. For more details, please check this. It helps to translate for converting ...
SpeechRecognition is a library that helps in performing speech recognition in python. It support for several engines and APIs, online and offline e.g. Google Cloud Speech API, Microsoft Bing Voice Recognition, IBM Speech to Text etc. Installing PyAudio. Go to terminal and type
Step 2: Import the library and set up the recognizer In your Python script, import the speech_recognition module and create a recognizer object. Step 3: Capture audio from a source (Microphone or ...
I need to build a speech to text converter using Python and Google speech to text API. I want to do this real-time as in this example link. So far I have tried following code: import speech_recogni...
In this tutorial, we've built a simple speech recognition application using the `speech_recognition` library in Python. We covered the steps from recording audio to recognizing speech and ...
I'm developing a conversational bot that requires accurate voice input from users, which will be converted to text. I need advice on the best tools or libraries in Python to ensure clear and precise voice capture, minimizing background noise and improving transcription accuracy. Here are some details about my setup and requirements:
🐸TTS is a library for advanced Text-to-Speech generation. 🚀 Pretrained models in +1100 languages. ... 🐸TTS is tested on Ubuntu 18.04 with python >= 3.9, < 3.12.. If you are only interested in synthesizing speech with the released 🐸TTS models, installing from PyPI is the easiest option.
1 pip install pydub. The last one to install is the Pyaudio Library, which we can install with the command below; 1 pip install pyaudio. Step 2: Convert Speech to Text. In this code, we'll use ...
Step 3: Test the Python Script. The Python script to translate speech to text is ready and it's now time to see it in action. Open your Windows command prompt or any other terminal that you are comfortable using and CD to the path where you have saved the Python script file. Type in python "STT.py" and press enter.
Install the client library. If you are using Visual Studio 2017 or higher, open nuget package manager window and type the following: Install-Package Google.Apis. If you are using .NET Core command-line interface tools to install your dependencies, run the following command: dotnet add package Google.Apis.
The Whisper model is a speech to text model from OpenAI that you can use to transcribe audio files. The model is trained on a large dataset of English audio and text. ... Here is a code snippet on how to use Azure Open AI Whisper API in python. ... You can use PyDub is a simple and easy-to-use Python library for audio processing tasks such as ...
The magic behind voice commands, speech and text translation, ... CoreNLP also supports the use of NLTK, a major Python NLP library discussed below. As of version 3.2.3, NLTK includes interfaces ...
In terminal, the way you make your computer speak is using the "say" command, thus to make the computer speak you simply use: os.system("say 'some text'") If you want to use this to speak a variable you can use: os.system("say " + myVariable) The second way to get python to speak is to use. The pyttsx module.
Offline Text To Speech (TTS) converter for Python . py3-tts (originally pyttsx3) is a text-to-speech conversion library in Python.Unlike alternative libraries, it works offline. Installation pip install py3-tts . If you get installation errors, make sure you first upgrade your wheel version using
PyAudio Library: This library is necessary for capturing audio from the microphone. Install it using pip. pip install PyAudio Conclusion. Speech-to-text conversion is a powerful tool with diverse applications. Python, with libraries like SpeechRecognition and PyAudio, makes it straightforward to implement basic speech-to-text functionality.
Text-to-speech technology has significantly advanced, allowing developers to create high-quality audio from text inputs using various programming languages, including Python.This article will guide you through the process of setting up and using a TTS API in Python, covering installation, configuration, and usage with code examples. We will explore various APIs, including Google Cloud Text-to ...
voicebox. Python text-to-speech library with built-in voice effects and support for multiple TTS engines. | GitHub | Documentation 📘 | Audio Samples 🔉 | # Example: Use gTTS with a vocoder effect to speak in a robotic voice from voicebox import SimpleVoicebox from voicebox.tts import gTTS from voicebox.effects import Vocoder, Normalize voicebox = SimpleVoicebox (tts = gTTS (), effects ...
SpeechRecognition is a popular Python library for performing speech recognition. It supports several engines and APIs, including Google Speech Recognition, Microsoft Azure Speech Services, and IBM Speech to Text. The library allows you to convert audio data into text, making it ideal for conversational bots.