Unsupported browser
This site was designed for modern browsers and tested with Internet Explorer version 10 and later.
It may not look or work correctly on your browser.
- Presentations

How to Create a PowerPoint Presentation From a PPT Template
- Bahasa Indonesia
Creating a presentation from scratch can be time-consuming and complicated. Even when you try your best, the presentation design may not turn out how you want. This is why using a premium template is beneficial.
This article covers how to create a PowerPoint presentation from a quality PPT template. In addition, we’ll also look at some top premium PowerPoint presentation templates.
Download Our Free PDF eBook on Making Great Presentations
We also have the perfect complement to use alongside a professional presentation template. Download our Free eBook: The Complete Guide to Making Great Presentations , which will help you write, design, and deliver the perfect presentation.

What Is a PowerPoint Template?
PowerPoint is a popular presentation software by Microsoft. You can use PowerPoint for business and personal purposes. Presentations are a great way to use words to create an impact. For example, if you show the benefits of a product or service or present data, a presentation can make it more memorable.
A PowerPoint template is like a blueprint for your presentation. Templates typically contain slide layouts, colors, fonts, effects, and background styles. In addition, some templates come with illustrations and infographics. These tools make your presentation more visually interesting and can help you explain an important topic.
Your Preparation
Most of the work while creating a business presentation occurs before you fire up PowerPoint.
When creating a presentation, you want to achieve an objective. For example, you might need to present the results of your department for the last quarter in the form of a presentation to your colleagues. Or, you could be seeking funding and looking to impress potential investors with your business pitch presentation . Know what your presentation is aiming to communicate and accomplish.
Getting the Content Right
Everything begins with the content you'll put in the presentation to achieve your objective. Ideally, it's brief and crystal-clear. Typically, the less content (by sticking to key facts and figures), the more digestible your presentation is.

To save time, revising content while you're still preparing it (such as in Word or any other text processor) is much smarter than making content changes while designing.
Once you feel confident about your content preparation, it's time to design your presentation in PowerPoint.
Designing Your Presentation
For our tutorial, we'll be using the Business PPT template . Then, we'll show you how to use the template to customize slides for your business presentation.

Before starting any template you download, look at the initial requirements in an accompanying text file or their online description. For example, not having the correct font installed might mess up the layout of the template slides.
Getting Started
First, let's duplicate the theme. You can achieve this by right-clicking on the .pptx file and clicking Copy in the menu. You can copy and paste the file and rename the new document.
Instead of directly editing the template, we'll be copying slides that we'll use in our new document from the original theme file. This way, we're not editing the template source in which you would need to delete or hide slides you don't use.
Now let's review how to edit this PowerPoint template for your presentation:
How to Create a PowerPoint Presentation from a PPT Template
Are you ready to start creating your presentation?
Let's get started:
1. Choose a Template
The first step in how to create a PowerPoint presentation is to choose a template. The template featured in this section is the Business PowerPoint Presentation . This template comes with 50 unique PowerPoint slides. Easily add an image to the template by dragging and dropping an image of your choice into the picture placeholder.
2. Create an Outline
Creating an outline before working on your presentation is a great way to organize your thoughts. When creating a presentation, you want the audience to be clear, consistent, and organized.
Also, when you create an outline, it can help you make sure that you've got the best message. You can also use an outline to choose where you want your images or other multimedia. Also, they can help you see if you missed a topic or point.
3. The Basics

To learn the basics, let's start with slide seven. As you can see, there are a few components on the slide that we can change according to our needs. At first sight, we notice the following components available to us:
- footer text
I'd advise you to always look at the available components in a slide design as you're glancing over the different slides within a theme. This has a few benefits:
- You can identify how your content can fit the deck's structure.
- You can decide on the components you like (or dislike).
- You'll notice a pattern in the slide designs.
Now that we understand the components we can change to suit our needs, let's move ahead and start designing.
4. Removing Slide Components

For this example, I'll be making a simple slide to introduce the topic of this presentation. I've decided I don't need a footer or paragraph text underneath the title.
To remove the text, simply click on each Text Box and use the Delete key to remove the components from the slide.
To delete multiple words, highlight the words and then press Delete on your keyboard. If you want to add them again, you can use the top toolbar to insert text boxes, images, and other assets such as shapes and graphs.
5. Use the Slide Master

But wait! You might notice that you can't click on certain components within the slide. For example, you can't change the footer. This is because it's set in a Master Slide .
The easiest way to explain a Master Slide is to think of a boilerplate which forms the foundation for your slide designs.
The slide master tool lets you edit the layout from a single slide. This makes it easy to edit the layout of multiple slides at once. To access the slide master tool, click on the View tab.
Next, click on the Slide Master icon. This opens up the tool. The large slide is the slide that you make edits to. The small slides under the large slide is the group that'll be edited when you edit the large slide.
This is normal, as a master slide can have a Master Layout . Master slides use a master layout used in a group of master slides.
Let's access the master layout by looking at our master slide overview in the left panel and scrolling all the way up until we see the slide on top of the group. This is the slide that contains the master layout.
In this slide, you can change the footer. You'll also notice the child master slides updating as you change this. Click the Close Master button in the top toolbar to save your changes.
You'll notice that the elements you couldn't edit have been updated and changed in the deck design.
For more information about the Slide Master tool, read this in-depth article:

6. How to Add Animation

If you want to add something fun to your presentation, you can add animation. First, however, you need to know how to edit PowerPoint templates to add animation. For this illustration, we'll switch to slide two.
First, click on the Animations tab above the toolbar. When you click on this tab, you’ll see the different effects, such as:
- the green Entrance Effects
- the yellow Emphasis Effects
- the red Exit Effects
Next, click on the object that you want to animate. Then, choose the animations from the effects options that you want to use.
For more information about PowerPoint animation, read these articles:

7. Add an Image
You can use two methods to add an image to a presentation template.
The first method is using picture placeholders. A good premium template has picture placeholders in the template.
For example, slide one of the Business PowerPoint Presentation templates has a picture placeholder in the middle of the slide.

For example, you can find unlimited stock photos on Envato Elements. Download them to your device quickly and easily.
Download a photo you'd like to use and drag the image into the slide. Of course, essential to notice is that the picture is high enough in resolution (as a general rule, never aim for an image that's got less than 1600 pixels in width, or the quality might be poor).
You may need to adjust the image size and position.
The second method is to click on the Insert tab above the toolbar.
Next, click on the Pictures button in the toolbar. When you click on this button, a menu appears. Choose the correct option depending on where your image file is located. Your image appears on your slide. Adjust the image as needed.

8. Image Transparency

First, click on the image. Next, click on the Picture Format tab above the toolbar. You'll see a Transparency button in the toolbar. When you click on this button, a Transparency menu appears. Choose the option that you want.
You can easily change the transparency of an image to increase the legibility of the text on top of the picture.
Let's add some finishing touches. Click on the title to change its text, remove the placeholder logo using backspace, and drag in your company's logo. Should you have any issues with the formatting, double-click on the image.
9. Fitting Images

In the top toolbar under the Picture Format tab, there's a Crop button with a dropdown next to it. When you click on the dropdown menu, there's a Fit option and a Fill option. The fit option helps you fit an image within a constrained box. The Fill option is useful to cover a constrained box (for example, when using a background image).
10. Images Within Shapes

The final tricky part is updating images within a shape. Let's look at slide 23.
When you click on the graphic on the right, you'll notice it's a shape that's got multiple areas. You can double-click on the image placeholders within the shape to open a menu to select the image you'd like to add to the shape.
With that, we're all set to complete this slide!
11. Final Tips
As you notice, navigating through a theme design is very easy.
It would be best if you remembered that there's a distinction between your slide design, which uses placeholders, and recurring components , which you can't edit directly in the slide but can change in the corresponding Master Slide . If you can't access an item in the original master slide, a parent Master Slide uses a Master Layout . Multiple slides use the master layout. This allows for a consistent design across multiple presentation files.
As a quick overview, the ideal process to edit a template is the following:
- Copy and the original template into a new working document you'll save separately.
- Make edits to each slide you work with. Start with placeholders, then change the corresponding Master Slide if needed. Of course, you can add and remove text, images, and charts.
- You might notice that your changes to the Master Slide affects your other slides, which is good as you only need to update the placeholders, saving time.
- Do a final check if everything looks solid, and you're all set!
The Top Source for Premium PowerPoint Templates (With Unlimited Use)
Envato Elements is a great place to find the top premium PowerPoint templates. To gain access to premium templates, you must pay a low monthly fee to become a subscriber. Once you become a subscriber, you’ll gain access to more than just premium PowerPoint templates . You’ll have access to images, fonts, audio, and more.
Explore Premium Presentation Templates

Using a premium PowerPoint template saves you time because you aren’t creating a presentation from scratch when you use a premium template. In addition, if you use a premium template, you start with a great base. This means that all you need to do is add images and text.
Every template is made by a professional to look impressive and stylish. As a result, you’ll stand out among your peers who created their own or used a free template.
If you’re creative and like to customize your presentation with a premium template, you can still make as many customizations as much as you want. A good premium template is entirely editable.
Best Five PowerPoint Presentation Templates from Envato Elements
Here are some of the top PowerPoint templates from Envato Elements:
1. Creature PowerPoint

Creature is a multipurpose presentation with a versatile design. There are over fifty unique slides that you can use to create a PowerPoint for any topic you have.
This template also comes with charts, graphs, and icons. These elements add visual interest to your presentation.
2. Everlux PowerPoint Presentation

This presentation template is a professional presentation with a portfolio to showcase your work if you’re a creator. For example, you’ll have over 40 unique total slides when you create a PowerPoint with this template.
Easily add an image to this template by dragging and dropping an image of your choice by dragging and dropping it into the picture placeholder.
3. Kanal PowerPoint Template

This template has a minimal design that can work for any presentation topic. With this template, you’ll have 68 custom slides to use when creating a PowerPoint presentation. Plus, it's got animation and transitions, adding some interest to your presentation.
4. VERA PowerPoint Template

When creating a PowerPoint, you must consider what kind of presentation you want. This template is excellent for Creatives. This template comes with 55 creatives slides. It also comes with 50 premade color schemes.
5. Style Multipurpose PowerPoint Template

Style Multipurpose PowerPoint Template is a multipurpose presentation template. It comes with 4000 total slides making it easy to create a PowerPoint presentation. Easily add an image of your choice to this template by dragging and dropping the image into a picture placeholder.
Grab This eBook on Making Great Presentations (Free Download)
We've got just the right complement to a professional PowerPoint template that'll help you learn the complete process of how to write, design, and deliver great presentations.
Download The Complete Guide to Making Great Presentations now for FREE with a subscription to the Tuts+ Business Newsletter. Get your ideas formed into a powerful presentation that'll move your audience.

More Top PowerPoint Templates
Haven’t found a template that suits your needs? Check these articles out for more templates.

Download a Premium PowerPoint Template Today!
You've just learned how to edit a PowerPoint template and how to create a PowerPoint presentation using a template.
Once you start with a premium template , it isn’t hard to create a presentation. Next time you need to create a presentation, try using a premium template. Gain access to thousands of premium PowerPoint templates and digital assets by signing up for Envato Elements today!
Editor's Note: This tutorial was originally published in 2016 by Sven Lenaerts . It's been completely redone to make it accurate and up to date.

How to Make a PowerPoint Template (Tutorial with Pictures!)

PowerPoint templates are the hidden gem of top designers worldwide. That's why incorporating templates within your team is a wise choice!
They not only save you a lot of time but also help convey your brand identity across internal departments and stakeholders .
In this guide, you will learn how to make a PowerPoint template from scratch, which will also help you know how to edit an existing one.
In summary, you'll learn about:
- What exactly is a PowerPoint Template , and what is its difference from a PowerPoint Theme ?
- Is there a Quick Method for creating a PowerPoint Template?
- How to create a Custom PowerPoint Template from scratch?
- How to get a Branded PowerPoint Template with a fast turnaround?
- Frequently Asked Questions (FAQs) about PowerPoint Templates
Let's begin with the basics – or jump to your favorite section using the list above.

What are PowerPoint Templates?
PowerPoint templates are a group of slides with predefined layouts, colors, fonts, and themes that will optimize your creative process when designing presentation decks.
A good PowerPoint template contains nice layouts, great background styles, and unique color combinations. It also has strategically positioned placeholders, allowing for seamless insertion of text, images, videos, charts, or tables.
Without a doubt, PowerPoint templates are an excellent tool for quickly creating professional slides!
PowerPoint Template vs. PowerPoint Theme
You may have heard the terms "theme" and "template" being used interchangeably, but they don't have the same meaning in this software.
Let's learn about the real difference between a PowerPoint template and a PowerPoint theme:
- A PowerPoint template is a set of ready-made PowerPoint slides that contain layouts, themes, graphs, charts, and even content. Its extension is .potx.
- A PowerPoint theme is a pre-set of fonts, colors, and visual effects you apply to your slides. Its extension is .thmx .
So, in summary, a template provides a pre-set structure where you only need to insert your content. Meanwhile, a theme allows you to change the overall visual appearance of your presentation with just a click.
Naturally, you can apply any theme to an existing PowerPoint template or presentation. When it comes to design, your imagination is the only limit!

The Quick Method: Using an Existing PowerPoint Template
In a rush? You don't have enough time to build a PowerPoint template?
If so, you should use an existing PowerPoint template from the software itself or download a free PowerPoint template from Templates by 24Slides.
We can tell you that both are high-quality resources and easy to customize.
Regarding the PowerPoint templates by 24Slides, we have elaborate two types of templates:
Presentation Deck Templates
They have a standard presentation structure .
It starts with a cover slide and a table of contents. Then, it gives you space to introduce yourself or your team with an "About Us" slide.
Also, you'll find slides with some diagrams and charts to organize your information. Check out this example:

Individual Slides Templates
These templates do not follow a step-by-step structure. So feel free to use each slide independently .
Most of the time, they're about the same topic and differ primarily in the layout design. Here is an example:

One of the greatest pros about templates is that you don't need expert knowledge to customize them , as PowerPoint is very intuitive software.
Keep in mind that you have the freedom to adapt our PowerPoint templates for personal or commercial projects!
Step-by-Step Guide: How to create a Custom PowerPoint Template from scratch?
Now, if you need an impactful template fully customized to your needs , you should create a PowerPoint template from scratch.
With a custom template in PowerPoint, you have complete control over the final design of your slides.
That being said, let's explore together how to make a PowerPoint template in six simple steps!
- Important : We recommend learning how to use Slide Master in PowerPoint . The key idea is that any element added to the Slide Master will be reflected across all subsequent slides.
Step 1: Set your Slides Size
Adjusting slide sizes is really easy on a blank PowerPoint presentation –just three clicks, and you're done!
To set or change your slide size in PowerPoint, you only need to:
- Go to the Design tab .
- Click on the Slide Size button .
- Select the size you need for your presentation deck. If you choose "Standard (4:3)" or "Widescreen (16:9)," your slides will automatically change.

How do you Resize a Slide with Custom Measurements?
By default, the slides are sized for a widescreen presentation. This happens because most desktop screens have a 16:9 aspect ratio .
Good news! If you require it, you can customize the size of your slides in PowerPoint . You only need to:
- Press "Custom Slide Size," and a pop-up will appear.
- To change the size of your slides, type the new measurement in the boxes or use the arrows from the "Width" and "Height" sections.

- If you are unsure about the specific Width and Height your slides require , click "Slides sized for" and select the most appropriate measurement for your PowerPoint template.

Step 2: Open the Slide Master View
Here's where a special PowerPoint feature comes in: Slide Master .
You wouldn't be able to learn how to make a PowerPoint template without this feature, so pay close attention!
- Go to the View tab .
- Press the button "Slide Master" (see image).
- The Slide Master tab will appear, and you will be able to access new features in PowerPoint.

The first slide is called the " Slide Master ," and any changes you make there will be reflected in the following slides ( Layout Slides ).

Let's delve into a concrete example! The next image shows the effectiveness of using Slide Master for creating templates or presentations in PowerPoint.
Step 3: Customize your Slide Master
Now that you opened the Slide Master view, it's time to learn how to customize this tool.
Here are some important changes you can apply to your Slide Master in PowerPoint:
Edit the Placeholders on your Slide Master
Let's start with the easiest part: the placeholders of your Slide Master.
- Go to the Slide Master tab .
- Click on the " Master Layout " button.

- A dialog box will appear with the different types of placeholders available in the software. There, you can check the placeholders you need to create a PowerPoint template.

Apply a PowerPoint Theme to your Slide Master
You are free to choose any default PowerPoint theme or a custom theme you already have for your project.
- If you like PowerPoint aesthetics , you'll see these options when clicking the Themes button.
- If you have a custom theme saved on your computer , you only need to click "Browse for Themes."

Set Up a Custom Color Palette on your Slide Master
By default, PowerPoint offers some built-in color palettes, but you can also use your own set of colors.
This approach is especially useful when your template is designed for a project with its own brand identity.
- Go to "Colors" in the Slide Master tab.
- Click "Customize Colors" to set your own color palette in Slide Master.

- A new pop-up will appear with 12 sections to fill out.
- Remember to name and save your final color palette in PowerPoint .

Choose a Custom Font Set for your Slide Master
In this process of creating your own PowerPoint template, you also need to know how to set up a font pack in this software.
Let's check how to do it:
- Go to "Fonts" in the Slide Master tab.

- Click on " Customize Fonts " to open a dialog box. There, you can set up your new Heading and Body fonts.
- Create a name for this font set and click on "Save."

Here you can see how the Layout Slides change when employing the Slide Master functionality in PowerPoint:

- PRO TIP: If you want a more eye-catching result, install your own fonts in PowerPoint . Follow all the steps in our blog!
Customize the Background of your Slide Master
If you don't like PowerPoint themes or feel like "something is missing," you can customize your background style.
Let's learn how to do it:
- Make sure you're on the Slide Master tab .
- Stay on the first slide (Slide Master slide).
- Select "Background Styles" > " Format Background ."
- A panel will open on the right side of the screen. There, you can customize your background with a solid color, a gradient, or even add a picture.

Add your Company Logo to your Slide Master
If you want to enhance brand consistency and improve brand awareness among your audience, it is advisable to incorporate your logo into the PowerPoint template.
It's very easy to do it – simply follow these instructions:
- Go to the Insert tab > Pictures > This device.
- Select your company logo image with a transparent background (PNG is the most common format).
- Place the logo on your Master Slides, and voilá!
Step 4: Design your Layout Slides
When you finish designing your Slide Master, you should know a little more about the following slides, known as "Layout Slides."
Designing layouts in PowerPoint facilitates the task of adding information to your presentation deck. Without a doubt, having different pre-set layouts saves a lot of your time!
Also, in case you share this master resource with different teams, you'll be able to adapt it to their needs. That way, your PowerPoint template will be more user-friendly!
Customize the Placeholders on your Layout Slides
Here are all the types of placeholders you can incorporate into your Layout Slides:
- Online Image

To edit these placeholders, you only need to:
- Click on the placeholder you want to edit.
- A new Format tab will appear. Depending on each type of placeholder, the PowerPoint settings would be different.
- Finally, change the aesthetics of each placeholder as you want!
We recommend adding placeholders in strategic areas on your Layout Slides. Try and see which setting fits better for your project!
Hide Background Graphics on a Layout Slide
Remember how we added a logo in the Master Slide throughout the entire presentation deck?
Well, if you want to remove the logo or any other background graphics from specific Layout Slides , here's what you need to do:
- Click on the Layout Slide you want to edit.
- Go to the Slide Master ribbon.
- Check the box that says "Hide Background Graphics" (see image).
- If you want to apply this to multiple slides, hold down the "Ctrl" key and select the slides you want to replicate this change.

Hide Title or Footers on a Layout Slide
Beyond hiding background graphics in the Layout Slides, you can also opt to hide the title or any footers.
Let's check how to do it:
- Go to the Slide Master tab.
- Uncheck the options "Title" and "Footers," as required (see image).
- Unlike the previous functionality, these changes are made manually on each slide.

Create a New Layout Slide
What if you want different settings for only one Layout Slide? Well, you can break the rules a bit.
Let's say you desire to incorporate a different background color from your Master Slide, and you'd rather use a white Stencil font for the headings –but just for a particular Layout Slide.
Luckily for us, PowerPoint is flexible enough to make this happen . Here's what you need to do:
- Click on the layout you want to edit. In this example, we will change the Title Slide Layout (the layout immediately below the Master Slide).

- To change the color of the background , right-click on the slide and select "Format Background."
- To edit the font style and color , highlight the text and the Shape Format tab will appear. There, you can customize it with the tools Text Fill, Text Outline, and Text Effects.
Here's how the final Layout Slide looks like:

Step 5: Apply the Layout Slides to your PowerPoint Template
We are nearing the end of this guide on how to make a PowerPoint Template.
Now, it's time to apply the layout designs previously created to your template . Remember that you have the freedom to choose the order!
- Close the Master View by going to Slide Master > Close Master View.
- Right-click on the slide you want to edit (you can either create a new slide or edit an existing one).
- Select the "Layout" option, and a new list of layouts will appear (here you will see all the layouts created in the previous step!).
- Choose the layout that best suits your needs!

Step 6: Save your Custom PowerPoint Template
Once you're happy with the aesthetics of your slides, it's time to save your PowerPoint template:
- Go to the File tab .
- Click on "Save As" > "Browse."
- Then, select "Save as Type."
- Choose "PowerPoint Template" (see image).
- Change the name of the file if needed.
- Click on "Save," and that's it!

There you go! You have created a custom PowerPoint template ready to be used for any project.
We hope you like this tutorial on how to make a PowerPoint template from scratch. You're free to share it with everyone you want!
Get a Branded PowerPoint Template with a fast turnaround
What if I tell you there's a quicker option to have your PowerPoint template on-brand ? And it has nothing to do with fiddling with PowerPoint's shapes and graphics yourself.
Nowadays, more and more big companies worldwide outsource their design tasks and get professional slides that significantly impact their audience.
If you're looking for a custom PowerPoint template, or want to elevate your business presentations, book a call with us !

Customer Frequently Asked Questions (FAQs) about PowerPoint Templates
1. how to delete a layout slide from slide master.
To delete a Layout Slide from Slide Master, simply:
- Right-click on the Layout Slide you want to delete.
- Select the "Delete Layout" option, and that's it!
As you can see in the image below, you can insert, duplicate, delete, and rename a layout in this PowerPoint feature.

2. How to apply a PowerPoint Template to an existing Presentation?
To apply a template to a new presentation deck, you must know how to save the file as a theme:
- Choose the template you prefer (with the design and color palette you like the most!).
- Go to View tab > Slide Master > Themes .
- Press "Save Current Theme."
- Name it and save it on your device (see image).
- Open the PowerPoint presentation you want to edit.
- Go to Design tab > Themes > Browse for Themes.
- Choose the PowerPoint theme you just saved, and that's it!

- Note: Remember that theme and template do not mean the same in PowerPoint.
3. How to make your own PowerPoint Template with a Picture?
Thanks to the latest PowerPoint updates, you can create a template from scratch with any image.
To achieve this, follow these steps:
- Choose and save some images to add to your PowerPoint template.
- Create a new PowerPoint presentation and place yourself on the first slide.
- Go to Insert tab > Picture > This device (you can also try images from Office or Bing).
- Find the image you saved in the first step and insert it into your presentation.
- Go to the Design tab and press the PowerPoint Designer tool . The software will give you many design ideas for your template.
- Add the number of slides your PowerPoint template needs by pressing the "Enter" key on the first slide.
- Choose the layouts that best suit each slide, and voila, you finally have a unique PowerPoint template!

Found this guide helpful? Check out more content like this:
- PowerPoint 101: The Ultimate Guide for Beginners
- How to Make a PowerPoint Slideshow that Runs Automatically?
- How to Make a Picture Transparent in PowerPoint?
- How to Rebrand a PowerPoint Template after a Brand Refresh
- How to Refresh Your Brand? Discover Our Strategic Approach
Create professional presentations online
Other people also read

Tutorial: Save your PowerPoint as a Video
How To Convert Google Slides To PowerPoint and Vice Versa

How To Add Animations To PowerPoint

Free Online Microsoft Training
Free tips and tricks for using Microsoft Office and Windows
How to create a PowerPoint presentation using a template
- By Belinda Anderson
- 15 August 2014
- Updated: 6 September 2021
- No Comments

Ever wondered how to create a quick PowerPoint presentation? Maybe you’re in a hurry and don’t have hours to spend playing with design, colours and slide layouts. Let me show you how to create an effective PowerPoint presentation using the built-in templates available through the Microsoft Office template gallery.
About Microsoft Office Templates
These built-in template designs provide pre-defined formatting for different parts of a presentation including the background patterns, fonts, colours and general look-and-feel. There is no need to start from scratch. The templates cover specific audiences but also target design styles. You can find a template for a “modern” presentation right through to a presentation suitable for high schoolers or even an architecture based slideshow. The templates are certainly worth 10 minutes of exploring while you enjoy a cup of coffee (or tea!).
One suggestion I provide to all people who attend one of my training courses is to be inquisitive. You don’t know what you don’t know , so have a sticky-beak around the programs to discover new options and resources.
There are many people who don’t like the template options. Some believe they are overused and that we should steer clear of them. I however am 100% for any feature of the Office products which will save me time and so if a template is going to save me 3 hours of design time then I’m all for utilising them.
So without further ado, let’s take a look at how to use a template to create a new PowerPoint presentation.
Create a presentation using a template
To create a presentation based on a template, follow these steps:
- Open Microsoft PowerPoint (I’m using PowerPoint 2016)
- Select the File tab and choose New
- The built-in templates will now be displayed:

- At the top of the screen, you will see a search box which allows you to search by keywords related to a topic or design style
- Underneath the search bar, you will see some suggested search terms
- I always recommend that you spend about 10-15 minutes and have a good browse through the different categories – “you don’t know what you don’t know” and so this provides you with some exploration of what you could utilise
- Let’s now look for business-related presentations, from the suggested search terms, click Business
- Browse through the options and single click on a design you wish to use, you will see a preview appear

- If you would like to proceed and use the template, click Create , otherwise click the X and continue looking through the templates till you find one you like
- Once you click Create , the template will be downloaded from the Office.com website and displayed in PowerPoint:

- Now that the template is open, you can spend a few moments exploring the different slide layouts plus the design elements such as images, SmartArt graphics, charts, and table which are included in the template
You have the option of now creating your content directly within the presentation, or use the Reuse slides feature to import slide content from existing presentations where relevant.
If you are new to using PowerPoint and are not yet comfortable with creating a presentation from scratch, the following posts will provide you with some guidance:
- Introducing the PowerPoint window
- Basics of using placeholders in PowerPoint
- Choosing a slide layout in PowerPoint – why it’s important
- Effective presentation design tips
- Create Speaker Notes in your presentation
- Preview a slide show in PowerPoint
- PowerPoint , Slides
- Microsoft PowerPoint
Leave a Reply Cancel reply
Your email address will not be published. Required fields are marked *
Please enter an answer in digits: 4 + eleven =
This site uses Akismet to reduce spam. Learn how your comment data is processed .
Recent Posts

- Microsoft Excel (38)
- Microsoft Forms (9)
- Microsoft OneNote (10)
- Microsoft Outlook (34)
- Microsoft PowerPoint (32)
- Microsoft Sway (9)
- Microsoft Teams (10)
- Microsoft Windows (23)
- Microsoft Word (32)
In order to continue enjoying our site, we ask that you confirm your identity as a human. Thank you very much for your cooperation.
How-To Geek
How to create a custom template in powerpoint.

Your changes have been saved
Email Is sent
Please verify your email address.
You’ve reached your account maximum for followed topics.
It Doesn't Cost Much to Start Twitch Streaming (You Might Already Have What You Need)
Not enough people know about spotify’s "jam" feature, why the logitech g502 will forever be my favorite mouse, quick links, create a custom powerpoint template, save your custom template.
PowerPoint provides extremely useful resources called templates that automatically construct the foundation and framework of your presentation. If you can’t quite find one that’s just right for you, you can create your own. Here’s how to do it.
To create a custom PowerPoint template, you’ll first need to open a blank presentation. You can do so by clicking the “File” tab and then selecting “New” in the left pane.

A large library of templates will appear, but since that’s not what we’re looking for, go ahead and select the “Blank Presentation” option.

Next, you need to choose the slide orientation and size . In the “Customize” group of the “Design” tab, select the “Slide Size” button. A small drop-down menu will appear. Here, click the “Customize Slide Size” option.

The “Slide Size” dialog box will appear. Here, you can (1) adjust the slide height and width or simply select a predefined option from the drop-down menu, and (2) select the slide orientation.

The rest of the template creation will be done in PowerPoint’s Slide Master . The Slide Master allows you to customize a presentation's fonts, headings, and colors in one place, applying the selections to all of your slides. This allows you to maintain consistency throughout the template, as well as eliminating the need to make changes to each individual slide.
Related: How to Change the Default Font in PowerPoint
To access the slide master, click on the "View" tab and then select “Slide Master” in the “Master Views” group.

The Slide Master will appear in the left pane. The Slide Master is the top thumbnail that appears in the pane. Each sub-thumbnail represents each slide layout available in your theme. Edits you make to the Slide Master will affect each slide layout.

This is where the magic happens. First, you can select a unique theme for what will be your PowerPoint template. To do so, select “Themes” in the “Edit Theme” group of the “Slide Master” tab.
A drop-down menu will appear, presenting a large library of themes to choose from. Each theme comes with its own fonts and effects. Browse through the collection and select the one you like.

You can also choose a background style for the theme you chose. Select “Background Styles” in the “Background” group and then select the style you like from the drop-down menu.

If you want to customize the placeholders in the slides, you can do so by selecting one of the options from the “Insert Placeholder” menu. You can find this option in the “Master Layout” group.

Once you’ve selected the slide where you want to insert a placeholder from the pane on left and the type of placeholder you want to insert from the menu, click and drag your cursor to draw the placeholder box.
Repeat this process until you’re happy with the placeholders in your template. Once you’re finished with this, all that’s left to do is save your custom template.
To save the PowerPoint presentation (.pptx) as a template (.potx), click the “File” tab and then the "Save As" button.

In the “Other Locations” group, select the “Browse" option.

The “Save As” dialog box will then appear. Select the box next to “Save as Type” and then choose “PowerPoint Template” from the list of options.
When you select the PowerPoint Template file type, PowerPoint redirects you to the “Custom Office Templates” folder. This is where you’ll want to save your template. Click the “Save” button.

Your template will now be saved and is ready to be used. To find your template next time you open PowerPoint, click the “File” tab and select the “New” button. Next, select the “Custom” tab and then select the “Custom Office Templates" option.

You’ll now see your custom template. Select it to start using your custom PowerPoint template.

- Microsoft Office
- Microsoft PowerPoint
- office 2019
- PRO Courses Guides New Tech Help Pro Expert Videos About wikiHow Pro Upgrade Sign In
- EDIT Edit this Article
- EXPLORE Tech Help Pro About Us Random Article Quizzes Request a New Article Community Dashboard This Or That Game Popular Categories Arts and Entertainment Artwork Books Movies Computers and Electronics Computers Phone Skills Technology Hacks Health Men's Health Mental Health Women's Health Relationships Dating Love Relationship Issues Hobbies and Crafts Crafts Drawing Games Education & Communication Communication Skills Personal Development Studying Personal Care and Style Fashion Hair Care Personal Hygiene Youth Personal Care School Stuff Dating All Categories Arts and Entertainment Finance and Business Home and Garden Relationship Quizzes Cars & Other Vehicles Food and Entertaining Personal Care and Style Sports and Fitness Computers and Electronics Health Pets and Animals Travel Education & Communication Hobbies and Crafts Philosophy and Religion Work World Family Life Holidays and Traditions Relationships Youth
- Browse Articles
- Learn Something New
- Quizzes Hot
- Happiness Hub
- This Or That Game
- Train Your Brain
- Explore More
- Support wikiHow
- About wikiHow
- Log in / Sign up
- Computers and Electronics
- Presentation Software
- PowerPoint Presentations
Simple Steps to Make a PowerPoint Presentation
Last Updated: April 28, 2024 Fact Checked
Creating a New PowerPoint
Creating the title slide, adding a new slide, adding content to slides, adding transitions, testing and saving your presentation.
This article was co-authored by wikiHow staff writer, Darlene Antonelli, MA . Darlene Antonelli is a Technology Writer and Editor for wikiHow. Darlene has experience teaching college courses, writing technology-related articles, and working hands-on in the technology field. She earned an MA in Writing from Rowan University in 2012 and wrote her thesis on online communities and the personalities curated in such communities. This article has been fact-checked, ensuring the accuracy of any cited facts and confirming the authority of its sources. This article has been viewed 4,333,322 times. Learn more...
Do you want to have your data in a slide show? If you have Microsoft 365, you can use PowerPoint! PowerPoint is a program that's part of the Microsoft Office suite (which you have to pay for) and is available for both Windows and Mac computers. This wikiHow teaches you how to create your own Microsoft PowerPoint presentation on a computer.
How to Make a PowerPoint Presentation
- Open the PowerPoint app, select a template and theme, then like “Create.”
- Click the text box to add your title and subtitle to create your title slide.
- Click the “Insert” tab, then “New Slide” to add another slide.
- Choose the type of slide you want to add, then add text and pictures.
- Rearrange slides by dragging them up or down in the preview box.
Things You Should Know
- Templates make it easy to create vibrant presentations no matter your skill level.
- When adding photos, you can adjust their sizes by clicking and dragging in or out from their corners.
- You can add animated transitions between slides or to individual elements like bullet points and blocks of text.

- If you don't have a Microsoft Office 365 subscription, you can use the website instead of the desktop app. Go to https://powerpoint.office.com/ to use the website version.
- You can also use the mobile app to make presentations, though it's easier to do this on a computer, which has a larger screen, a mouse, and a keyboard.

- If you don't want to use a template, just click the Blank option in the upper-left side of the page and skip to the next part.

- Skip this step if your selected template has no themes available.

- If you're creating a PowerPoint presentation for which an elaborate title slide has been requested, ignore this step.

- You can change the font and size of text used from the Home tab that's in the orange ribbon at the top of the window.

- You can also just leave this box blank if you like.

- You can also click and drag in or out one of a text box's corners to shrink or enlarge the text box.

- On a Mac, you'll click the Home tab instead. [1] X Research source

- Clicking the white slide-shaped box above this option will result in a new text slide being inserted.

- Title Slide
- Title and Content
- Section Header
- Two Content
- Content with Caption
- Picture with Caption

- Naturally, the title slide should be the first slide in your presentation, meaning that it should be the top slide in the left-hand column.

- Skip this step and the next two steps if your selected slide uses a template that doesn't have text boxes in it.

- Text boxes in PowerPoint will automatically format the bulk of your text for you (e.g., adding bullet points) based on the context of the content itself.
- You can add notes that the Presentation will not include (but you'll still be able to see them on your screen) by clicking Notes at the bottom of the slide.

- You can change the font of the selected text by clicking the current font's name and then clicking your preferred font.
- If you want to change the size of the text, click the numbered drop-down box and then click a larger or smaller number based on whether you want to enlarge or shrink the text.
- You can also change the color, bolding, italicization, underlining, and so on from here.

- Photos in particular can be enlarged or shrunk by clicking and dragging out or in one of their corners.

- Remember to keep slides uncluttered and relatively free of distractions. It's best to keep the amount of text per slide to around 33 words or less. [2] X Research source

- Slide content will animate in the order in which you assign transitions. For example, if you animate a photo on the slide and then animate the title, the photo will appear before the title.
- Make your slideshow progress automatically by setting the speed of every transition to align with your speech as well as setting each slide to Advance . [3] X Trustworthy Source Microsoft Support Technical support and product information from Microsoft. Go to source

- If you need to exit the presentation, press Esc .

- Windows - Click File , click Save , double-click This PC , select a save location, enter a name for your presentation, and click Save .
- Mac - Click File , click Save As... , enter the presentation's name in the "Save As" field, select a save location by clicking the "Where" box and clicking a folder, and click Save .
Community Q&A
- If you save your PowerPoint presentation in .pps format instead of the default .ppt format, double-clicking your PowerPoint presentation file will prompt the presentation to open directly into the slideshow view. Thanks Helpful 6 Not Helpful 0
- If you don't have Microsoft Office, you can still use Apple's Keynote program or Google Slides to create a PowerPoint presentation. Thanks Helpful 0 Not Helpful 0

- Your PowerPoint presentation (or some features in it) may not open in significantly older versions of PowerPoint. Thanks Helpful 1 Not Helpful 2
- Great PowerPoint presentations avoid placing too much text on one slide. Thanks Helpful 0 Not Helpful 0
You Might Also Like

- ↑ https://onedrive.live.com/view.aspx?resid=DBDCE00C929AA5D8!252&ithint=file%2cpptx&app=PowerPoint&authkey=!AH4O9NxcbehqzIg
- ↑ https://www.virtualsalt.com/powerpoint.htm
- ↑ https://support.microsoft.com/en-us/office/set-the-timing-and-speed-of-a-transition-c3c3c66f-4cca-4821-b8b9-7de0f3f6ead1#:~:text=To%20make%20the%20slide%20advance,effect%20on%20the%20slide%20finishes .
About This Article

- Send fan mail to authors
Reader Success Stories
Artis Holland
Sep 22, 2016
Is this article up to date?

Oct 18, 2016
Jul 23, 2016
Margery Niyi
Sep 25, 2017
Jul 21, 2016

Featured Articles

Trending Articles

Watch Articles

- Terms of Use
- Privacy Policy
- Do Not Sell or Share My Info
- Not Selling Info
wikiHow Tech Help:
Tech troubles got you down? We've got the tips you need
- Content Types
Presentations Keep your audience engaged.
Documents Formalize your branding.
Videos Add movement to your brand.
Infographics Share information visually.
Whiteboards Brainstorming, plan, and design.
Charts and Graphs Bring life to your data.
Social Media Graphics Create scroll-stopping content.
Forms & Surveys new Visual forms that convert.
Mockups Create high-quality mockups in seconds.
Printables Create content for printing.

- Features & Assets
AI Designer
Interactivity
AI Image Generator
Integrations
Data Widgets
Collaborations
Social Scheduler
Branded Templates
Presenter Studio
Free Educational Resources See All
Visme Video Tutorials Watch videos on how to use Visme.
Ebooks Read in-depth knowledge for your industry.
Graphic Design Videos Learn design principles & best practices.
Live Webinars Interact with the experts live.
Free Online Courses Get certified with free online courses.
Our Blog See All
- Presentations
Video & Animations
Digital Marketing
Infographics
Design for Business
Data Visualization
Design Inspiration
For Work All Teams
Agencies & Consulting Manage multiple brands.
Education Use Visme in the classroom.
Nonprofit Bring life to your cause.
Enterprises Create visual content at scale.
- Perfect For These Roles
Marketers Creative content that shines.
Human Resources Improve internal communication.
Sales Teams Close more deals with your content.
Training Development Create interactive training content.
Templates See All
Presentations 1000+ layouts and themes.
Chart & Maps Get data visualization ideas.
Social Media Graphics Browse templates for every platform.
Infographics Find the right format for your information.
Documents Templates for every business document.
Videos & GIFs Find the perfect preanimated template.
Branded Templates Get a bundle of templates that match your brand.
Forms & Surveys new Forms for engagement and conversions.
- Other Templates
Website Graphics
Survey Results
Case Studies See All

How the Florida Panthers Maximize Their Workflow & Win New Clients Using Visme

Converting More Leads from Existing Traffic with Visme’s Interactive Form Builder

How the Denver Broncos Use Visme to Visualize Data, Execute Strategies & Wow Partners

How a Consultancy Uses Visme to Create Engaging Client-Facing Content
Created with Visme See All
Infographics / Data Viz
Document / EBooks
Forms / Surveys
- Request a Demo
- Sign Up Free
- Free Educational Resources
Online Presentation Maker for Engaging Presentations
Create Your Presentation It’s free and easy to use.

- Online presentation maker with 900+ slide layouts.
- Millions of images, icons and graphics to choose from.
- Dozens of chart types to visualize data and numbers.

Chosen by brands large and small
Our presentation maker is used by over 27,500,000 marketers, communicators, executives and educators from over 133 countries that include:

EASY TO EDIT
Presentation Templates
Avoid the trouble of having to search for just the right template or create your own slide design from scratch by tapping into our library of more than 900 slide design layouts for practically every content need, from diagrams, charts and maps to image collages and quote slides.

Create your presentation View more templates
Features of the Presentation Maker
Beautiful presentation themes.
Choose from one of our presentation themes with hundreds of available slide layouts for you to pick from and build a beautiful presentation. Find slide layouts to fit any type of information you need to communicate within your presentation and customize them to perfectly fit your brand or topic.
Create Your Presentation

Build your presentation
With fully customizable slides, text blocks, data visualization tools, photos and icons to help tell your story, you can easily build creative and cool presentations as quickly as you need. Build the perfect slides with Visme’s easy-to-use presentation editor.

Customize every aspect of your presentation with your own images and text
Choose from over a million images, thousands of icons, dozens of charts and data widgets to visualize information in an engaging way. Apply a color scheme to all your slides with one click. Add animation effects, transitions, interactivity, pop-ups, rollovers and third-party content such as live websites and social media feeds.

Record yourself presenting
Once you’ve created your presentation, do more than only share or download it. With Visme’s Presenter Studio, you can record your presentation and share it with your audience.
- Record your screen, audio, and video, or switch off your camera for an audio-only presentation.
- Present asynchronously on your own time, at your own pace. Let your colleagues watch it at their convenience.
More Great Features of the Presentation Maker
Share your presentation.
Visme makes it easy to create and share presentations online. Our presentation software allows you to present online by generating a link to access your presentation, share privately by sending a password protected link to friends and colleagues, or even turn your presentation into a lead generation tool by requiring email sign-in before viewing.

LEARN ABOUT PRESENTATIONS
What is a Presentation ?
A presentation is a sequence of slides that tell a story or teach an audience about a topic. These are often used in business as ways of demonstrating something and in the classroom as teaching aids. While PowerPoint long dominated the presentation industry, Visme’s free online presentation maker allows you to create even more beautiful and engaging content.
With Visme's engaging presentation maker, you can start with a template, dive into one of our themes with various slide ideas, or mix and match slides from different templates to create your own masterpiece.

Use the presentation maker to take the trouble out of presentation design.
Creating a slide deck for an important presentation can take several hours, if not days. Our free presentation maker provides a searchable slide library with 900+ layouts that you can fully customize. With so many options, you can easily find the exact slides that you need instead of searching for the right template or building a slide design from scratch.
EVERYTHING YOU NEED + MORE
More Than a Presentation Maker
Visme’s online presentation tools allow you to create an interactive online presentation that will blow your audience away. Add interactive elements, animate your slides and create a presentation that will have your viewers talking for days to come.
MAKE IT ENGAGING
Create interactive presentations with popup and rollover effects that allow your viewer to interact with your design to learn more information.

VISUALIZE YOUR DATA
Charts & Graphs
Share data, statistics, simple numbers and more in your presentation slides with Visme’s easy-to-use charts, graphs and other data widgets.

BEAUTIFY YOUR CONTENT
Stock Photos & Graphics
Choose from over a million stock photos, icons, illustrations, characters, lines, shapes and more to create an engaging presentation design.
HOW IT WORKS
Make Presentations in 5 Steps
Whether you’re creating a presentation to pitch your business, to inform your industry or to update your team or supervisors, you want your slideshow to be equal parts beautiful and informative. Visme makes it easy with our powerful presentation maker.
Mix and match template styles and slide ideas, customize with your own ideas, insert design elements from our asset library, present online with presenter notes and more.
- Sign up for free or log into your Visme account and create a new project.
- Choose one of our beautiful themes under the Presentations content category or select a pre-designed presentation template.
- Add new slides from our theme library to help guide your presentation design.
- Customize text boxes, fonts, colors, photos, icons, charts, data visualization tools and so much more within your slides.
- Quickly and easily share or present your slideshow by clicking Share in the top navigation bar and viewing our share options.
How to Use the Presentation Maker
Before creating your slide deck, make sure to create an outline with all the major points that you need to include within your presentation.
Start creating your slides. You can easily use our free presentation slides and templates to help you create a well-designed and informative presentation.
Easily replace any image with millions of free images within our editor, as well as diagrams, charts, icons, illustrations and maps.
Insert your own text by clicking on any text box and typing in your own information (or you can simply copy and paste it from your outline).
Our free presentation maker online also comes with built-in animation effects. Add transitions, audio, pop-ups, rollovers and interactive buttons to wow your audience.
Use the Presenter View to rehearse your delivery. Use the timer to make sure you don’t go over the allotted time. You can easily add presenter notes that only you will see while you present.
Generate a public or private URL to share with anyone or embed your slide deck on your website or blog by clicking the Share button in the Visme editor.
Download as an editable PowerPoint or in HTML5 to keep all of your animations and interactivity intact for offline presenting.
Questions About the Presentation Maker
How can i create an account with visme, how much does it cost to create a presentation with the presentation maker app, can i create animated projects, is it possible to make interactive projects with the presentation maker, how do i present my slide deck, how can i create a slide deck in a few minutes.

Your presentations deserve to be beautiful and so does the rest of your content
Sign up. It’s free!
Critical PowerPoint Shortcuts – Claim Your FREE Training Module and Get Your Time Back!
How to Make a PowerPoint Presentation (Step-by-Step)
- PowerPoint Tutorials
- Presentation Design
- January 22, 2024
In this beginner’s guide, you will learn step-by-step how to make a PowerPoint presentation from scratch.
While PowerPoint is designed to be intuitive and accessible, it can be overwhelming if you’ve never gotten any training on it before. As you progress through this guide, you’ll will learn how to move from blank slides to PowerPoint slides that look like these.

Table of Contents
Additionally, as you create your presentation, you’ll also learn tricks for working more efficiently in PowerPoint, including how to:
- Change the slide order
- Reset your layout
- Change the slide dimensions
- Use PowerPoint Designer
- Format text
- Format objects
- Play a presentation (slide show)
With this knowledge under your belt, you’ll be ready to start creating PowerPoint presentations. Moreover, you’ll have taken your skills from beginner to proficient in no time at all. I will also include links to more advanced PowerPoint topics.
Ready to start learning how to make a PowerPoint presentation?
Take your PPT skills to the next level
Start with a blank presentation.
Note: Before you open PowerPoint and start creating your presentation, make sure you’ve collected your thoughts. If you’re going to make your slides compelling, you need to spend some time brainstorming.
For help with this, see our article with tips for nailing your business presentation here .
The first thing you’ll need to do is to open PowerPoint. When you do, you are shown the Start Menu , with the Home tab open.
This is where you can choose either a blank theme (1) or a pre-built theme (2). You can also choose to open an existing presentation (3).
For now, go ahead and click on the Blank Presentation (1) thumbnail.

Doing so launches a brand new and blank presentation for you to work with. Before you start adding content to your presentation, let’s first familiarize ourselves with the PowerPoint interface.
The PowerPoint interface

Here is how the program is laid out:
- The Application Header
- The Ribbon (including the Ribbon tabs)
- The Quick Access Toolbar (either above or below the Ribbon)
- The Slides Pane (slide thumbnails)
The Slide Area
The notes pane.
- The Status Bar (including the View Buttons)
Each one of these areas has options for viewing certain parts of the PowerPoint environment and formatting your presentation.
Below are the important things to know about certain elements of the PowerPoint interface.
The PowerPoint Ribbon

The Ribbon is contextual. That means that it will adapt to what you’re doing in the program.
For example, the Font, Paragraph and Drawing options are greyed out until you select something that has text in it, as in the example below (A).

Furthermore, if you start manipulating certain objects, the Ribbon will display additional tabs, as seen above (B), with more commands and features to help you work with those objects. The following objects have their own additional tabs in the Ribbon which are hidden until you select them:
- Online Pictures
- Screenshots
- Screen Recording
The Slides Pane

This is where you can preview and rearrange all the slides in your presentation.
Right-clicking on a slide in the pane gives you additional options on the slide level that you won’t find on the Ribbon, such as Duplicate Slide , Delete Slide , and Hide Slide .

In addition, you can add sections to your presentation by right-clicking anywhere in this Pane and selecting Add Section . Sections are extremely helpful in large presentations, as they allow you to organize your slides into chunks that you can then rearrange, print or display differently from other slides.

The Slide Area (A) is where you will build out your slides. Anything within the bounds of this area will be visible when you present or print your presentation.
Anything outside of this area (B) will be hidden from view. This means that you can place things here, such as instructions for each slide, without worrying about them being shown to your audience.

The Notes Pane is the space beneath the Slide Area where you can type in the speaker notes for each slide. It’s designed as a fast way to add and edit your slides’ talking points.
To expand your knowledge and learn more about adding, printing, and exporting your PowerPoint speaker notes, read our guide here .
Your speaker notes are visible when you print your slides using the Notes Pages option and when you use the Presenter View . To expand your knowledge and learn the ins and outs of using the Presenter View , read our guide here .

You can resize the Notes Pane by clicking on its edge and dragging it up or down (A). You can also minimize or reopen it by clicking on the Notes button in the Status Bar (B).
Note: Not all text formatting displays in the Notes Pane, even though it will show up when printing your speaker notes. To learn more about printing PowerPoint with notes, read our guide here .
Now that you have a basic grasp of the PowerPoint interface at your disposal, it’s time to make your presentation.
Adding Content to Your PowerPoint Presentation
Notice that in the Slide Area , there are two rectangles with dotted outlines. These are called Placeholders and they’re set on the template in the Slide Master View .
To expand your knowledge and learn how to create a PowerPoint template of your own (which is no small task), read our guide here .

As the prompt text suggests, you can click into each placeholder and start typing text. These types of placeholder prompts are customizable too. That means that if you are using a company template, it might say something different, but the functionality is the same.

Note: For the purposes of this example, I will create a presentation based on the content in the Starbucks 2018 Global Social Impact Report, which is available to the public on their website.
If you type in more text than there is room for, PowerPoint will automatically reduce its font size. You can stop this behavior by clicking on the Autofit Options icon to the left of the placeholder and selecting Stop Fitting Text to this Placeholder .
Next, you can make formatting adjustments to your text by selecting the commands in the Font area and the Paragraph area of the Home tab of the Ribbon.

The Reset Command: If you make any changes to your title and decide you want to go back to how it was originally, you can use the Reset button up in the Home tab .

Insert More Slides into Your Presentation
Now that you have your title slide filled in, it’s time to add more slides. To do that, simply go up to the Home tab and click on New Slide . This inserts a new slide in your presentation right after the one you were on.

You can alternatively hit Ctrl+M on your keyboard to insert a new blank slide in PowerPoint. To learn more about this shortcut, see my guide on using Ctrl+M in PowerPoint .
Instead of clicking the New Slide command, you can also open the New Slide dropdown to see all the slide layouts in your PowerPoint template. Depending on who created your template, your layouts in this dropdown can be radically different.

If you insert a layout and later want to change it to a different layout, you can use the Layout dropdown instead of the New Slide dropdown.
After inserting a few different slide layouts, your presentation might look like the following picture. Don’t worry that it looks blank, next we will start adding content to your presentation.

If you want to follow along exactly with me, your five slides should be as follows:
- Title Slide
- Title and Content
- Section Header
- Two Content
- Picture with Caption
Adding Content to Your Slides
Now let’s go into each slide and start adding our content. You’ll notice some new types of placeholders.

On slide 2 we have a Content Placeholder , which allows you to add any kind of content. That includes:
- A SmartArt graphic,
- A 3D object,
- A picture from the web,
- Or an icon.
To insert text, simply type it in or hit Ctrl+C to Copy and Ctrl+V to Paste from elsewhere. To insert any of the other objects, click on the appropriate icon and follow the steps to insert it.
For my example, I’ll simply type in some text as you can see in the picture below.

Slides 3 and 4 only have text placeholders, so I’ll go ahead and add in my text into each one.

On slide 5 we have a Picture Placeholder . That means that the only elements that can go into it are:
- A picture from the web

To insert a picture into the picture placeholder, simply:
- Click on the Picture icon
- Find a picture on your computer and select it
- Click on Insert
Alternatively, if you already have a picture open somewhere else, you can select the placeholder and paste in (shortcut: Ctrl+V ) the picture. You can also drag the picture in from a file explorer window.

If you do not like the background of the picture you inserted onto your slide, you can remove the background here in PowerPoint. To see how to do this, read my guide here .
Placeholders aren’t the only way to add content to your slides. At any point, you can use the Insert tab to add elements to your slides.
You can use either the Title Only or the Blank slide layout to create slides for content that’s different. For example, a three-layout content slide, or a single picture divider slide, as shown below.

In the first example above, I’ve inserted 6 text boxes, 3 icons, and 3 circles to create this layout. In the second example, I’ve inserted a full-sized picture and then 2 shapes and 2 text boxes.
The Reset Command: Because these slides are built with shapes and text boxes (and not placeholders), hitting the Reset button up in the Home tab won’t do anything.
That is a good thing if you don’t want your layouts to adjust. However, it does mean that it falls on you to make sure everything is aligned and positioned correctly.
For more on how to add and manipulate the different objects in PowerPoint, check out our step-by-step articles here:
- Using graphics in PowerPoint
- Inserting icons onto slides
- Adding pictures to your PowerPoint
- How to embed a video in PowerPoint
- How to add music to your presentation
Using Designer to generate more layouts ideas
If you have Office 365, your version of PowerPoint comes with a new feature called Designer (or Design Ideas). This is a feature that generates slide layout ideas for you. The coolest thing about this feature is that it uses the content you already have.
To use Designer , simply navigate to the Design tab in your Ribbon, and click on Design Ideas .

NOTE: If the PowerPoint Designer is not working for you (it is grey out), see my troubleshooting guide for Designer .
Change the Overall Design (optional)
When you make a PowerPoint presentation, you’ll want to think about the overall design. Now that you have some content in your presentation, you can use the Design tab to change the look and feel of your slides.
For additional help thinking through the design of your presentation, read my guide here .
A. Picking your PowerPoint slide size
If you have PowerPoint 2013 or later, when you create a blank document in PowerPoint, you automatically start with a widescreen layout with a 16:9 ratio. These dimensions are suitable for most presentations as they match the screens of most computers and projectors.
However, you do have the option to change the dimensions.
For example, your presentation might not be presented, but instead converted into a PDF or printed and distributed. In that case, you can easily switch to the standard dimensions with a 4:3 ratio by selecting from the dropdown (A).
You can also choose a custom slide size or change the slide orientation from landscape to portrait in the Custom Slide Size dialog box (B).

To learn all about the different PowerPoint slide sizes, and some of the issues you will face when changing the slide size of a non-blank presentation, read my guide here .
B. Selecting a PowerPoint theme
The next thing you can do is change the theme of your presentation to a pre-built one. For a detailed explanation of what a PowerPoint theme is, and how to best use it, read my article here .
In the beginning of this tutorial, we started with a blank presentation, which uses the default Office theme as you can see in the picture below.

That gives you the most flexibility because it has a blank background and quite simple layouts that work for most presentations. However, it also means that it’s your responsibility to enhance the design.
If you’re comfortable with this, you can stay with the default theme or create your own custom theme ( read my guide here ). But if you would rather not have to think about design, then you can choose a pre-designed theme.
Microsoft provides 46 other pre-built themes, which include slide layouts, color variants and palettes, and fonts. Each one varies quite significantly, so make sure you look through them carefully.
To select a different theme, go to the Design tab in the Ribbon, and click on the dropdown arrow in the Themes section .

For this tutorial, let’s select the Frame theme and then choose the third Variant in the theme. Doing so changes the layout, colors, and fonts of your presentation.

Note: The theme dropdown area is also where you can import or save custom themes. To see my favorite places to find professional PowerPoint templates and themes (and recommendations for why I like them), read my guide here .
C. How to change a slide background in PowerPoint
The next thing to decide is how you want your background to look for the entire presentation. In the Variants area, you can see four background options.

For this example, we want our presentation to have a dark background, so let’s select Style 3. When you do so, you’ll notice that:
- The background color automatically changes across all slides
- The color of the text on most of the slides automatically changes to white so that it’s visible on the dark background
- The colors of the objects on slides #6 and #7 also adjust, in a way we may not want (we’ll likely have to make some manual adjustments to these slides)

Note: If you want to change the slide background for just that one slide, don’t left-click the style. Instead, right-click it and select Apply to Selected Slides .
After you change the background for your entire presentation, you can easily adjust the background for an individual slide.

Inside the Format Background pane, you can see you have the following options:
- Gradient fill
- Picture or texture fill
- Pattern fill
- Hide background
You can explore these options to find the PowerPoint background that best fits your presentation.
D. How to change your color palette in PowerPoint
Another thing you may want to adjust in your presentation, is the color scheme. In the picture below you can see the Theme Colors we are currently using for this presentation.

Each PowerPoint theme comes with its own color palette. By default, the Office theme includes the Office color palette. This affects the colors you are presented with when you format any element within your presentation (text, shapes, SmartArt, etc.).

The good news is that the colors here are easy to change. To switch color palettes, simply:
- Go to the Design tab in the Ribbon
- In the Variants area, click on the dropdown arrow and select Colors
- Select the color palette (or theme colors) you want
You can choose among the pre-built color palettes from Office, or you can customize them to create your own.
As you build your presentation, make sure you use the colors from your theme to format objects. That way, changing the color palette adjusts all the colors in your presentation automatically.
E. How to change your fonts in PowerPoint
Just as we changed the color palette, you can do the same for the fonts.

Each PowerPoint theme comes with its own font combination. By default, the Office theme includes the Office font pairing. This affects the fonts that are automatically assigned to all text in your presentation.

The good news is that the font pairings are easy to change. To switch your Theme Fonts, simply:
- Go to the Design tab in the Ribbon
- Click on the dropdown arrow in the Variants area
- Select Fonts
- Select the font pairing you want
You can choose among the pre-built fonts from Office, or you can customize them to create your own.
If you are working with PowerPoint presentations on both Mac and PC computers, make sure you choose a safe PowerPoint font. To see a list of the safest PowerPoint fonts, read our guide here .
If you receive a PowerPoint presentation and the wrong fonts were used, you can use the Replace Fonts dialog box to change the fonts across your entire presentation. For details, read our guide here .
Adding Animations & Transitions (optional)
The final step to make a PowerPoint presentation compelling, is to consider using animations and transitions. These are by no means necessary to a good presentation, but they may be helpful in your situation.
A. Adding PowerPoint animations
PowerPoint has an incredibly robust animations engine designed to power your creativity. That being said, it’s also easy to get started with basic animations.
Animations are movements that you can apply to individual objects on your slide.

To add a PowerPoint animation to an element of your slide, simply:
- Select the element
- Go to the Animations tab in the Ribbon
- Click on the dropdown arrow to view your options
- Select the animation you want
You can add animations to multiple objects at one time by selecting them all first and then applying the animation.
B. How to preview a PowerPoint animation

There are three ways to preview a PowerPoint animation:
- Click on the Preview button in the Animations tab
- Click on the little star next to the slide
- Play the slide in Slide Show Mode
To learn other ways to run your slide show, see our guide on presenting a PowerPoint slide show with shortcuts .
To adjust the settings of your animations, explore the options in the Effect Options , Advanced Animation and the Timing areas of the Animation tab .

Note: To see how to make objects appear and disappear in your slides by clicking a button, read our guide here .
C. How to manage your animations in PowerPoint

The best way to manage lots of animations on your slide is with the Animation Pane . To open it, simply:
- Navigate to the Animations tab
- Select the Animation Pane
Inside the Animation Pane, you’ll see all of the different animations that have been applied to objects on your slide, with their numbers marked as pictured above.
Note: To see examples of PowerPoint animations that can use in PowerPoint, see our list of PowerPoint animation tutorials here .
D. How to add transitions to your PowerPoint presentation
PowerPoint has an incredibly robust transition engine so that you can dictate how your slides change from one to the other. It is also extremely easy to add transitions to your slides.
In PowerPoint, transitions are the movements (or effects) you see as you move between two slides.

To add a transition to a PowerPoint slide, simply:
- Select the slide
- Go to the Transitions tab in the Ribbon
- In the Transitions to This Slide area, click on the dropdown arrow to view your options
- Select the transition you want
To adjust the settings of the transition, explore the options in the Timing area of the Transitions tab.
You can also add the same transition to multiple slides. To do that, select them in the Slides Pane and apply the transition.
E. How to preview a transition in PowerPoint

There are three ways to preview your PowerPoint transitions (just like your animations):
- Click on the Preview button in the Transitions tab
- Click on the little star beneath the slide number in the thumbnail view
Note: In 2016, PowerPoint added a cool new transition, called Morph. It operates a bit differently from other transitions. For a detailed tutorial on how to use the cool Morph transition, see our step-by-step article here .
Save Your PowerPoint Presentation
After you’ve built your presentation and made all the adjustments to your slides, you’ll want to save your presentation. YOu can do this several different ways.

To save a PowerPoint presentation using your Ribbon, simply:
- Navigate to the File tab
- Select Save As on the left
- Choose where you want to save your presentation
- Name your presentation and/or adjust your file type settings
- Click Save
You can alternatively use the Ctrl+S keyboard shortcut to save your presentation. I recommend using this shortcut frequently as you build your presentation to make sure you don’t lose any of your work.

This is the standard way to save a presentation. However, there may be a situation where you want to save your presentation as a different file type.
To learn how to save your presentation as a PDF, see our guide on converting PowerPoint to a PDF .
How to save your PowerPoint presentation as a template
Once you’ve created a presentation that you like, you may want to turn it into a template. The easiest – but not technically correct – way, is to simply create a copy of your current presentation and then change the content.
But be careful! A PowerPoint template is a special type of document and it has its own parameters and behaviors.
If you’re interested in learning about how to create your own PowerPoint template from scratch, see our guide on how to create a PowerPoint template .
Printing Your PowerPoint Presentation
After finishing your PowerPoint presentation, you may want to print it out on paper. Printing your slides is relatively easy.

To open the Print dialog box, you can either:
- Hit Ctrl+P on your keyboard
- Or go to the Ribbon and click on File and then Print

Inside the Print dialog box, you can choose from the various printing settings:
- Printer: Select a printer to use (or print to PDF or OneNote)
- Slides: Choose which slides you want to print
- Layout: Determine how many slides you want per page (this is where you can print the notes, outline, and handouts)
- Collated or uncollated (learn what collated printing means here )
- Color: Choose to print in color, grayscale or black & white
There are many more options for printing your PowerPoint presentations. Here are links to more in-depth articles:
- How to print multiple slides per page
- How to print your speaker notes in PowerPoint
- How to save PowerPoint as a picture presentation
So that’s how to create a PowerPoint presentation if you are brand new to it. We’ve also included a ton of links to helpful resources to boost your PowerPoint skills further.
When you are creating your presentation, it is critical to first focus on the content (what you are trying to say) before getting lost inserting and playing with elements. The clearer you are on what you want to present, the easier it will be to build it out in PowerPoint.
If you enjoyed this article, you can learn more about our PowerPoint training courses and other presentation resources by visiting us here .
🔒 Unlock the PowerPoint Shortcuts Trusted by Industry Leaders KKR, American Express, HSBC, and More!
Join over 114,880 professionals from diverse fields including consulting, investment banking, advertising, marketing, sales, and business development who have supercharged their PowerPoint game with our proven methods.
✅ Customize compelling presentations effortlessly.
✅ Master time-saving techniques for faster deck creation.
✅ Boost your career prospects with top-notch PowerPoint skills.
Get FREE access to the Critical PowerPoint Shortcuts module of our premium training course by entering your name and email below.
DISCLAIMER: PC Users Only!
We respect your privacy and will keep your info safe and confidential.
About The Author

Popular Tutorials
- How to Strikethrough Text (l̶i̶k̶e̶ ̶t̶h̶i̶s̶) in Word, Excel & PowerPoint
- How to Make Animated Fireworks in PowerPoint (Step-by-Step)
- Strikethrough Shortcut (l̶i̶k̶e̶ ̶t̶h̶i̶s̶) for Word, Excel & PowerPoint
- How to Create a Flash Card Memory Game in PowerPoint (Like Jeopardy)
- Keyboard Shortcuts Not Working: Solved
PowerPoint Tutorial Categories
- Strategies & Opinions
- Shortcuts & Hacks
- Pictures, Icons, Videos, Etc.
- New Features
- Miscellaneous
- Charts & Data Viz
We help busy professionals save hours and gain peace of mind, with corporate workshops, self-paced courses and tutorials for PowerPoint and Word.
Work With Us
- Corporate Training
- Presentation & Template Design
- Courses & Downloads
- PowerPoint Articles
- Word Articles
- Productivity Resources
Find a Tutorial
- Free Training
- For Businesses
We help busy office workers save hours and gain peace of mind, with tips, training and tutorials for Microsoft PowerPoint and Word.
Master Critical PowerPoint Shortcuts – Secure Your FREE Training Module and Save Valuable Time!
⌛ Master time-saving expert techniques.
🔥 Create powerful presentations.
🚀 Propel your career to new heights.
We value your privacy – we keep your info safe.
Discover PowerPoint Hacks Loved by Industry Giants - KKR, AmEx, HSBC!
Over 114,880 professionals in finance, marketing and sales have revolutionized their PPT skills with our proven methods.
Gain FREE access to a full module of our premium PowerPoint training program – Get started today!
We hate spam too and promise to keep your information safe.
You are currently viewing a placeholder content from Facebook . To access the actual content, click the button below. Please note that doing so will share data with third-party providers.
Find the perfect PowerPoint presentation template
Bring your next presentation to life with customizable powerpoint design templates. whether you're wowing with stats via charts and graphs or putting your latest and greatest ideas on display, you'll find a powerpoint presentation template to make your ideas pop., presentations.
Help your data, insights, and recommendations make a statement with beautiful and easily customizable presentation templates.
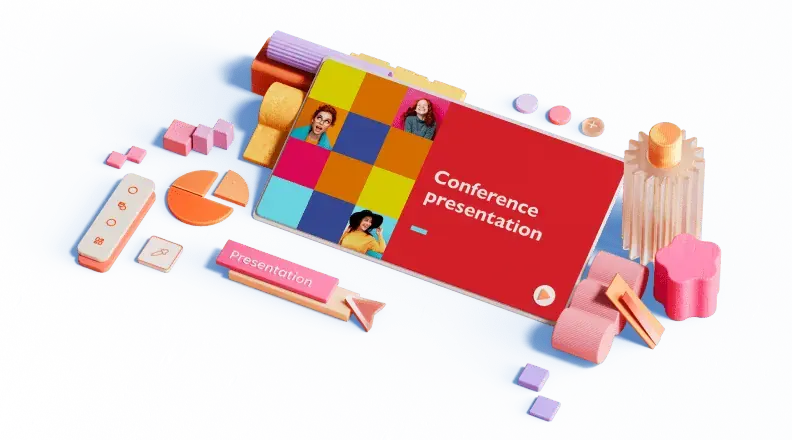
Certificates
Celebrate accomplishments big and small with customizable certificate templates. From gift certificates to awards for finishing a course or training, find a template that highlights their accolades.
Boost visibility for your show, project, or business with easily customizable poster templates. Find templates for all your promotion needs and make them uniquely yours in a flash.
Keep track of whatever you need to in style. From personal planning to promotional calendars, find templates for every kind of project and aesthetic.
Infographics
Say more with less using helpful and easily customizable infographic templates. Add clarity to business presentations, school projects, and more with these helpful templates.
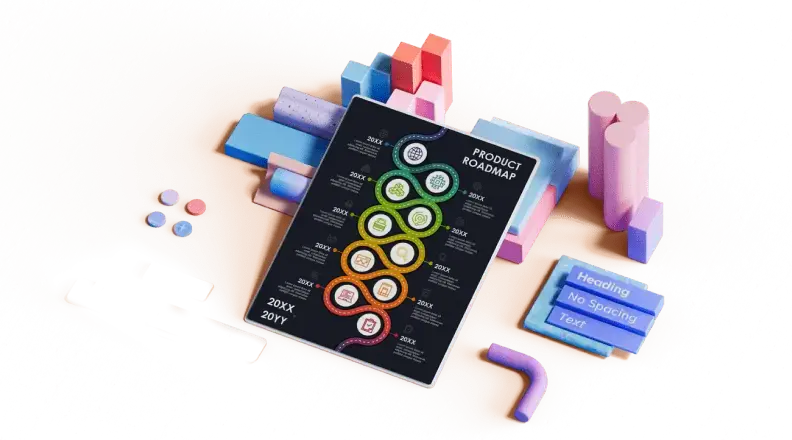
Start with the best PowerPoint templates

Elevate your storytelling
Tips, tricks, and insider advice from our business and design experts
A quick way to create beautiful, powerful PowerPoint presentations
Create captivating, informative content for PowerPoint in just a few minutes—no graphic design experience needed. Here's how:
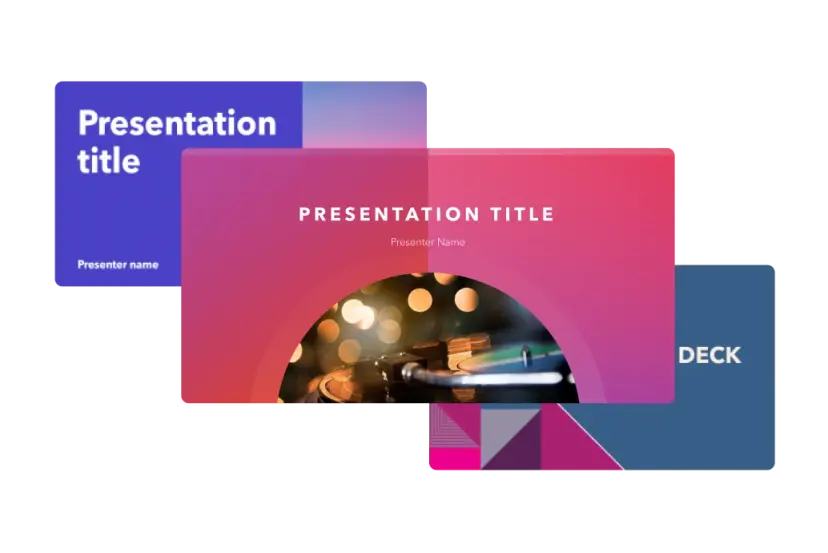
1. Find the perfect PowerPoint template
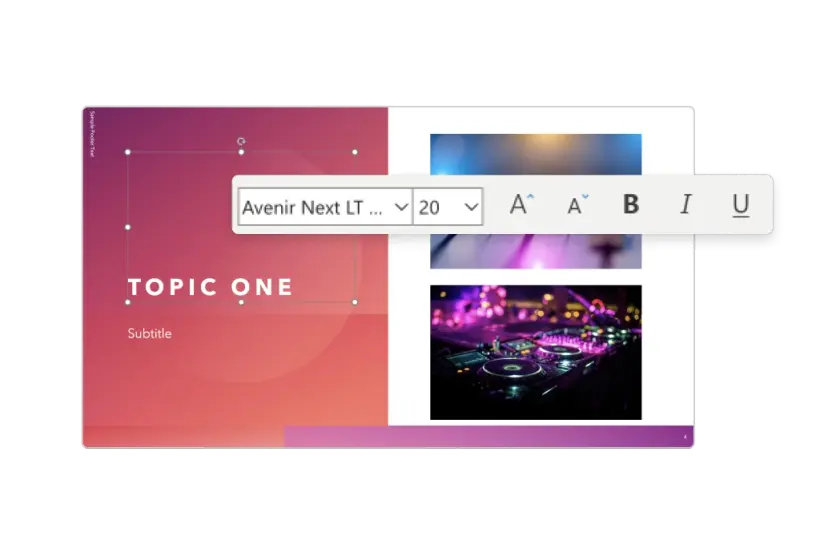
2. Customize your creation
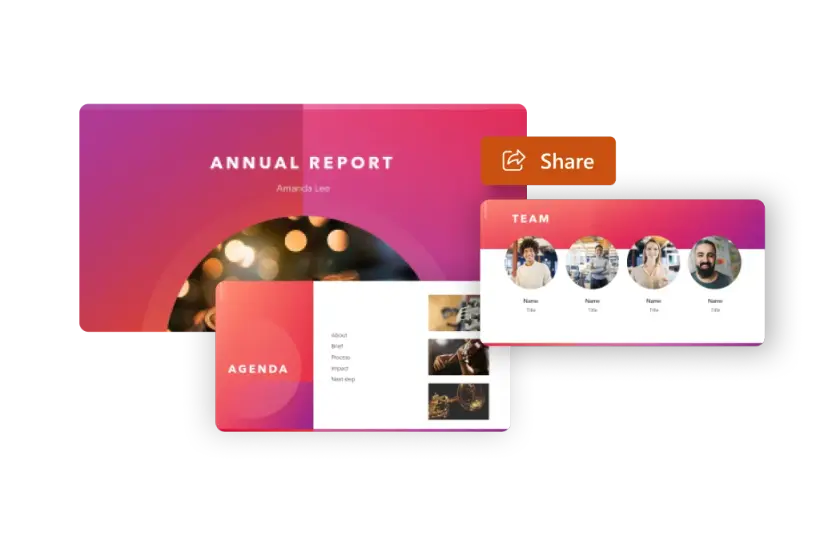
3. Show it off
Let's create a powerpoint design, frequently asked questions, where can i find slide templates and themes that i can customize.
To find customizable slide templates and themes, you can explore the business presentations templates or search by PowerPoint templates . Once you find a template that resonates with you, customize it by changing its color scheme, add in your own photos, and swap out the font.
How do I use pre-made PowerPoint templates?
After you've chosen a PowerPoint template to use, customize it. Explore [design tips] on how to customize a deck that resonates with your brand while putting emphasis on the topic at hand. Play with other design elements, like photo shapes, to make each slide unique.
How can I make or edit my own custom PowerPoint templates?
Start from scratch by creating your own PowerPoint template . Follow tips for designs and business presentations so that your unique template is cohesive and relevant to your brand. Incorporate your brand's color scheme and graphics so that all your slides aren't text only.
What kinds templates can I get online for PowerPoint?
You can get PowerPoint templates that have modern designs, animated ones, or even hand-drawn art in each slide. The color schemes range from bold to subtle. Each template's slides are also organized based on what you may want to include in your presentation . You can use the template as a starting point and customize its specific details from theme.
Popular categories

How to create a custom PowerPoint template to use or share with others
- You can create your own PowerPoint templates, which you can then open later and use.
- To create a PowerPoint template, create a new presentation and edit it however you like, and then save it as a "Powerpoint Template."
- Making a PowerPoint template can save you time if you make many similar slideshows.
- Visit Business Insider's Tech Reference library for more stories .
If you use PowerPoint often, and there isn't an available template for the type of presentation you normally make, you probably wish that there were.
As it turns out, though, that's an option — you can actually make your own PowerPoint template at any time, so that when you want to make a similar presentation again, all you have to do is open the template.
Once you make your PowerPoint template, you can even share it with colleagues, and make everyone's life a little easier.
Here's how to create your own template in Microsoft PowerPoint for Mac or PC.
Check out the products mentioned in this article:
Apple macbook pro (from $1,299.00 at apple), acer chromebook 15 (from $179.99 at walmart), how to create a powerpoint template.
First, you have to create the template that you want. Here's some tips on how to meaningfully set up a template.
1. Open PowerPoint on your Mac or PC and open a new, blank presentation.
2. Click "Design" at the top of the window, and choose a slide size and a theme. If you'd like, you can customize your theme using the Format Background button on the right.
3. Next, go to the "View" tab and select "Slide Master." Doing this will allow you to view your master slide at all times, and use it to create other slides.
4. From here, you can edit any number of things about your PowerPoint. Play around with the different buttons and settings until you find a look that you like for your presentation.
One important thing to know how to do, though, is add a placeholder for an image, chart, or other piece of media you may need.
To add a placeholder, go to the Slide Master tab and click the button labeled "Insert Placeholder." Select a type from the dropdown menu, then use your cursor to click and drag the placeholder to the spot you want it.
Once you've finished creating your template and are satisfied with its design and functionality, it's time to save it.
To save your template on a PC:
1. Go to "File" and click "Save As" (or, if you're using Office 365, "Save A Copy"), and click "Browse" to pick a place to save it.
2. Click the dropdown menu next to "File Type" in the pop-up, and from the list, select "Powerpoint Template." When you do this, PowerPoint will automatically change the save location to the appropriate folder for you.
3. Give it whatever name you like, then click "Save."
To save your template on a Mac:
1. Click "File" at the top of the screen, and then click "Save as Template..."
2. In the pop-up that appears, choose a name for the template and set where you'd like it to be saved. By default, it'll be saved in a folder reserved for PowerPoint files.
3. Next to "File Format," click "PowerPoint Template (.potx)." If your presentation contains macros (if you don't know what this means, chances are you don't have any), select "PowerPoint Macro-Enabled Template (.potm)" instead.
4. Click "Save."
To use your template the next time you open PowerPoint, just open the template file, or select your template from the list when you open PowerPoint. You may need to click a tab labeled "Personal."
Related coverage from Tech Reference :
How to download and access microsoft powerpoint on your mac computer, how to embed a youtube video into your microsoft powerpoint presentations using a mac or pc, how to convert google slides to a powerpoint presentation in 4 easy steps, how to convert a powerpoint to google slides in 2 different ways, how to copy or duplicate a powerpoint slide and put it anywhere in your slideshow.
Insider Inc. receives a commission when you buy through our links.
Watch: The coolest gadgets we saw at CES 2018
- Main content
Top searches
Trending searches

welcome back
89 templates

meet the teacher
30 templates

stop bullying
11 templates

indigenous canada
10 templates

27 templates

collaboration
29 templates
Create your presentation Create personalized presentation content
Writing tone, number of slides, ai presentation maker.
When lack of inspiration or time constraints are something you’re worried about, it’s a good idea to seek help. Slidesgo comes to the rescue with its latest functionality—the AI presentation maker! With a few clicks, you’ll have wonderful slideshows that suit your own needs . And it’s totally free!

Generate presentations in minutes
We humans make the world move, but we need to sleep, rest and so on. What if there were someone available 24/7 for you? It’s time to get out of your comfort zone and ask the AI presentation maker to give you a hand. The possibilities are endless : you choose the topic, the tone and the style, and the AI will do the rest. Now we’re talking!
Customize your AI-generated presentation online
Alright, your robotic pal has generated a presentation for you. But, for the time being, AIs can’t read minds, so it’s likely that you’ll want to modify the slides. Please do! We didn’t forget about those time constraints you’re facing, so thanks to the editing tools provided by one of our sister projects —shoutouts to Wepik — you can make changes on the fly without resorting to other programs or software. Add text, choose your own colors, rearrange elements, it’s up to you! Oh, and since we are a big family, you’ll be able to access many resources from big names, that is, Freepik and Flaticon . That means having a lot of images and icons at your disposal!

How does it work?
Think of your topic.
First things first, you’ll be talking about something in particular, right? A business meeting, a new medical breakthrough, the weather, your favorite songs, a basketball game, a pink elephant you saw last Sunday—you name it. Just type it out and let the AI know what the topic is.
Choose your preferred style and tone
They say that variety is the spice of life. That’s why we let you choose between different design styles, including doodle, simple, abstract, geometric, and elegant . What about the tone? Several of them: fun, creative, casual, professional, and formal. Each one will give you something unique, so which way of impressing your audience will it be this time? Mix and match!
Make any desired changes
You’ve got freshly generated slides. Oh, you wish they were in a different color? That text box would look better if it were placed on the right side? Run the online editor and use the tools to have the slides exactly your way.
Download the final result for free
Yes, just as envisioned those slides deserve to be on your storage device at once! You can export the presentation in .pdf format and download it for free . Can’t wait to show it to your best friend because you think they will love it? Generate a shareable link!
What is an AI-generated presentation?
It’s exactly “what it says on the cover”. AIs, or artificial intelligences, are in constant evolution, and they are now able to generate presentations in a short time, based on inputs from the user. This technology allows you to get a satisfactory presentation much faster by doing a big chunk of the work.
Can I customize the presentation generated by the AI?
Of course! That’s the point! Slidesgo is all for customization since day one, so you’ll be able to make any changes to presentations generated by the AI. We humans are irreplaceable, after all! Thanks to the online editor, you can do whatever modifications you may need, without having to install any software. Colors, text, images, icons, placement, the final decision concerning all of the elements is up to you.
Can I add my own images?
Absolutely. That’s a basic function, and we made sure to have it available. Would it make sense to have a portfolio template generated by an AI without a single picture of your own work? In any case, we also offer the possibility of asking the AI to generate images for you via prompts. Additionally, you can also check out the integrated gallery of images from Freepik and use them. If making an impression is your goal, you’ll have an easy time!
Is this new functionality free? As in “free of charge”? Do you mean it?
Yes, it is, and we mean it. We even asked our buddies at Wepik, who are the ones hosting this AI presentation maker, and they told us “yup, it’s on the house”.
Are there more presentation designs available?
From time to time, we’ll be adding more designs. The cool thing is that you’ll have at your disposal a lot of content from Freepik and Flaticon when using the AI presentation maker. Oh, and just as a reminder, if you feel like you want to do things yourself and don’t want to rely on an AI, you’re on Slidesgo, the leading website when it comes to presentation templates. We have thousands of them, and counting!.
How can I download my presentation?
The easiest way is to click on “Download” to get your presentation in .pdf format. But there are other options! You can click on “Present” to enter the presenter view and start presenting right away! There’s also the “Share” option, which gives you a shareable link. This way, any friend, relative, colleague—anyone, really—will be able to access your presentation in a moment.
Discover more content
This is just the beginning! Slidesgo has thousands of customizable templates for Google Slides and PowerPoint. Our designers have created them with much care and love, and the variety of topics, themes and styles is, how to put it, immense! We also have a blog, in which we post articles for those who want to find inspiration or need to learn a bit more about Google Slides or PowerPoint. Do you have kids? We’ve got a section dedicated to printable coloring pages! Have a look around and make the most of our site!

Integrations
Inspiration
Consideration

Go hybrid with Prezi
It’s a new world. Are you ready? Here’s how Prezi helps your team thrive in today’s hybrid workplace.

Prezi Video explained
We’ve compiled these quick, easy-to-follow tutorials to make you a Prezi Video master in no time.

The science
Learn to grab their attention and keep it with presentation advice from the pros.
Create moving, zooming presentations that grab attention and keep it.
Appear right alongside your content while presenting to your audience.
Make stunning interactive charts, reports, maps, infographics, and more.

Create a presentation that will "wow" your audience
"see ya later powerpoint." present the way the human brain works..

Using visuals and movement instead of static text, Prezi catches and keeps your audience’s interest. Jump freely from topic to topic, focusing on the material you want to cover.

Your audience will retain more information when you show the whole story in context, displaying relationships between ideas in ways slides can’t. Any subject is easier to remember when it all makes more sense.

You can jump-start your awesomeness with designer templates and reusable presentations.
Meet just a few of our 100 million customers.
Home Blog Education How to Memorize a Presentation: Guide + Templates
How to Memorize a Presentation: Guide + Templates

Memorizing a presentation is the process of internalizing a speech’s concepts, key points, and structure so it can be delivered confidently and smoothly without relying heavily on presentation notes or a script. As a skill, it implies understanding the material as a whole, committing it to memory, and recalling and articulating it effectively in front of an audience. And we mean articulating, as the end goal is not to repeat the content verbatim without emotion or feeling out of the element if questions are asked.
In this article, we will talk about the advantages of memorizing a presentation, the different techniques for accomplishing it, and some examples of how to put these tools into practice.
Table of Contents
Benefits of Memorizing a Presentation
Technique #1: create an outline, technique #2: the 20-20-20 rule of rehearsal, technique #3: the method of loci, technique #4: using acronyms, technique #5: rhyming, technique #6: visualization linking, technique #7: chunking, technique #8: pqrst, technique #9: write it down, recommended templates for visual aids in memorization.
Although some may think of memorizing a presentation as a sort of counterproductive practice, “ knowing the speech cold ” – as HBR labels this practice – gives us room to be more confident about our understanding of the topic to present, reducing public speaking anxiety , and obtain a better performance outcome. Let’s go through some of the benefits of memorizing a presentation.
Audience Engagement
A well-memorized presentation allows for better eye contact and interaction with the audience, making the delivery more engaging and dynamic. The presentation feels less robotic, allowing you to connect with the public through genuine levels of audience engagement .
Flexibility
Understanding the material thoroughly enables the presenter to adapt to questions, comments, or technical issues without losing track of the presentation. A typical scenario is when the talk drifts off its original intention, such as when an attendee has genuine concerns about some of the presentation’s points or application. Rather than abruptly returning to where you left off, you can resume the presentation by connecting a fact to what you just discussed.
Memorizing helps maintain a logical flow and structure, ensuring that key points are covered effectively and smooth transitions between sections. This is extremely practical if we deliver video presentations , where we need to do a before and after part of the presentation from where the video starts.
A confident and well-delivered presentation is more persuasive and can have a greater impact on the audience, whether the goal is to inform, inspire, or convince. Think of how much of a difference it can make in short-format presentations like elevator pitches , as all your mental and physical efforts are focused on your body language and how you connect with the audience rather than remembering facts.
Reduced Dependence on Visual Aids
With memorized material, the presenter can use visual aids more effectively as supplements rather than crutches. Visual aids for presentations can become more artistic, enhancing the aesthetic of your presentation rather than needing specific word cues to help you remember parts of your speech.
Enhanced Credibility
Memorizing a presentation can significantly enhance your credibility as a presenter by ensuring a smooth and confident delivery, which audiences often interpret as a sign of expertise and reliability. This phenomenon is supported by the “Halo Effect,” a cognitive bias where the perception of one positive trait (such as confidence and fluency in delivering a presentation) leads to the assumption of other positive traits (such as competence and trustworthiness). When a presenter speaks without hesitation or errors, the audience is more likely to view them as knowledgeable and credible, thus reinforcing their overall message. You can learn more about this in our article about how different cognitive bias impact your presentation .
An outline organizes your thoughts and provides a clear presentation structure . Start with a broad framework, then fill in the details. For instance, an outline for a presentation on a project management course might look like this:
- Definition of project management
- Importance of effective project management
- Defining project scope
- Setting objectives and milestones
- Resource allocation
- Team management
- Tracking progress
- Adjusting plans as needed
- Evaluating project success
- Lessons learned
- Summary of key points
- Final thoughts and call to action
This outline serves as a roadmap, helping you remember the sequence and relationships between points. You can quickly create outlines with AI tools like ChatGPT for Presentations .

The 20-20-20 rule is a structured rehearsal technique designed to enhance presentation memorization and delivery. This rule breaks down practice sessions into manageable segments, focusing on different presentation aspects and ensuring a comprehensive preparation process. The rule involves three 20-minute phases: content rehearsal, delivery practice, and review/adjustment.
Content Rehearsal
The focus should be on memorizing and understanding the concepts of your presentation. Go through the outline or main points of your presentation. Ensure you know the flow and structure.
Cover each key point, argument, and supporting evidence. You can use mnemonic devices, such as acronyms or rhymes, to aid the memory fixation process. Recite the content without worrying about your delivery style. Concentrate on getting the information right, and repeat each challenging section until you feel confident to recall it.
A good practice is to pair this content rehearsal process with the Feynman Technique , which helps you acknowledge whether you truly understand what you’re talking about.
Delivery Practice
Practice delivering the presentation, concentrating on your speaking style, body language, and engagement with the audience. It is best if you practice standing up and speaking aloud, mentally recreating the conditions of your future presentation to reduce potential anxiety.
Pay attention to your tone, pitch, and pace. Ensure your speech is dynamic and engaging, and make eye contact with the imaginary audience. Incorporate appropriate gestures and movements to emphasize points and keep the audience engaged.
Review and Adjustment
Review your performance, make necessary adjustments, and refine your presentation. If possible, get feedback from a peer, mentor, or record your practice session and review it.
Simplify complex points and add clarifications where needed. Look at how much jargon you’re using, your vocal variety, pacing, and body language.

The Method of Loci involves choosing a familiar location, such as your home or a route you often take, and mentally placing pieces of information at specific locations within this setting. When you need to recall the information, you mentally “walk” through the location, retrieving the information associated with each specific place.
Spatial memory is powerful, making it easier to remember and recall information. The physical layout of the location helps create a logical sequence for the presentation.
Steps to Implement the Method of Loci
Choose a familiar location, identify specific locations or landmarks, associate information with each location, visualize and rehearse, mentally walk through the location, practice regularly, adapt and expand as needed.
Select a familiar place, such as your home, office, or frequently taken route. Familiarity with the location is crucial because it allows you to visualize and navigate the space in your mind easily.
Your home, including rooms such as the living room, kitchen, bedroom, and garden.
Within your chosen location, identify distinct spots or landmarks where you will “place” information. These should be areas that are easy to visualize and distinct from one another.
- The couch in the living room
- Dining table in the kitchen
- Bed in the bedroom
- Flowerbed in the garden
Assign a piece of information from your presentation to each specific location. Create vivid, memorable images or associations for each piece of information.
For a presentation on the benefits of renewable energy:
- Front door: A bright sun symbolizes solar energy.
- Couch: A spinning wind turbine representing wind energy.
- Dining table: A flowing river representing hydroelectric power.
- Bed: A peaceful forest symbolizing biomass energy.
- Flowerbed: A vibrant array of flowers representing the benefits of renewable energy for the environment.
Spend time visualizing each piece of information in its designated location. Walk through the location in your mind, seeing each piece of information clearly.
Mentally walk to your front door and vividly imagine the bright sun. Move to the living room and picture the wind turbine on the couch. Continue this process for each location and associated image.
When it’s time to recall the information, mentally walk through the chosen location in the same order. As you visualize each spot, recall the information associated with it.
During your presentation, mentally start at the front door (solar energy) and proceed to the living room (wind energy), kitchen (hydroelectric power), bedroom (biomass energy), and garden (environmental benefits).
Regular practice helps reinforce the associations and improves recall. Periodically walk through your memory palace to ensure the information remains fresh and accessible.
Practice your mental walk-through daily leading up to your presentation. Spend a few minutes each day reinforcing the associations.
The Method of Loci is versatile and can be adapted for different types of information and expanded as needed. Add more locations or create new memory palaces for additional topics.
If your presentation has multiple sections, create a new memory palace for each section or expand your existing one by adding more rooms or landmarks.

Acronyms are powerful mnemonic devices that can simplify the process of memorizing a presentation by condensing complex information into easily remembered letters and words. Each letter in an acronym stands for a key point or concept, helping you recall the sequence and details of your presentation more effectively.
Begin by identifying the main points or concepts of your presentation. These could be steps in a process, important themes, or critical details that must be remembered.
For a presentation on effective communication, the key points might be:
- Conciseness
- Consistency
Using the key points above, create the acronym “5Cs” for effective communication:
- C onciseness
- C onsistency
Enhance the acronym with mnemonic devices, such as creating a sentence or phrase where each word starts with the same letter as your key points. This helps reinforce memory.
“ C ats C atch C lever C reatures C arefully”

Rhyming is a highly effective mnemonic tool that greatly improves presentation memorization. Crafting rhymes can result in engaging presentations as an ice-breaker and makes content easier to remember. By utilizing the natural rhythm and sound patterns of language, rhyming helps information stay in your memory.
Identify the key points or concepts you want to memorize in your presentation. These could be main ideas, lists, steps in a process, or important details. Once you have a clear list of these points, you can begin to create rhymes around them.
Create simple, catchy rhymes for each key point. Aim for short and memorable phrases that encapsulate the essence of the information. For example, if you’re presenting on the benefits of exercise, you might create a rhyme like:
“Exercise each day, keeps fatigue away.”
Combine rhymes into couplets (two-line verses) or longer verses if needed. This helps create a narrative or flow that is easy to follow. For instance, for a presentation on healthy eating, you could use:
“Fruits and veggies every day, keep the doctor far away.
Whole grains and lean meats too, give your body fuel to renew.”
Use visual aids that complement your rhymes. Say you have a slide listing the benefits of a product; use a rhyme to introduce or summarize the points on the slide. The combination of visual and auditory cues strengthens memory retention.

Visualization linking involves using vivid, imaginative images to represent key points or pieces of information in a presentation. By creating a mental picture for each point and linking these pictures together logically, you create a memorable and coherent mental map of your presentation. This technique leverages the brain’s natural ability to remember visual and spatial information more effectively than abstract concepts or words.
Unlike the Method of Loci, it focuses on creating a chain of connected images that follow a narrative or logical sequence rather than working with a familiar physical location. Therefore, there’s no need for a physical or spatial structure to help memory recall, and it is a more flexible method.
Let’s say we are wondering how to remember a presentation about the use of chemicals in food preparation. We can retrieve the mental process a consumer makes before buying a product by linking the image of the product—say, a detergent—to the store where you purchase it. Then, we can think of the potential usage by picturing the bubbles this product creates when combined with water when cleaning vegetables.
You need to mentally go through the sequence until it feels natural. Each image triggers a memory corresponding to a key point in your presentation.

Chunking is the process of dividing large amounts of information into smaller, more manageable pieces, or chunks. Each chunk represents a unit of information that is easier to process and remember. This technique helps reduce cognitive load, making understanding, memorizing, and recalling complex concepts easier.
Once you have identified the main concepts in your presentation, you need to organize them into chunks.
Group the time management key points:
- Importance of goals
- Types of goals (short-term, long-term)
- Urgent vs. important
- Task prioritization techniques (Eisenhower Matrix)
- Daily planning
- Weekly and monthly planning
- Identifying distractions
- Techniques to stay focused
- Regular review sessions
- Adjusting plans based on progress
Label each chunk with clear headings or section titles. This helps organize the presentation and provides a clear structure for the presenter and the audience. Incorporate visual aids such as slides, charts, or diagrams to represent each chunk. Visual aids help reinforce the information and make it more memorable. Although this technique is a good answer to how to memorize a speech faster, its most common application of chunking is related to data presentations , when we need to recall lengthy numbers critical for discussing our findings.

The PQRST method is a study and memory technique that stands for Preview, Question, Read, Self-Recite, and Test. Originally developed for academic study, this method can be effectively adapted to help presenters memorize their material by breaking down the content into manageable steps and reinforcing understanding and recall.
This method involves five steps: Previewing the material to get an overview, generating questions about the content, reading to find answers to those questions, self-reciting the key points, and testing oneself to ensure the information is retained. This structured approach aids in comprehending, memorizing, and recalling information for a presentation.

Writing things down involves manually recording information on paper. This can include writing out the full text of your presentation, key points, summaries, or notes. Writing engages your brain in different ways compared to simply reading or typing, making it an effective mnemonic device. As we take notes manually, we can implement complementary techniques to further enhance our memory recall process, like storytelling in presentations .
Suppose your presentation contains words or paragraphs in another language. In that case, this is the best method to implement, as the manual writing process triggers your brain’s reticular activating system (RAS).
There are multiple approaches to writing down a presentation. You can write an outline, but that wouldn’t be enough. Summarizing each section of the presentation in your own words rather than repeating the lengthy speech is a great practice, as you test your comprehension simultaneously. Flashcards, which can be manual or digital, are another alternative to test your memory about the contents of the presentation.

We want to conclude this article with a series of selected PowerPoint templates that can help us work with effective visual aids for memorization. Keep in mind these PPT/PPTX files can be accessed as Google Slides templates as well.
1. Corporate Process Map Template for PowerPoint
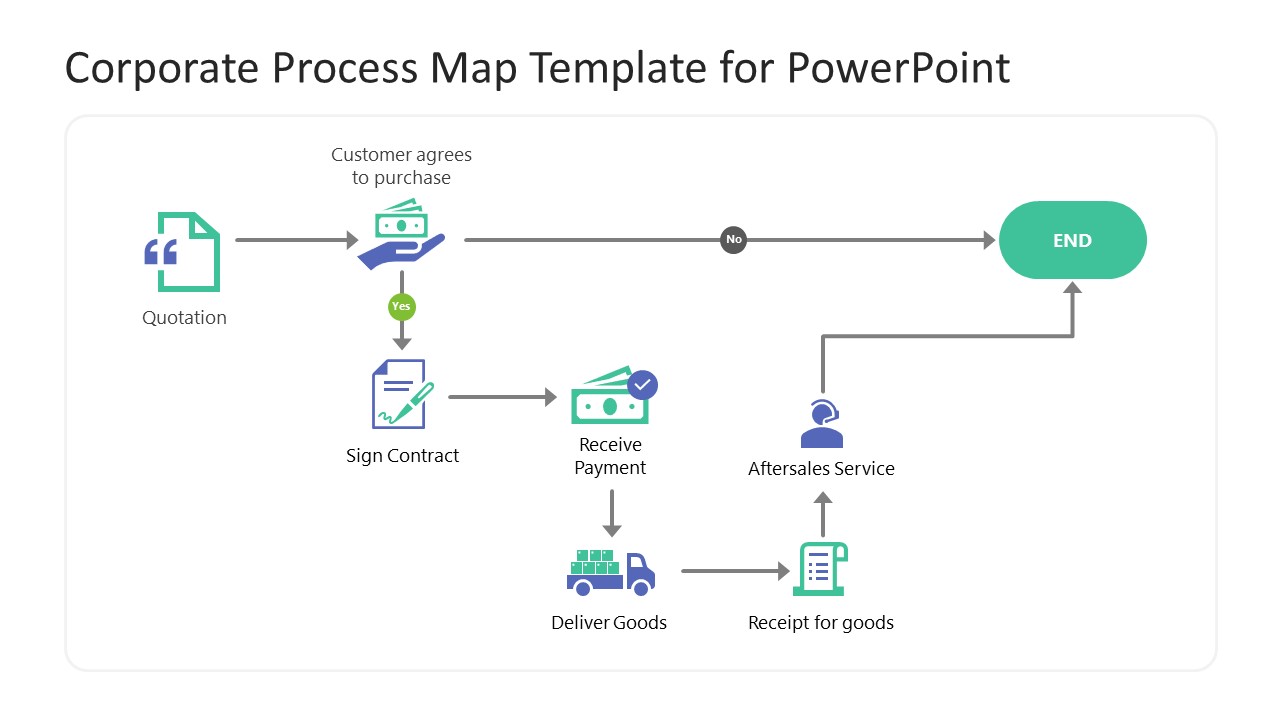
Suppose you’re wondering how to memorize a presentation about your company’s processes, either in the change management stages or to coach personnel. In that case, you need to get this PPT template.
Detailed icons help us recall each stage of employee onboarding, sales chain, or customer fulfillment processes, to name a few.
Use This Template
2. 6-Milestone Hanging Platforms Timeline PowerPoint Template

Another template with visual aids for how to memorize speeches, this time intended for team meetings briefing in the implementation phases of specific business operations. Presenters can pair the icons to each stage or associate them with a mnemonic.
3. Data Science Shapes PowerPoint Template

This PPT template is intended for any kind of data science presentation. Its use of a broad selection of icons and contrasting colors makes it easy to remember the contents of a presentation.
4. Statistical Bias PowerPoint Templates
Say you need to deliver an academic presentation about cognitive bias; this template comes with tips to remember a speech in the form of vector art illustrations. Adapt the contents of the slides to your presentation’s needs and let the images help you retrieve concepts.
5. Action Plan PowerPoint Diagram
Share your process for launching a product or service, creating a training program, or setting new action plans for your organization with a highly visual presentation template for PowerPoint and Google Slides. Creative icons allow you to visually link the different stages your team has to complete.
Like this article? Please share
Presentation Approaches, Presentation Skills Filed under Education
Related Articles

Filed under Design • July 3rd, 2024
ChatGPT Prompts for Presentations
Make ChatGPT your best ally for presentation design. Learn how to create effective ChatGPT prompts for presentations here.

Filed under Design • July 1st, 2024
Calculating the Slide Count: How Many Slides Do I Need for a Presentation?
There’s no magical formula for estimating presentation slides, but this guide can help us approximate the number of slides we need for a presentation.

Filed under PowerPoint Tutorials • June 28th, 2024
How to Represent Branching Scenarios in PowerPoint
Do you have a situation to expose with multiple possible outcomes? If so, check our guide on branching scenarios in PowerPoint.
Leave a Reply
Skip to main content
- Contact sales
- Get started Get started for free
Figma Design
Design and prototype in one place
Collaborate with a digital whiteboard
Translate designs into code

Figma Slides
Co-create presentations

Explore all Figma AI features
Get the desktop, mobile, and font installer apps
See the latest features and releases
- Design systems
- Prototyping
- Wireframing
- Online whiteboard
- Team meetings
- Strategic planning
- Brainstorming
- Diagramming
- Product development
- Web development
- Design handoff
- Engineering
- Product managers
Organizations
Creator fund
Build and sell what you love
User groups
Join a local Friends of Figma group
Learn best practices at virtual events
Customer stories
Read about leading product teams
Shortcut: The Figma blog
Stories about how products take shape—and shape our world

Get started
- Developer docs
- Best practices
- Reports & insights
- Resource library
- Help center
The first presentation tool built for designers and their teammates.
Figma Slides is trusted by the world's leading teams
The power of Figma, made easy for everyone
Backed by our design platform, Figma Slides makes it easier than ever for teams to co-create narratives, engage their audience, and craft impressive slide decks.
Design your way: simple or pro
Land in a simple, yet powerful interface. And—with a quick toggle over to Design Mode—access design favorites like Auto Layout, Advanced Properties, and shared Libraries.
Keep it engaging with live slides
Encourage two-way conversations and drive alignment with Live Polls, Alignment Scales, and Voting. Plus, you can even embed live prototypes to share design interactivity.
Bring all hands on deck
Build on-brand presentations with Templates, Theming, and AI-powered writing tools. Switch between Single Slide and Grid Views to think visually with structure.
Six Figma Slides features we think you’ll love
Showcase interactive designs.
Add playable prototypes to your deck to bring your products to life. And coming soon: add any Live Object to your slides.
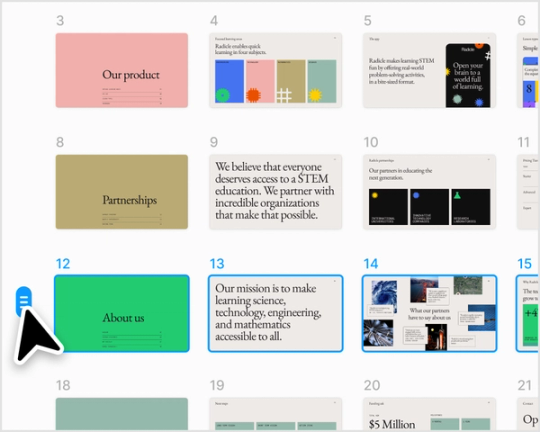
See the big picture with grid view
Zoom out to see your entire presentation from a bird’s eye view. Easily group multiple slides and move sections of your presentation.
Toggle on Design mode
Toggle on Figma Design tools for easy access to Auto Layout, Advanced Properties, and all of your favorite design features.
Fine tune copy in minutes with AI
Easily dial up the tone of your text to be shorter or longer, more professional or more casual.
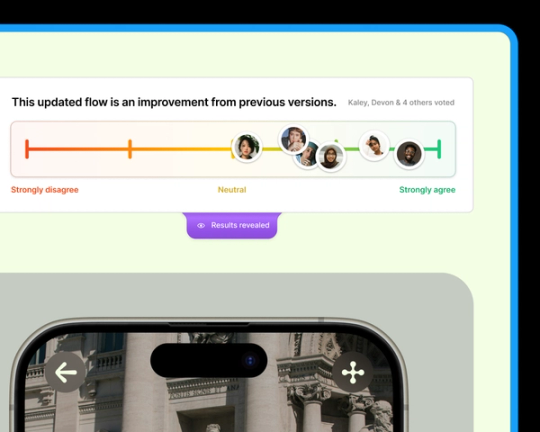
Slide into alignment with your team
Tease out misalignment with the Alignment Scale. Quickly find out where you’re good to go, and where you need to do more digging.
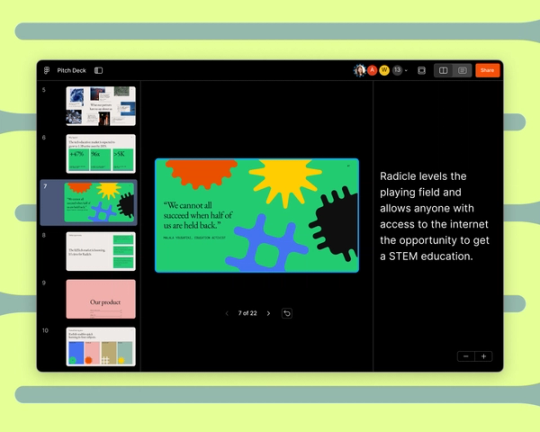
Present confidently
See your presenter notes and preview the next slide—all within Presenter View. A tiny step toward getting rid of “ummms...” forever.
Get started with a stunning template
No matter what kind of presentation you’re gearing up for, we have a high-quality slide templates to help you get started.
Explore all templates

Product review
Design review
Startup pitch
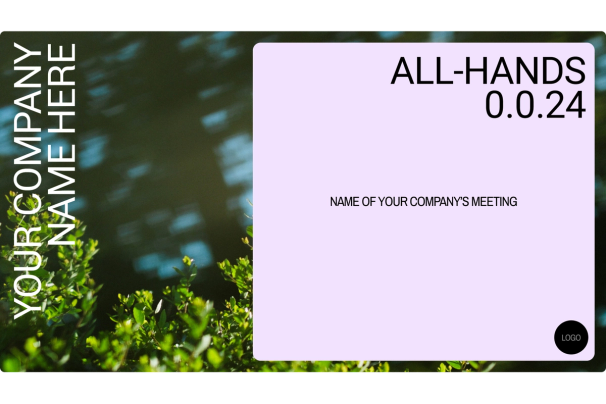
All hands meeting

Product roadmap
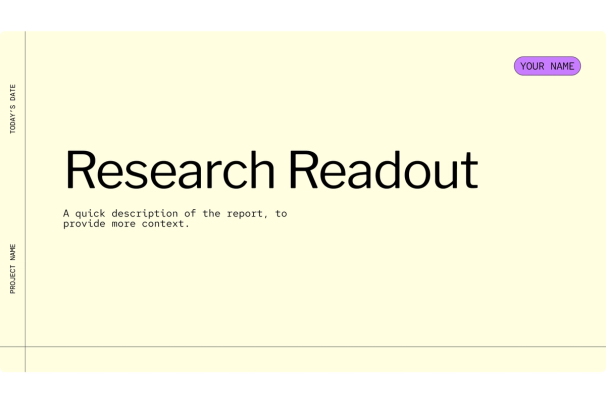
Research readout

Marketing strategy
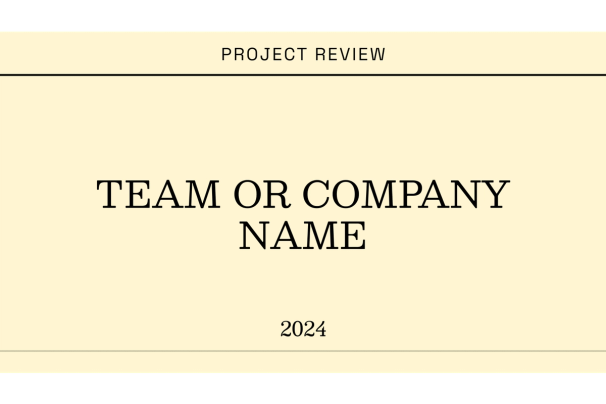
Project review
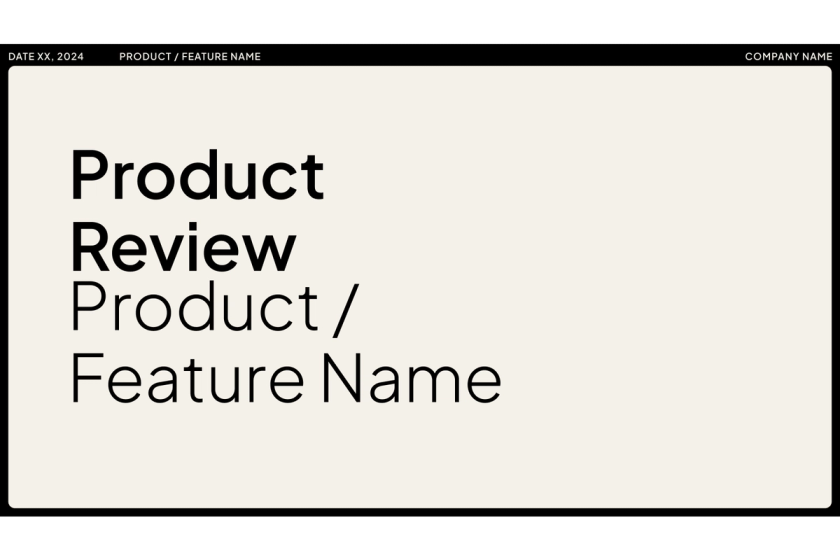
Figma Slides empowers anyone on the team to create beautiful, effective presentations.
Charmaine Lee Product Manager, Snap

Looking for more on Figma Slides? We’ve got you.

Stack the deck with Figma Slides
For presentations that actually move the needle, our new slide tool combines the power and precision of Figma with the collaborative spirit of FigJam.

Getting started with Figma Slides
Figma Slides is built for everyone. Not sure where to start? Here’s a helpful video tutorial to get you going.

Explore community presentation templates
Discover and use presentation templates crafted by the best and brightest in our Figma community.
- Summarize PowerPoints with AI
- Summarize Word documents with AI
- Summarize PDF with AI
- Generate PowerPoints with AI from text
- Create Presentation with AI
- GPT for Presentations
- Chat with Document Groups
- Import files from Cloud
- Request Demo
- July 10, 2024
- Comments Off on How do I upload a custom PowerPoint template?
Creating SlideSpeak AI presentations with a custom PowerPoint template allows you to produce cleaner and more consistent material. Whether it is company projects or for personal use, SlideSpeak allows users to easily upload custom PowerPoint templates.
Follow these 4 simple steps to upload your custom PowerPoint template right away.
Step 1: Upload your custom template
Head over to https://app.slidespeak.co and log in to your account. Then click on “My templates” on the left hand side of the page.
Once you’re on the “My templates” section of SlideSpeak, select “Click to upload”.

Select the desired template from your files. Please ensure your PowerPoint template is in the correct format (.pptx). Click “Open” to upload the template.

Step 2: Create your AI Presentation with SlideSpeak
Click on “Create presentation” and follow the AI wizard who will walk you through the steps for creating a presentation from a document/pdf or a topic of your choosing.

Step 3: Use your custom template
As part of the SlideSpeak presentation process, you will be given the option to use a default or custom templates. Please go ahead and click “Custom Templates”. You will the be shown the templates you have uploaded previously. Select the relevant PowerPoint template and click “Next”.

Fill out the final step of the process and when ready, select “Generate”.

Step 4: Download your AI Presentation with SlideSpeak
If you’re happy with the preview of your presentation, go ahead and click “Download” and select the format for your presentation- either a PDF or PowerPoint.

That’s it, you’ve successfully used a custom template to create a SlideSpeak AI presentation.
AI generate presentations and summaries.
Summarize and generate PowerPoint files with ChatGPT. Upload, chat, and gain new insights from your presentations. Use SlideSpeak AI to boost your productivity.
- Help Center
- Affiliate Program 💵
- Call us: +1 (512) 777-1759
- Compress PowerPoint
- Convert PowerPoint to PDF
- Convert PowerPoint to PSD
- Convert PowerPoint to Figma
- Convert PDF to Word
- Terms of Service
Slidesgo: How to Use It to Teach
Slidesgo uses the power of AI to make slide-based presentations more powerful and targeted than ever

Slidesgo is a template-based slides presentation tool that comes from software company Freepik. Crucially, this uses the power of AI to enhance presentation creations that you may already be working on with the likes of Google Slides, Apple Keynote, and Microsoft PowerPoint.
With lots of templates and the ability to edit using the AI-assisted process, this makes for a fast and effective way to tailor learning to individuals and groups in the class without taking up too much teacher time.
Since this tool is also built for business, it's very powerful, but there are lots of education-specific parts of the build that also make it ideal for classroom use.
This guide aims to lay out all you need to know about Slidesgo and how it can help in your classroom.
What is Slidesgo?

Slidesgo is an AI-assisted slides presentation generation tool that works across other slide-based software and is tuned specifically for teaching.
The education specific part of Slidesgo offers lots of templates that are made with teachers' needs specifically in mind. That can mean finding a perfect template, often free, may be an easy process that doesn't even require a great deal of editing.
The idea here is to offer professional level results without it taking as much time as it might for a teacher building these from scratch.
Tech & Learning Newsletter
Tools and ideas to transform education. Sign up below.
Crucially, this can work in multiple languages, allowing teachers to present one topic to a class and reach multiple students in their home tongues, at the same time.

How does Slidesgo work?
Slidesgo is available for use by anyone, immediately, with lots of free templates that don't require you to pay anything or to even sign up for an account.
Either scroll through or use the search bar to find a template that suits your needs, or start directly with the AI. Select the AI tool and complete some basic boxes to get going. Enter a topic, writing tone, language, number of slides, style, and hit generate presentation to get your result.
At this point you will be asked to sign-in if you want results, but this can be done with a current Google or Apple account as well as with email. Although if your school has signed up, you will be able to access it that way.
The templates are laid out in sections to help in making a selection with areas such as Math, Literacy, Science, Thesis Defense, Music, Teacher Toolkit, and more all available.

What are the best Slidesgo features?
Slidesgo is very easy to use as all those helpful templates are laid out with big colorful images so you can get a taste of what is available at a glance. Searching through options is an easy and very real possibility -- which is great if you're not sure what you want but are open to inspiration.
The AI generation is also super efficient and helpful. While that can be done the first time, this is also an area that you can improve on as you use it more and learn how the outcome is achieved.
Slidesgo lets you download your creations, however, there is a limit as unlimited downloads only available to premium subscribers. You do get a few more per month -- five rather than two -- if you sign-up using your email.
You have the option to upload your own images for use in the slides, and also have access to a host of icons and imagery from the company that you can use for free as part of your plan.

How much does Slidesgo cost?
Slidesgo is free to use in a limited way, and also offers the option to sign-up and to pick from two payment plans for more features.
The Free version lets you access templates of presentations and provides the ability to download two per month. Sign-up using your email address and that is extended to five downloads per month.
Two paid versions are available: Enterprise and Education . These are the same, only the latter gets larger discounted pricing. With these you get unlimited downloads per month, access to more than 15,000 premium templates, larger discounts for larger teams, the ability to share templates without crediting the company, priority support, up to 1,000 users, and the ability to add, remove or reassign users as necessary.

Slidesgo best tips and tricks
Start a class Use a fun and relevant slide template to build a basic guidance into a new subject at the start of class to grab attention and engage the students, with the option to share the slides for reference later.
Share to edit Pick templates to share with students and assign them the task of completing these with relevant information from the class, and to offer that back as their homework to show what they've learned.
Try before you buy This tool offers a lot before you pay so it's worth giving it a go to see if this suits your needs before you commit to any payment plan.
- New Teacher Starter Kit
- Best Tools for Teachers
Luke Edwards is a freelance writer and editor with more than two decades of experience covering tech, science, and health. He writes for many publications covering health tech, software and apps, digital teaching tools, VPNs, TV, audio, smart home, antivirus, broadband, smartphones, cars and much more.
ISTELive 2024: Edtech Show & Tell
Diffit: How to Use It to Teach
What to Know About Buying A Projector for School
Most Popular
- Computer Vision
- Federated Learning
- Reinforcement Learning
- Natural Language Processing
- New Releases
- Advisory Board Members
- 🐝 Partnership and Promotion
- Recognize Your Audience : Understand who your audience is, as that will help you customize your content to meet their needs and preferences.
- Define Your Purpose : Clearly state the purpose and aim of your presentation. Knowing your exact goal can help you create material that will educate, convince, or entertain.
Brainstorming Ideas with ChatGPT
ChatGPT is excellent for generating ideas. Here’s how to get the best out of it:
- Prompt Examples : Use prompts like “What are some innovative ideas for a presentation on Artificial intelligence (AI)?” or “How can I make a presentation on Machine Learning (ML) engaging?”
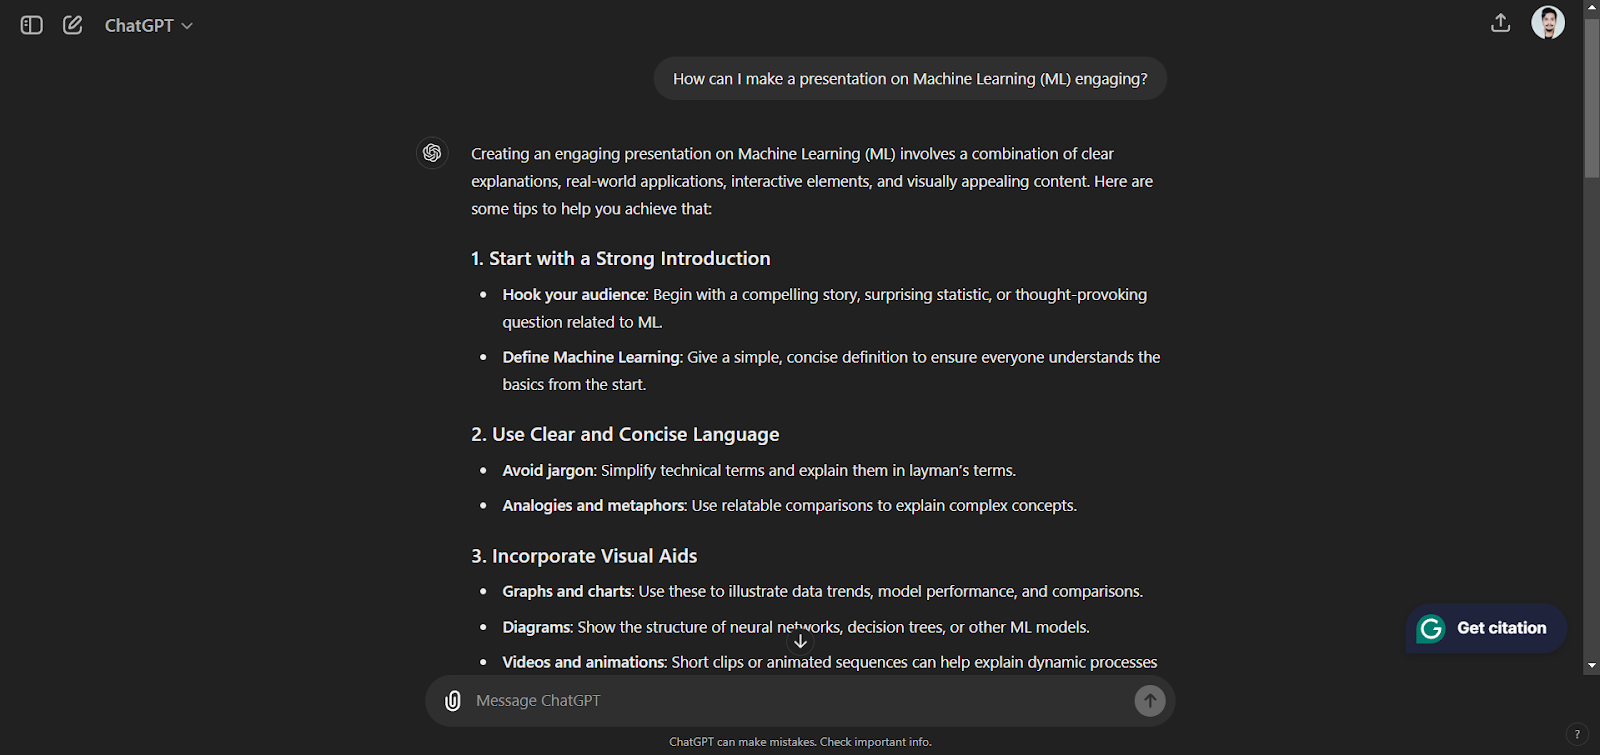
- Topic Refinement : Ask ChatGPT to narrow down broad topics. For example, “What are the key points I should cover in a presentation about Machine Learning for beginners?”
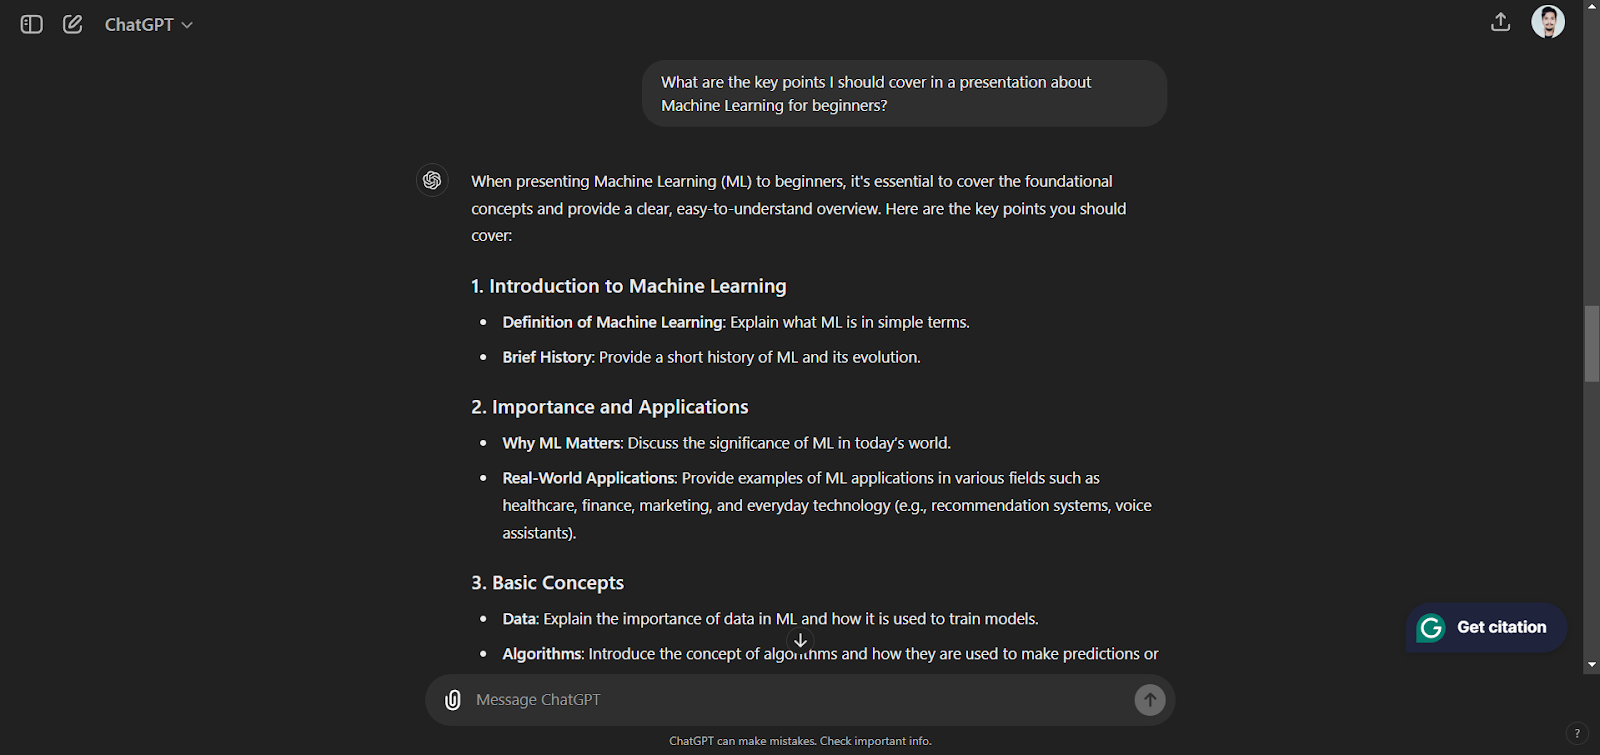
Structuring Your Presentation
A well-structured presentation is crucial for maintaining audience engagement. Use ChatGPT to outline your presentation:
- Beginning : Request ChatGPT to write an engaging opening paragraph. For instance: “How can I effectively introduce the topic of Machine Learning (ML)?”
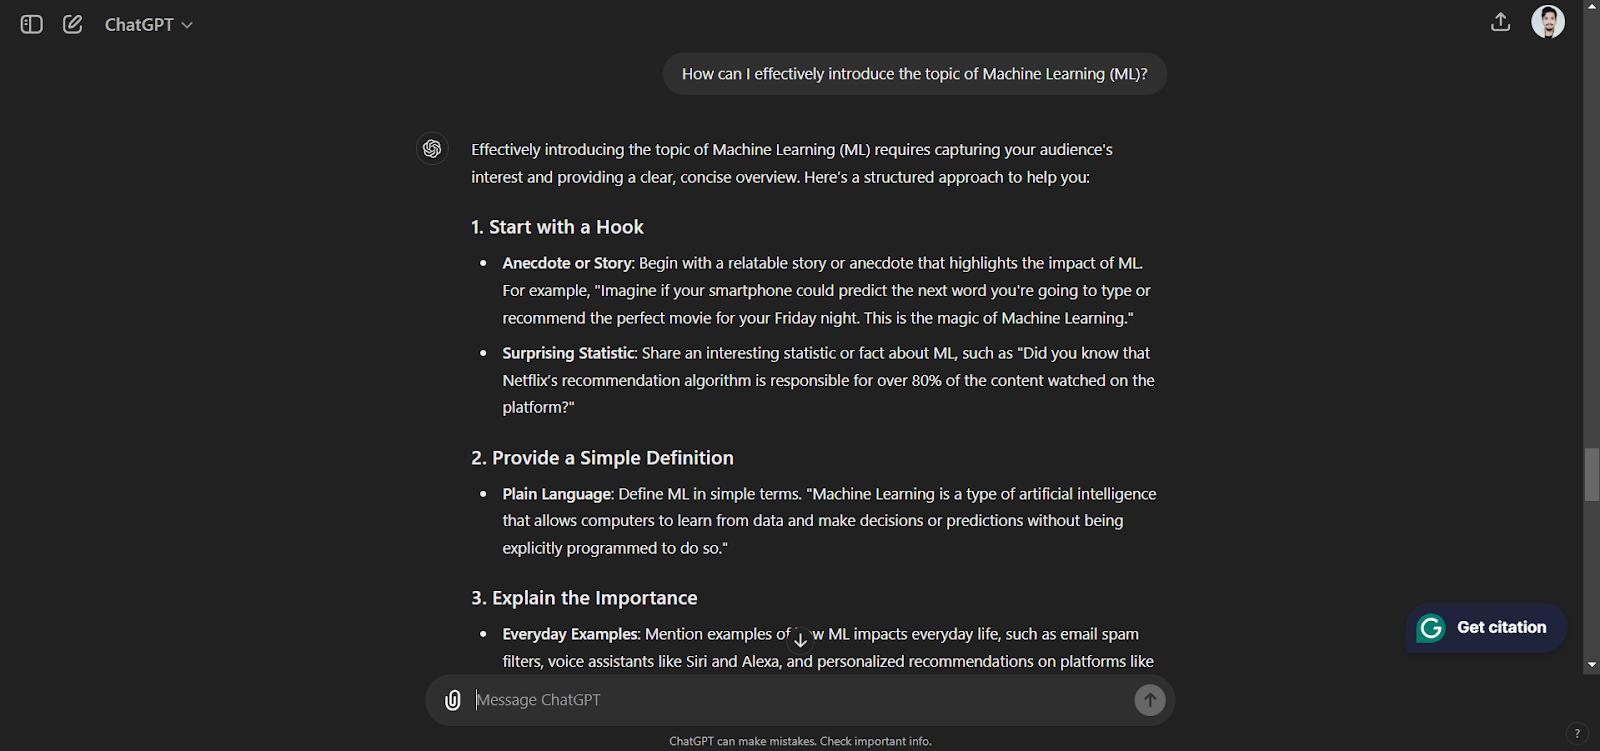
- Main Content : Divide your text into manageable chunks. Use prompts such as “List the main points for a section on the benefits of Machine Learning in education.”
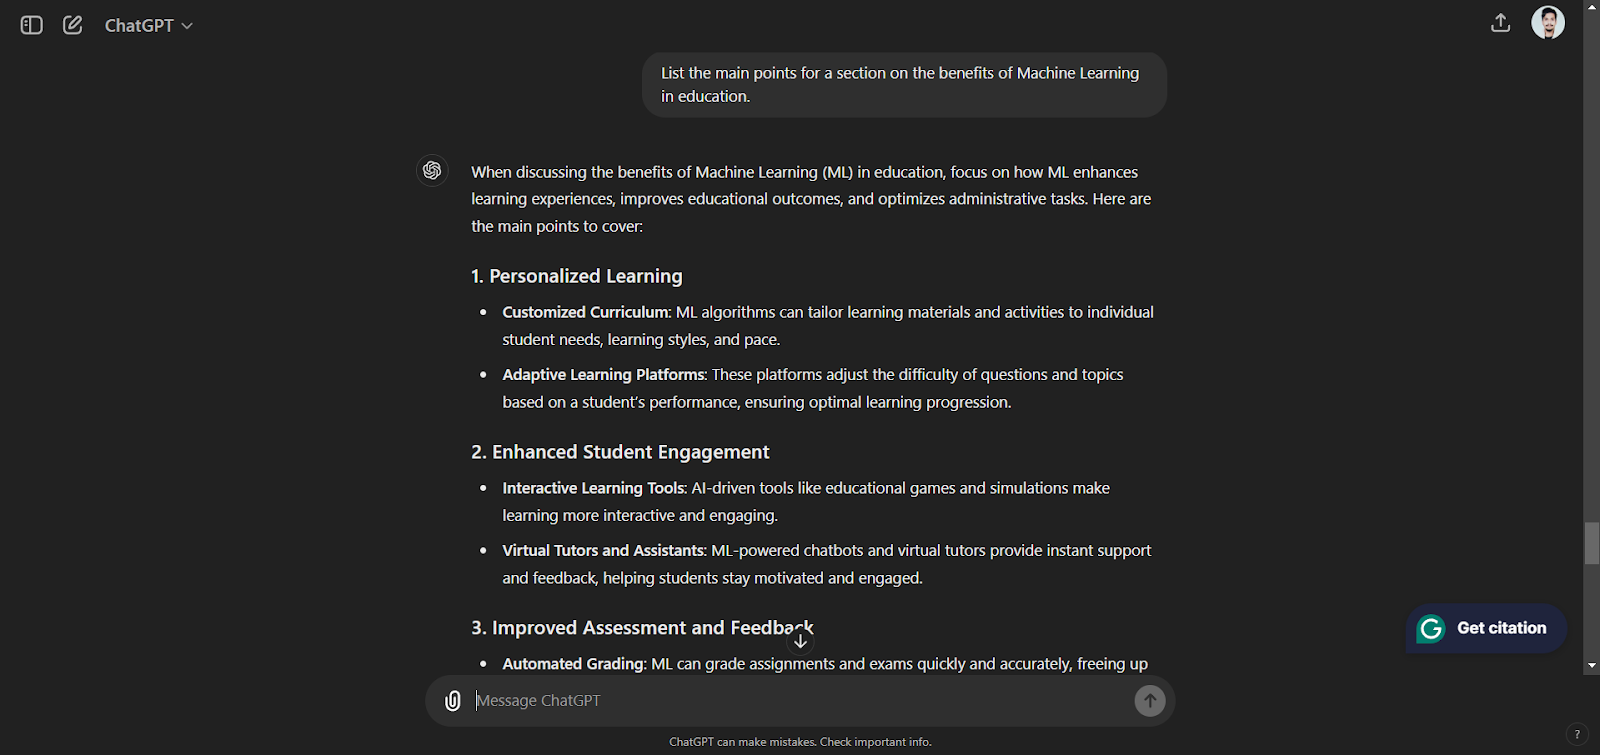
- Conclusion : Conclude with a powerful statement. For instance: “How can I summarize the key takeaways of my presentation on Machine Learning?”
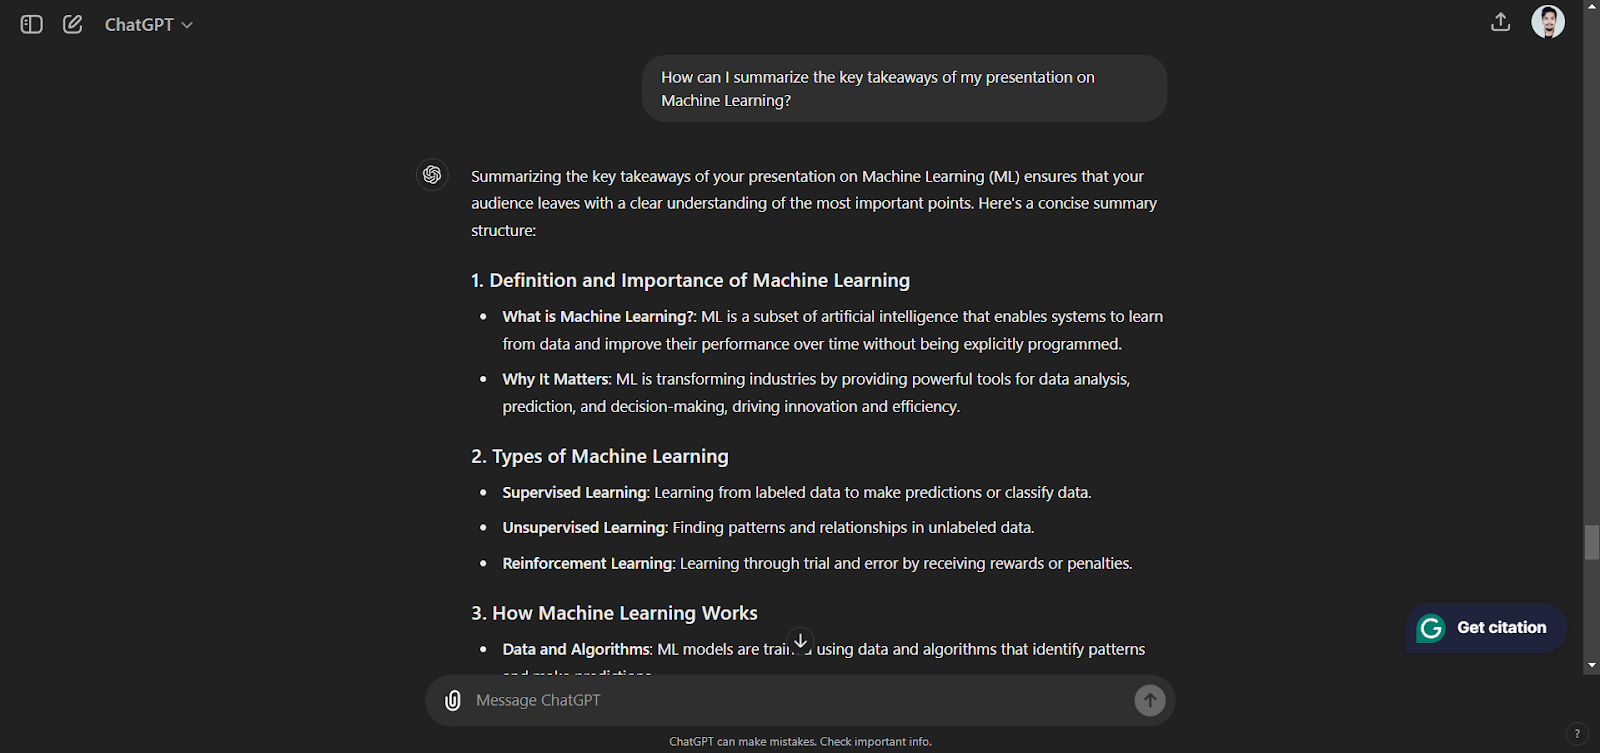
Creating Slide Content
Once you have the structure, it’s time to fill in the details. ChatGPT can help you prepare the content for each slide:
- Text Content : Use writing exercises like “Write a brief sentence discussing how Machine Learning has affected modern businesses.”

- Bullet Points : Highlight important details in bullet points. For example: “Convert this paragraph into bullet points.”
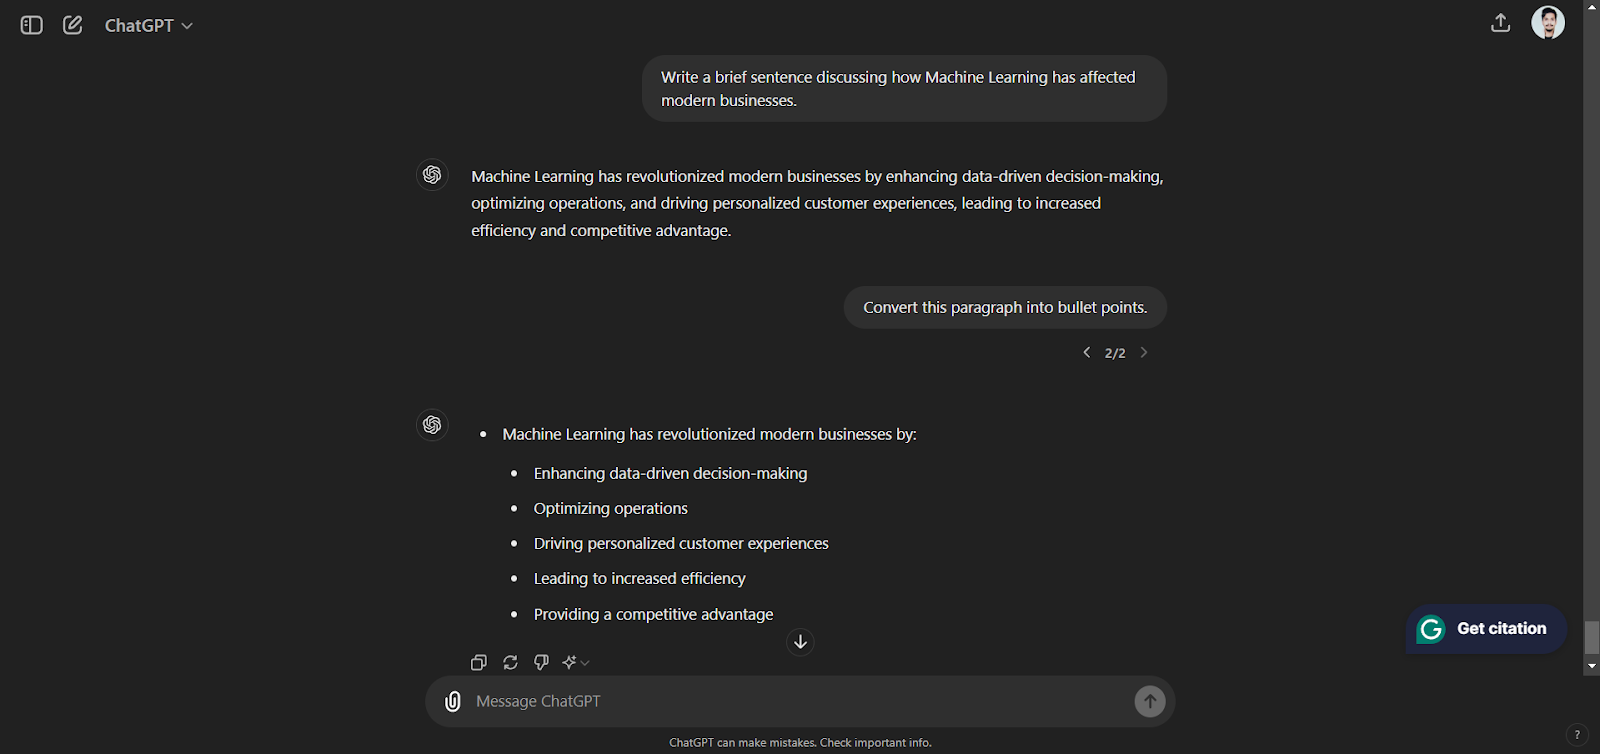
- Visual Suggestions : Ask ChatGPT for suggestions on images. For example: “Create some images or charts that I should include in the presentation about the benefits of Machine Learning in day-to-day life?”
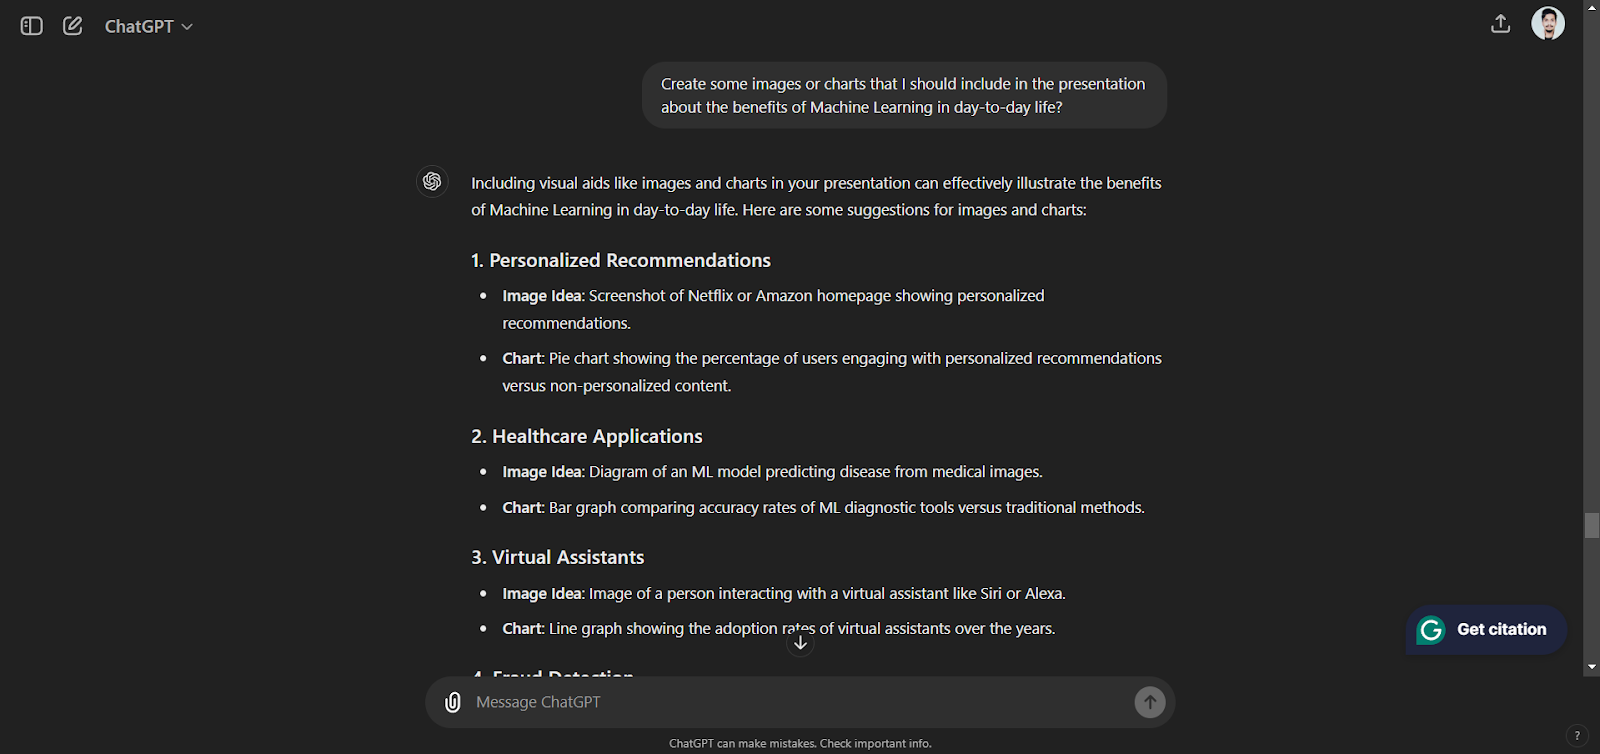
Designing the Presentation
While ChatGPT can’t design slides directly, it can offer valuable advice:
- Slide Layouts : Request advice on how to organize your slides. For instance: “What is the best layout for the main body of this presentation?”
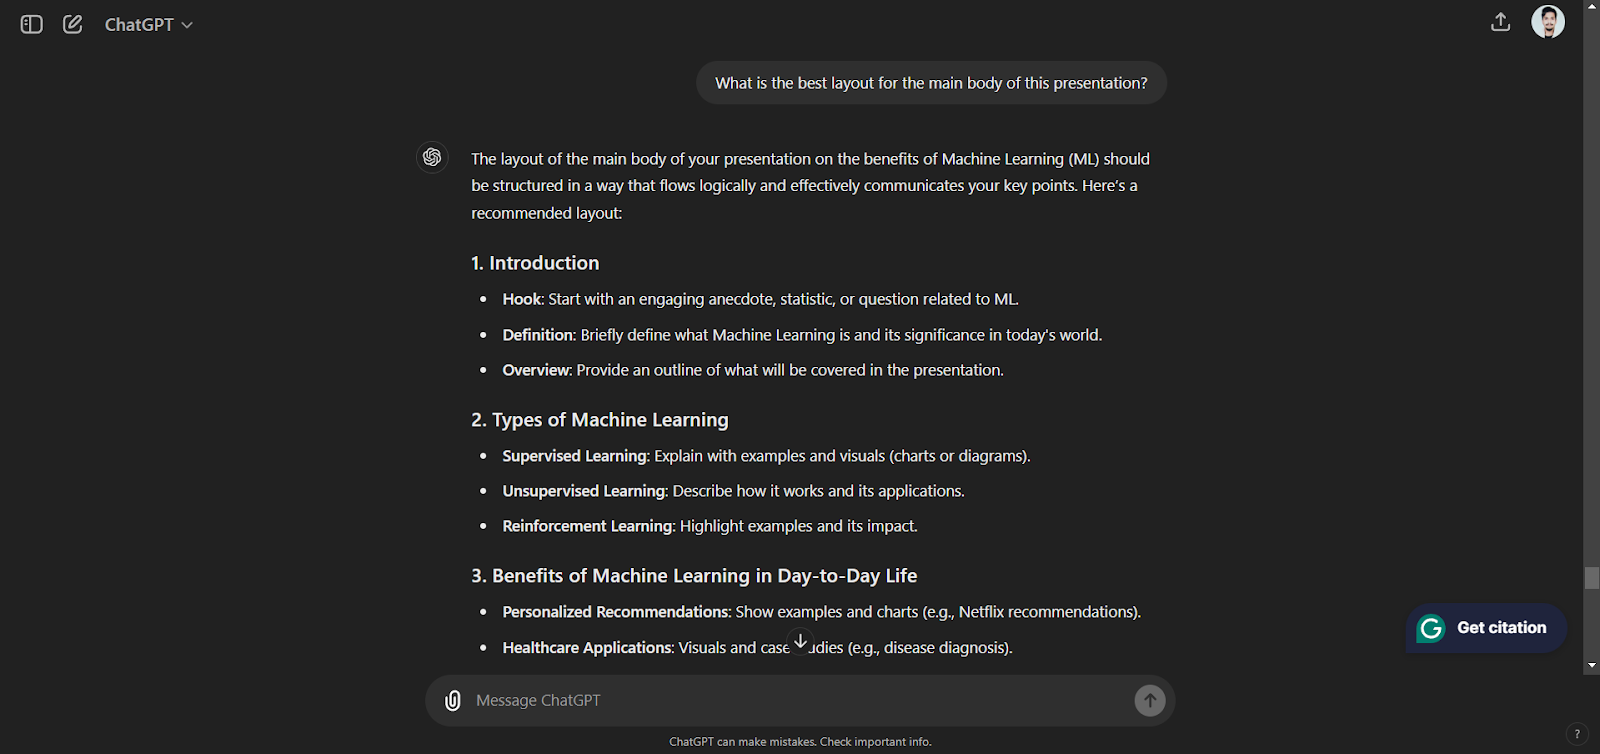
- Color Schemes : Find color schemes that work well for your subject. For instance: “Show me the color scheme I should use for a Machine Learning and Generative AI presentation?”

- Font Choices : You should always select a readable font. For instance, “What fonts are best for a technical professional business presentation?”
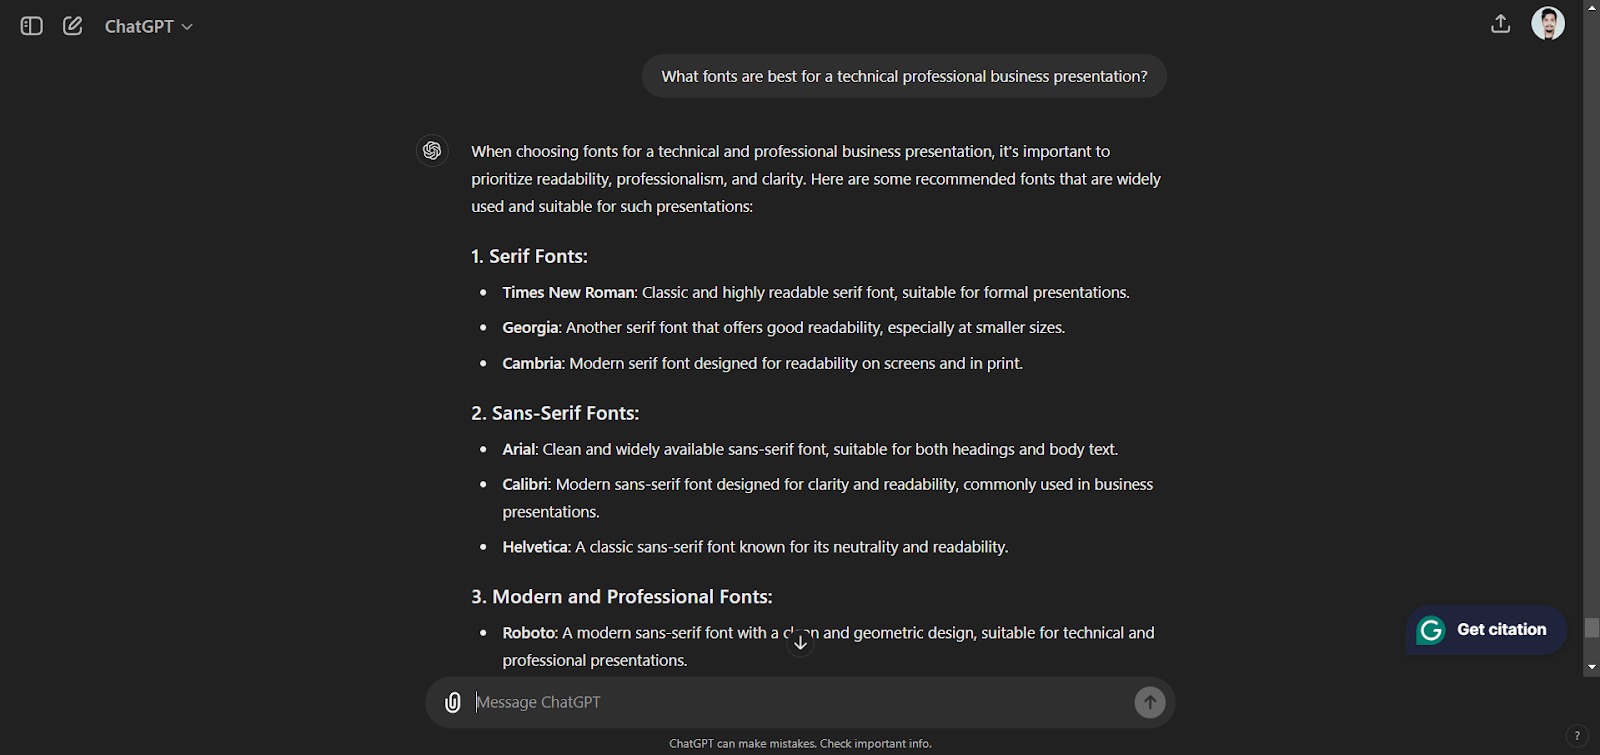
Practicing Your Presentation
ChatGPT can even help you practice your delivery:
- Q&A Preparation : Prepare for audience questions during the Q&A period. For example: “What questions might be asked after a presentation on Machine Learning?”
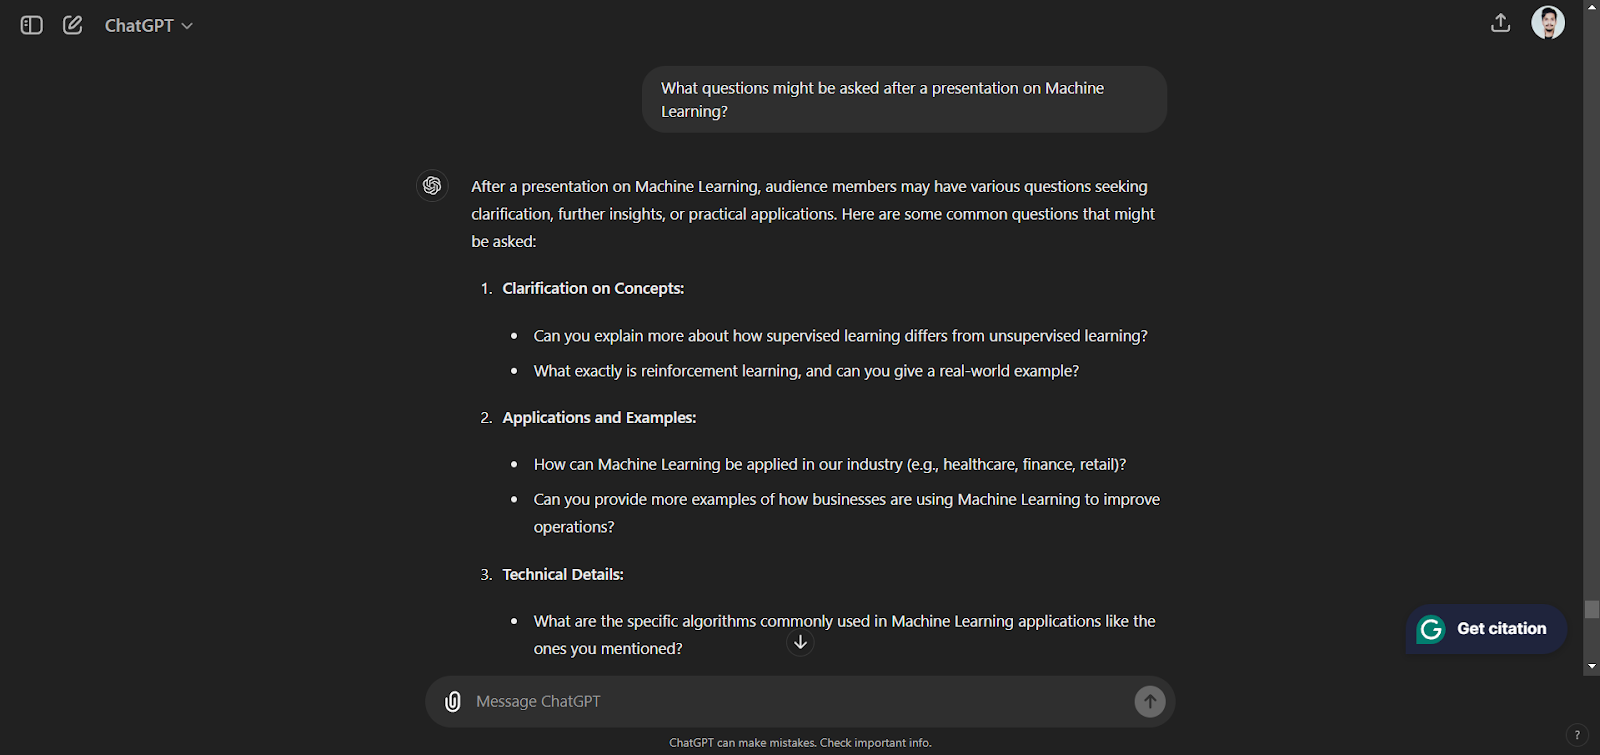
- Feedback and Enhancement : To improve your content, simulate feedback from the audience with ChatGPT. For example: “How can I improve my slide on Machine Learning?”
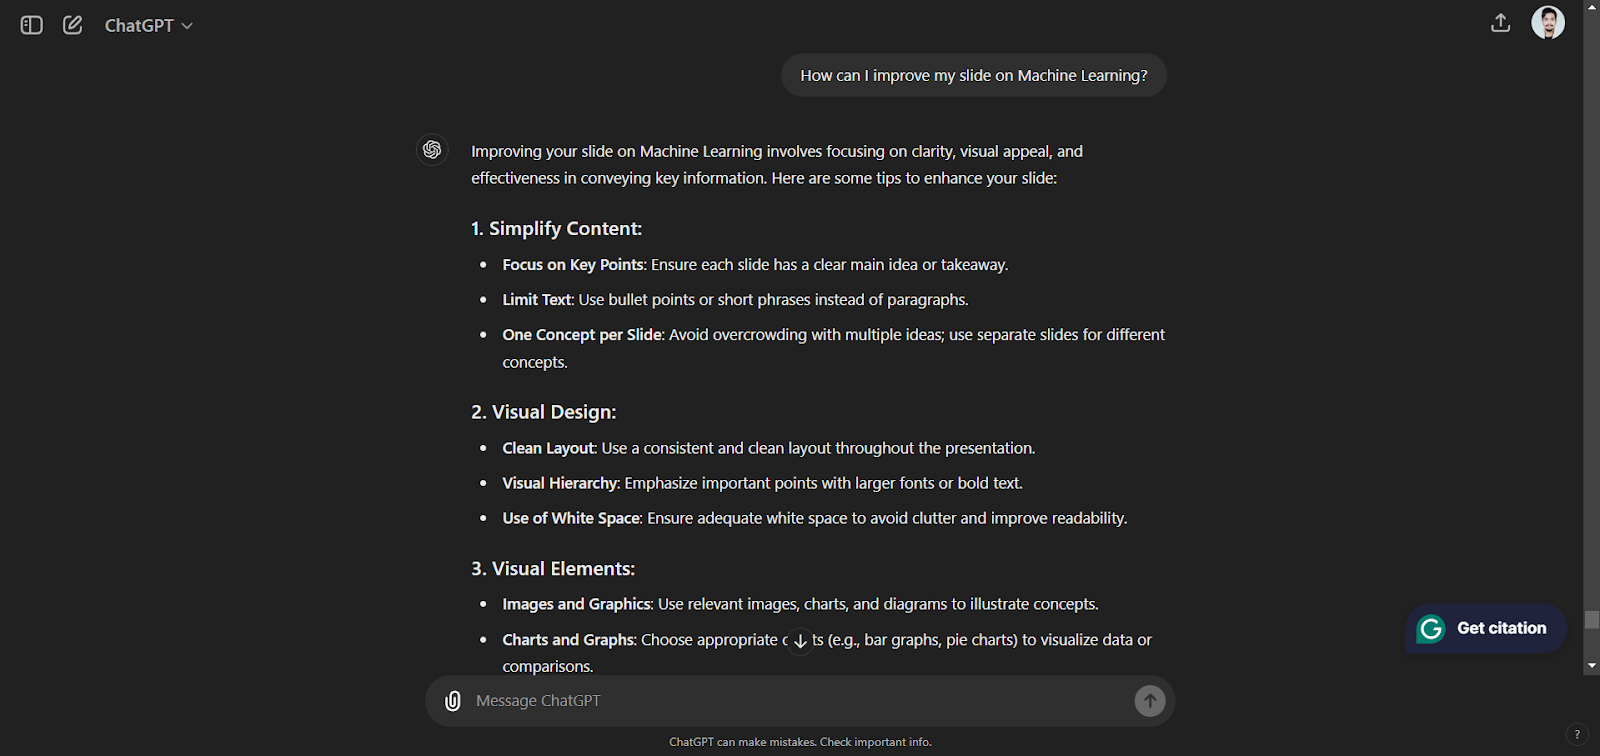
In Conclusion:
Using ChatGPT to create PowerPoint presentations can greatly improve your content, design, and way of delivery. You can take advantage of its capabilities to create engaging and polished presentations that grab your audience’s attention. Whether you’re presenting in a business meeting, academic setting, or public event, ChatGPT can be your valuable assistant in creating outstanding presentations.

Nishant, the Product Growth Manager at Marktechpost, is interested in learning about artificial intelligence (AI), what it can do, and its development. His passion for trying something new and giving it a creative twist helps him intersect marketing with tech. He is assisting the company in leading toward growth and market recognition.
- 10 GPTs for Software Developers
- Boost Your Data Analysis with Google Gemini's Advanced 1.5 Pro's New Spreadsheet Upload Feature
- Excited about GPT-4o? Now Check out Google AI's New Project 'Astra': The Multimodal Answer to the New ChatGPT
- OpenAI Launches ChatGPT Desktop App: Enhancing Productivity for Mac Users
RELATED ARTICLES MORE FROM AUTHOR
Internet of agents (ioa): a novel artificial intelligence ai framework for agent communication and collaboration inspired by the internet, layershuffle: robust vision transformers for arbitrary layer execution orders, researchers at stanford introduce kita: a programmable ai framework for building task-oriented conversational agents that can manage intricate user interactions, generalizable reward model (grm): an efficient ai approach to improve the generalizability and robustness of reward learning for llms, microsoft research introduces agentinstruct: a multi-agent workflow framework for enhancing synthetic data quality and diversity in ai model training, funaudiollm: a multi-model framework for natural, multilingual, and emotionally expressive voice interactions, internet of agents (ioa): a novel artificial intelligence ai framework for agent communication and..., researchers at stanford introduce kita: a programmable ai framework for building task-oriented conversational agents..., generalizable reward model (grm): an efficient ai approach to improve the generalizability and robustness..., microsoft research introduces agentinstruct: a multi-agent workflow framework for enhancing synthetic data quality and....
- AI Magazine
- Privacy & TC
- Cookie Policy
🐝 FREE AI Courses on RAG + Deployment of an Healthcare AI App + LangChain Colab Notebook all included
Thank You 🙌
Privacy Overview

Cooking up a great prompt: Getting the most from Copilot
Prompts are how you ask Copilot for Microsoft 365 to do something for you — like creating, summarizing, editing, or transforming. Think about prompting like having a conversation, using plain but clear language and providing context like you would with an assistant.
1. Tell Copilot what you need
|
"Give me a concise summary of recent news about [Product X]." |
“Write a session abstract of this /[presentation].” |
|
“Check this product launch rationale for inconsistencies.” |
"Create a value proposition for [Product X].” |
|
“Create an onboarding presentation based on this /[document].” |
"What's the latest on [Project X].” |
2. Include the right prompt ingredients
To get the best response, it’s important to focus on some of the key elements below when phrasing your Copilot prompts.

3. Keep the conversation going
Following up on your prompts help you collaborate with Copilot to gain more useful, tailored responses.
|
Lead with broader requests, then give specific details about the content. |
Ask for a summary of a specific file, then ask relevant questions to gain deeper insights. |
|
Request a meeting recap, then ask for more information about what you should know. |
Ask Copilot to translate a sentence to one of the supported languages, then ask for more context or a regional dialect. |
|
Ask Copilot to write a story, then guide it by giving more specific, relevant details. |
Present a technical problem, then narrow it down, or ask for step-by-step guidance. |
Helpful hints to keep in mind
Know Copilot’s limitations Copilot is limited to your current conversation, so give lots of details.
Be professional Using polite language improves Copilot’s response.
Communicate clearly Pay attention to punctuation, grammar, and capitalization.
Use quotation marks This helps Copilot know what to write, modify, or replace for you.
Start fresh Avoid interrupting and type “new topic” when switching tasks.
Copilot Lab

Need more help?
Want more options.
Explore subscription benefits, browse training courses, learn how to secure your device, and more.

Microsoft 365 subscription benefits

Microsoft 365 training

Microsoft security

Accessibility center
Communities help you ask and answer questions, give feedback, and hear from experts with rich knowledge.

Ask the Microsoft Community

Microsoft Tech Community

Windows Insiders
Microsoft 365 Insiders
Was this information helpful?
Thank you for your feedback.
IMAGES
VIDEO
COMMENTS
Click on the object you want to animate. If you want to add something fun to your presentation, you can add animation. First, however, you need to know how to edit PowerPoint templates to add animation. For this illustration, we'll switch to slide two. First, click on the Animations tab above the toolbar.
Open the file that contains the existing slides. Click the thumbnail pane and then select the slides you want: Select all slides: Ctrl+A. Select a subset of the slides: Ctrl+click. Copy the slides (Ctrl+C). Switch to the new file, right-click the thumbnail pane, and under Paste Options select Use Destination Theme: All the copied slides are ...
Select the Date and time placeholder and hit Ctrl + R on your keyboard to align the text to the right. Go up to the Insert tab and in the Text group, select Header & Footer. Click on Date and time so that there is a checkmark next to it. Click on the Date dropdown and select the option as required.
Create a new PowerPoint presentation and place yourself on the first slide. Go to Insert tab > Picture > This device (you can also try images from Office or Bing). Find the image you saved in the first step and insert it into your presentation. Go to the Design tab and press the PowerPoint Designer tool.
Select File > New. Choose a template or type a key word or phrase into the Search for online templates and themes field, and press Enter. When you find the template that you want, select it to see the details, and then select Create. Note: If you created templates, they may be under the Personal tab. Business customers may see a Company tab ...
When you create a presentation and then save it as a PowerPoint template (.potx) file, you can share it with your colleagues and reuse it again. To create a template, you'll need to modify a slide master and a set of slide layouts. Choose from thousands of free templates to download at Microsoft templates. Windows Web.
Create a presentation using a template. To create a presentation based on a template, follow these steps: Open Microsoft PowerPoint (I'm using PowerPoint 2016) Select the File tab and choose New. The built-in templates will now be displayed: At the top of the screen, you will see a search box which allows you to search by keywords related to ...
You have several options to create a PowerPoint presentation. These include: Create a blank presentation from scratch, then add slides and format the presentation. Create a presentation based on a ...
Click Blank Presentation. You can either select here or go to File > New > Blank Presentation . On Mac, simply opening PowerPoint might open a new presentation depending on your settings. If it does, skip this step. 3. Click the Design tab. It's in the editing ribbon above your PowerPoint with File and Home . 4.
Create a Custom PowerPoint Template. To create a custom PowerPoint template, you'll first need to open a blank presentation. You can do so by clicking the "File" tab and then selecting "New" in the left pane. A large library of templates will appear, but since that's not what we're looking for, go ahead and select the "Blank ...
Open the PowerPoint app, select a template and theme, then like "Create.". Click the text box to add your title and subtitle to create your title slide. Click the "Insert" tab, then "New Slide" to add another slide. Choose the type of slide you want to add, then add text and pictures. Rearrange slides by dragging them up or down in ...
Use our free online presentation maker to create more polished presentations that are easy and quick to read. Make an impact starting today. ... Choose one of our beautiful themes under the Presentations content category or select a pre-designed presentation template. Add new slides from our theme library to help guide your presentation design ...
How to make your presentation. Choose a design from our presentation templates or create your own from scratch. Customize your presentation with colors, fonts, and key information. Add animations, videos, images, illustrations. Use assets and other media content from your Brand Kit (Pro) to stay consistent with your business or school brand.
To do that, simply go up to the Home tab and click on New Slide. This inserts a new slide in your presentation right after the one you were on. You can alternatively hit Ctrl+M on your keyboard to insert a new blank slide in PowerPoint. To learn more about this shortcut, see my guide on using Ctrl+M in PowerPoint.
Find the perfect PowerPoint presentation template Bring your next presentation to life with customizable PowerPoint design templates. Whether you're wowing with stats via charts and graphs or putting your latest and greatest ideas on display, you'll find a PowerPoint presentation template to make your ideas pop.
1. Open PowerPoint on your Mac or PC and open a new, blank presentation. 2. Click "Design" at the top of the window, and choose a slide size and a theme. If you'd like, you can customize your ...
Use the same 'banner' or title font throughout your design. Have the same 'frame' or 'grid' throughout your design. Apply the same background throughout your design. Use consistent fonts. 2. Work smarter, not harder. Create a template page for your presentation to keep all the points above about consistency in line.
Go to the Design tab on the editor. Simply type a descriptive prompt in the search bar, and the AI presentation maker will generate beautiful drafts of slides for you. You can then edit the content and use other awesome AI tools to perfect your presentation. These AI features are super helpful for people new to design, as well as pros and teams.
Create a presentation. Open PowerPoint. In the left pane, select New. Select an option: To create a presentation from scratch, select Blank Presentation. To use a prepared design, select one of the templates. To see tips for using PowerPoint, select Take a Tour, and then select Create, . Add a slide.
Slidesgo comes to the rescue with its latest functionality—the AI presentation maker! With a few clicks, you'll have wonderful slideshows that suit your own needs. And it's totally free! How does it work? Try for free our new AI Presentation Generator and create a customizable template in seconds. Explore beyond PowerPoint.
Inspiration. Recommended videos See how other users use Prezi Video to engage their audiences. Reusable presentations Browse some of our favorite presentations and copy them to use as templates. Reusable infographics Customize the content in these infographics to create your own works of art. Presentation templates Get a big head start when creating your own videos, presentations, or infographics.
Its use of a broad selection of icons and contrasting colors makes it easy to remember the contents of a presentation. Use This Template. 4. Statistical Bias PowerPoint Templates. Say you need to deliver an academic presentation about cognitive bias; this template comes with tips to remember a speech in the form of vector art illustrations ...
Create custom presentations for any event with Figma Slides. Effortlessly design, customize, and share visually appealing slides to captivate your audience.
Make it simple and hassle-free with a collection of well-designed and easy-to-use presentation templates from Canva. To captivate your target audience, you need the proper presentation template design that suits your subject. After all, a pleasing visual, coupled with helpful and relevant content, can go a long way in creating a solid presentation.
Step 3: Use your custom template. As part of the SlideSpeak presentation process, you will be given the option to use a default or custom templates. Please go ahead and click "Custom Templates". You will the be shown the templates you have uploaded previously. Select the relevant PowerPoint template and click "Next".
Double-click Computer or, in Office 2016 programs, double-click This PC. Type a name for your template in the File name box. For a basic template, click the template item in the Save as type list. In Word for example, click Word Template. If your document contains macros, click Word Macro-Enabled Template.
Slidesgo is free to use in a limited way, and also offers the option to sign-up and to pick from two payment plans for more features. The Free version lets you access templates of presentations and provides the ability to download two per month. Sign-up using your email address and that is extended to five downloads per month.
Click on "Blank presentation" to create your presentation from scratch, or pick your preferred free PowerPoint template from the options at the top (there's also a host of editable templates you ...
Making an engaging PowerPoint presentation is a talent that may set you apart from your colleagues at work and classmates at school or university. You can be a working professional, student, or business owner; learning the art of presenting can open up new opportunities. Yes! Both the creation of a presentation and learning how to present it are a form of art. The more engaging you are, the ...
"Write a session abstract of this /[presentation]." Edit text: "Check this product launch rationale for inconsistencies." Create engaging content: "Create a value proposition for [Product X]." Transform documents: "Create an onboarding presentation based on this /[document]." Catch-up on missed items: "What's the latest on ...