Easily Create Voiceovers Using Realistic Text to Speech
Stop wasting time on recording your voice, editing out mistakes and synchronising picture with sound.
Just type or upload your script, select one of our 700 voices, and get a professionally sounding audio or video in minutes.
Try Narakeet realistic text to speech free, no need to register.

C’est magique!
Truly remarkable
Oh my goodness!! This was so awesome!! As a non-techie, I was able to easily do this and it was perfect!! Thank you sooooooooooooooooo much!!
A fantastic tool you have made. It is especially handy now when we teach remotely.
It's truly an amazing product. I love how I can refine the visuals, add more, and just write text, and then I get a complete demo video. Much easier than the way I was doing it before.
Rather than having to do that recording and editing, I loaded it and got the final video in under three minutes. Just recording and editing the audio would have taken me at least three hours.

Convert Text To Speech
Natural sounding text to speech in 100 languages, with 700 voices, will help you create audio files and narrated videos quickly. When you want to change the script in the future, just update a bit of text. Stop wasting time on recording and re-recording the narration.
Create training video lessons in multiple languages, make marketing videos for your products in global markets or use Narakeet as a narrator for YouTube videos.
Use our text-to-speech tool to convert a Word document or a text script to an audio file in seconds, using realistic AI voice generators.
Convert Subtitles to Audio
Turn a subtitle file into audio, synchronized with timestamps in the subtitles. Easily produce voiceover dubbing in a different language for e-learning content, make alternative audio tracks for videos and localize audio content without wasting time on audio/video synchronization.
Upload a SRT or WebVTT to our Text to Audio tool and make a synchronized dubbing audio in 100 languages.
Create Narrated Videos Quickly
Stop wasting time on recording voice, synchronising picture with sound and adding subtitles. Let Narakeet do all the dull tasks, so you can focus on the content.
Convert Powerpoint to Video. Edit videos as easily as editing text.
Narakeet is video presentation maker with voice over. Use it to convert PPT to video easily, create a slideshow with music or turn lecture slides into videos.
Make videos from PowerPoint, Google Slides or Keynote. Create full HD videos for YouTube from slides. Use our templates to quickly make videos for Instagram, LinkedIn, Facebook or Twitter. Automatically add subtitles and closed captions to videos.
Create video from images and audio
Narakeet is a text to speech video maker, allowing you to turn a script to voice over, and edit videos as easily as editing text. Script the entire video using Markdown , and embed visual assets from images, screen recordings and video clips. Make video screencasts, tutorials and announcements in minutes.
Use our scripting stage directions to create slides, add call-outs, put text on top of images and videos, generate subtitle files and extract video segments. Add a voiceover to your video easily, using text-to-speech that gets synchronised to visual assets automatically.
Just edit the text and upload the slideshow or narrator script again, and you can easily create a new version of your video.
Automate Video Production
Create several versions of a single video, in different languages or different resolutions. Automatically build documentation videos with up-to-date images when your product changes. Create many similar videos quickly.
Developers can use the Narakeet API or command-line client to integrate video production into continous delivery pipelines and automation systems.
Narakeet is an excellent short video maker. Use it to create marketing videos, announcements, demos or documentation videos automatically.
Make Presentations that Talk. In Minutes.

Natural human-like Voiceovers
Turn your bland presentation into an engaging one with Murf's realistic, human-like AI voiceovers.

Easy-to-use, intuitive interface
Save time, save effort and save yourself the trouble of recording and editing voiceovers.
Languages, Accents & Styles
Tweak the tonality, accent, pronunciation, emphasis, add music and pauses to your slide with Murf's text-to-speech studio.
Start creating voice overs
Nothing sells better than a perfectly told story. Narrate your slide show using our curated 120+ human-like text-to-speech voices. Adjust pitch, tonality, volume and add emphasis on the right word using our text to speech studio. A script is all you need, Murf will handle the rest.
How to Create a Voiceover for Presentations in 5 simple steps
- 1 Upload your presentation in jpg/jpeg/MP4 format on Murf Studio.
- 2 You can also type in your e-learning script or if you have a pre-written version of any learning content, copy-paste it to Murf's text editor.
- 3 Choose the voice you want to use. Murf comes with male and female voices, both young and old. Align the text with visuals in the studio.
- 4 Use customization features such as emphasis, pause, and pronunciation to add more depth to the learning module.
- 5 Click on ‘Build Audio’ to render and preview the final voiceover.

Reliable and Secure. Your Data, Our Promise.

Add power of narration to your PowerPoint presentation
You don't see silent movies nowadays, do you? Well, there's a reason for that. People pay less or no attention to a silent visual. In fact, the age of Reels and TikTok has proved how any complex information could be catered to the masses through an audiovisual delight. That applies to your slide show presentation as well. To understand better, let us look at some of the common goals of a presentation:
Persuasion : A presentation can be more effective in persuading your target audience if the information is presented with a narration.
Form a connection : Your audience is more likely to believe in your presentation if the narration is done using the right gender of voice, correct tone, and by placing the right emphasis.
Simplify key concepts/data : Some information can be hard to express visually alone. A realistic-sounding voiceover can help in explaining it, thus, making it more interesting for the audience.
An act of professionalism : A presentation clubbed with a natural-sounding voiceover will demonstrate your dedication and efforts, thus, showing how professional you are.
Still not convinced? Let us tell you a fact!
A research by the University of Denmark indicates that the average global attention span is dwindling. Due to the increasing amount of information inflow, the audience has a new challenge in the form of the inability to read and retain text in a presentation or a research paper.
For presenters, this has culminated in a complex situation. Those who want to put across their slideshow meaningfully now need to battle the transient attention of the viewers as well. This can be curbed by supercharging your slide show presentation with a voiceover. We know that adding a narration would go a long way in making things easier for your audience.
Murf can help you help your audience. How?
AI Voice Generator for Presentations
By using Murf's AI voice generator , you can generate the right voiceover presentation in a fraction of the time. You can upload a pre-recorded audio file of your entire presentation and convert it into an AI voice over. Well, that's not all! You also get to save some money along the way.
Unlike in older days, now you don't have to pay a hefty sum of money to hire voiceover artists for your presentation. Nor do you have to wait for days for the final product to emerge. With Murf studio, you can integrate natural-sounding voices with your powerpoint presentation.
Now when you hear the AI Voices, it can be a major turn-off, given its robotic, bland, and devoid of inflections in the narration. We understand that the problem with most other text to speech programs is that they read everything in one flat, robotic tone. Besides, monotonous pitches can leave your audience unaffected and unmoved. Your content deserves a perfectly tailored voice. Murf is like no other TTS, it's 'As Natural As It Can Get.'
120+ Natural-Sounding Voiceovers for Presentations
So, Murf's TTS studio empowers your PowerPoint presentation or audio file of your voiceoever based on the various options on available Depending upon what you're presenting, the data, and how you want it to be portrayed, choose the most suited voice. It also allows users to change the pitch, tone, and accent of the voice.
Just use Murf to make your slide show reach horizons by using any foreign language VO. With many different languages to choose from, you can reach many untapped areas for your pitches, ideas, data, research, etc.
Convert raw, pre-recorded audio to a professional voiceover
One of the best features of Murf is that it can transcribe the audio you upload on its interface. In case you have a raw recording of your voice with background noise, all you need to do is upload the audio on Murf Studio, and it'll transcribe it in text format for you to edit.
You can simply mask the background noise by adding supportive music. Using Murf's simple and intuitive interface, you can sync your audio with your video and make the watching experience flawless.
How to add voiceover to Google Slides presentation?
Now you can write, edit, and playback your voiceover scripts while creating Google Slide presentations using Murf's add-on. It makes you in charge of the slides and voiceover.
1. Search Murf in the Google Slides add-on option.
2. Install the Murf add-on to add audio files to your Google Slides presentation
3. Click on the install button on the Murf icon.
4. Follow the set of instructions that appears to install the Murf plug-in.
5. Once installed, go to Murf within Google Slides. Next, on the add-ons menu, click on 'Murf.'
6. Click on 'Open Murf,' and Murf's studio will appear on the right side of your screen.
7. You can find a consolidated voiceover generating studio within your Google slides, thus, saving the extra process of uploading your slides on Murf.
Apart from this, you can start recording your own voiceover, you can edit the text and sync your script with your slides right on Google Slides. The simplicity and convenience of use cuts down the average turnaround time. So, you can create more informative and engaging slideshows or pitches.
Why Murf Text to Speech Software?
Adjust tuning, and remove the monotonous tone by playing with various features available on Murf's text to voice Studio. Turn those sleepyheads into enthusiastic listeners. Get lots of awesome features to generate a perfectly-crafted voiceover for your Microsoft PowerPoint presentation or a Google Slides presentation.
Speaking rate
Slower speech is best for complex topics, whereas a faster voice is ideal for creating a sense of urgency. Luck for You! Murf lets you slow down your VO or speed it up with just one click!
Pitch personalization
Higher voices are viewed as more cheery and energetic, whereas lower voices convey trust and authority. Murf lets you adjust the pitch for each word to suit your presentation.
You can completely change your voiceover by adding a pause. See for yourself! "Did you change, Dad?" "Did you change Dad?" Murf lets you add all these pauses.
Background music
You need just the right background music to create the right ambiance for your presentation. Murf, your Voiceover superhero, lets you choose from dozens of background music tracks and add them seamlessly "behind" your voiceover.
Imagine if Cersei Lannister's famous dialog "Power is Power" was delivered in a flat monotone. You can't, right? Murf lets you stress specific words to place emphasis where needed.
Loud voices convey confidence, urgency, and anger. In contrast, a softer voice conveys intimacy or warmth. Murf lets you adjust the volume of your voice so your narration is heard clearly and loudly or softly and gently, depending on your slide show.
Application of AI Voiceovers for Presentation
Small businesses.
Don't burn a hole in your pocket because of a passive, silent call-to-action (CTA). Add voice to it and make it active. Also, create cost-effective, realistic-sounding voiceovers for tutorials, promo videos, and explainers.
Break the barrier of language and make your knowledge more accessible using the 20+ languages available on Murf. Simplify the complex data for your audience with storytelling.
Non-profit Organizations
Make your powerpoint presentation of fund pitches more appealing, empowered with data and narration. Increase the reach of reports, data, and solutions with the diverse tools available in Murf, like accents and languages.
Frequently Asked Questions

- Presentations
- Most Recent
- Infographics
- Data Visualizations
- Forms and Surveys
- Video & Animation
- Case Studies
- Design for Business
- Digital Marketing
- Design Inspiration
- Visual Thinking
- Product Updates
- Visme Webinars
- Artificial Intelligence
How to Create a Narrated Presentation With Voice Over Using Visme

Written by: Nayomi Chibana
If you've ever taken weeks, even months, to painstakingly prepare for an important presentation, you know how useful it is to have a recording of your memorable delivery to share with others.
Here at Visme , we're excited to tell you that you can easily record your own voice over right within this online presentation design tool .
This allows you not only to create self-running presentations or stand-alone slide decks but also narrated software tutorials, audio presentations and visual stories with narration.
All of these can be easily shared across all social media platforms with just the click of a button or embedded into your own website or blog.
You can also repurpose written content into a narrated presentation, which is one of the best ways to make the most of every marketing dollar you spend. To learn more about repurposing, you can read our post on 11 smart ways to repurpose your content.
To get started, follow this simple step-by-step tutorial on how to create a narrated presentation in Visme by adding a voice over. We'll also help you learn how to add background music to your presentation to make it more dynamic and engaging.
Video: How to Make a Presentation in Visme
The video tutorial below will walk you through the process of creating a presentation in Visme. Keep scrolling for a detailed, step-by-step guide on how to create a narrated presentation.

1 Create a Visme Project

To create a slideshow with voiceover, you'll need to log in to your Visme account and create a new project. If you don't already have an account, you can easily create one here for free.
Enter your name, email and password to register. Once you're inside the dashboard, click on the "+ Create" button on the left-hand side of your screen.
Create a stunning presentation in less time
- Hundreds of premade slides available
- Add animation and interactivity to your slides
- Choose from various presentation options
Sign up. It’s free.

2 Choose a Presentation Template
Find the perfect template for your next presentation! Browse Now
Click on the "Presentations" tab to view all the customizable templates inside Visme. Pick a presentation template that best fits your content and industry, and click on "Edit."
You can also choose to start with one of our presentation themes. Each theme is packed with hundreds of fully designed slides that you can mix-and-match for your own use.
3 Customize Your Slides

Customize this presentation theme now! Edit and Download
Next, edit and design your presentation using all the graphic assets Visme has to offer, including icons, images, text and interactive elements such as video and maps.
Add charts, maps and data widgets to visualize boring numbers. You can also upload your own images and fonts or embed third-party content, such as surveys, quizzes and polls.
4 Click on Add Audio

Now, open the Media tab in the left-hand panel, and click on "Add Audio".
Visme offers dozens of free audio clips you can attach either to individual slides or set as background music for your entire presentation. If you've subscribed to a paid Visme Plan, you'll have access to all of the free audio files in the library.
To create your voice over slides, you can also upload your own audio file from a voice actor or record your voice over directly in Visme.
5 Attach an Audio File

To attach an audio file to the current slide, click on the gear icon next to it and select "Attach to Current Slide". You can preview each clip by clicking on the Play button next to it.
If you decide to choose another file or want to remove an audio clip from a slide, you can detach it by clicking on the gear again and selecting "Detach."
6 Record Your Voice Over

Here’s how to do a presentation with voice over using Visme.
Record your own audio by clicking on the "Record" option to the top right of the "Add Audio" tab. Once chosen, you will see a red record button appear below your slide.
To start recording your own narration within Visme, simply click on the red button and speak into your microphone. Make sure your microphone is working properly before recording.
You can preview your recording before saving it to the library by clicking on the Play button. Once you're satisfied with your recording, click on "Save to Library."
Your audio will automatically be converted to MP3 format, added to your Audio Library and attached to your current slide. You can then rename it by double clicking on the file name or detach it from the slide by clicking on the gear and selecting "Detach."
7 Customize Audio Settings

If you’re looking to make an audio presentation, the process is super easy. After adding your video to the library, you can customize how it is played.
To customize the way your audio presentation is played, simply click on "Audio Settings" at the top. You'll see options at the bottom to trim your clip or adjust more settings by clicking on the gear icon.
In Visme, you can also customize the time your audio takes to fade in and out. For example, if you want your audio to quickly fade in at the beginning, you can set it for 1 second. Or, if you want your audio to slowly fade out, you can set it for 3 or 4 seconds.
Also, you can set the time at which your audio will begin. If you want your narration to start 5 seconds into your presentation, you type in a value of 5 in the "Start Playing After" setting.
You can also reduce or increase the volume of your audio by inputting any value up to 100%. Finally, you can have the audio loop automatically by enabling the "Loop Audio" setting.
The advantage of having the option to tweak the settings for each individual audio track is that it allows you to customize it according to the content presented on each slide. For example, for slides with long animations, you might want to enable the "Loop Audio" setting.
8 Preview Your Audio

To see if your audio narration or voice over is effectively complementing your visuals, select the "Present" option at the top-right corner of the screen to preview your slides.
9 Add Background Music

Along with your audio narration, you can add background music to your presentation.
Click on "Share" at the top of your screen and select "Advanced Settings" at the bottom-right of the window. Click on the "Sound" tab and then enable the "Background Music" setting.
Here, you'll be able to select your uploaded or recorded audio file from the drop-down menu or choose one of the free audio clips from the library.
10 Publish Your Project

Once you're satisfied with your voice over, you can share your presentation with the world by clicking on the "Share" button at the top and then choosing one of the three options below:
- Publish for Web: This will publish your Visme project on the web and generate a shareable link, which will enable anyone on the internet to find and access your presentation.
- Share Privately: This will generate a private link to your Visme project that you can share with specific people.
- Embed: This will generate an embed code for your presentation that you can add to your web pages or email.
You can also choose to download your narrated presentation as an HTML5 or editable PowerPoint file to present offline or share with a pre-recorded voice over.
Five Tips for Adding a Good Presentation Voice Over
Ready to nail your audio presentation? Here are five useful tips for adding a voice over to your presentation.
Practice Before Recording
This is a critical step when prepping for your presentation voice over. Start with vocal warm and breathing exercises. Then do the initial takes and record them to identify and fix any issues that could hamper your delivery. These activities help warm your vocal cords, ease you into the right voice and ensure excellent delivery.
Use a Good Microphone
When recording your audio, you want to avoid poor production quality. Otherwise, you risk losing your audience's attention. According to Statista , 33% of people said they’ll abandon a video if it had poor audio quality.
Invest in high-quality microphones that produce balanced audio and clear dialog and eliminate background noise. The good news is that you don’t have to blow your budget on a full studio setup with expensive mics. You can find budget-friendly microphones to help provide professional-grade audio quality.
The best part? With a PowerPoint voice over software like Visme, you’re sure to have top-notch audio quality. The software comes with features that take your audio and voiceover recording to a whole new level.
Find a Good Place to Record
Where you record your presentation voice over can make a big difference in your audio output.
Microphones tend to pick up lots of background noises. So even if you don’t have access to a professional studio, find quiet and ambient environments. Also, opt for spaces with less reverberation and echo.
We get it. No place can be entirely silent, but you’ve got to be ingenious. For example, if you’re at home, you can stay away from the windows. You could even drive to a remote location and record in your car. It’s all about thinking outside of the box.
Sound Confident & Relaxed
Speaking with confidence can be a game-changer when it comes to presentations. It creates a great first vocal impression and ensures your audience pays attention to you.
One way to sound confident is to speak in a relaxed voice and moderate pace. Get rid of the tension by engaging in exercises that relieve stress. Then practice repeatedly to get familiar with your content, transitions and visual aids. Where necessary, infuse a bit of humor to lighten the mood and get you more comfortable.
Take Vocal Breaks In Between Slides
During the presentation with voiceover, you need to pause between slides.
This won't appear odd. Rather these pauses will give you a chance to catch your breath, calm down and organize your thoughts. Pausing also helps speakers avoid filler word like um, uh, er, which can make them sound uncertain.
Another upside of pausing is that it allows the audience to think, reflect and take in everything you’ve said.
Create Your Own Narrated Presentation With Visme
Creating a narrated presentation with your own voice over in Visme is super easy. All it takes is a few clicks and your presentation is ready to be shared with the world.
Sign up for a free account today and take it for a test drive.
Have you created an interactive presentation in Visme yet? Don't hesitate to share your best projects with us or tell us about your experience using the Audio Library and Record features.
Just drop us a comment below, and we'll get back to you as soon as possible.
Create beautiful presentations faster with Visme.

Trusted by leading brands
Recommended content for you:
![15 Best AI Presentation Makers in 2024 [Free & Paid]](https://visme.co/blog/wp-content/uploads/2023/11/Best-AI-Presentation-Makers-in-2024-Thumbnail-500x280.jpg "voiceover presentation app")
Create Stunning Content!
Design visual brand experiences for your business whether you are a seasoned designer or a total novice.
About the Author
Nayomi Chibana is a journalist and writer for Visme’s Visual Learning Center. Besides researching trends in visual communication and next-generation storytelling, she’s passionate about data-driven content.
Create Your Course
How to do a voiceover on google slides or powerpoint, share this article.
Voice-over presentations offer a better learning experience because they are a more engaging way to learn.
Some students learn better through visual cues, while others learn by listening. Adding voice-over narration to your presentations allows students to benefit from the best of both worlds.
Thankfully, adding voice-over to your presentations isn’t as complicated as it used to be. In most cases, once you have your slides ready, you’ll need to take just a few extra steps to add narration.
In this post, we’ll share four ways to do a voiceover presentation. This includes voice-over on Google Slides, PowerPoint, screen recording, and with Thinkific. At the end of the article, you will also find five tips for adding a good voice-over.
But, before we get into the options, let’s quickly cover the only ground rule regarding recording voice-overs: Don’t sacrifice sound quality. Viewers are willing to put up with rough visuals but don’t forgive poor sound. Most computers have built-in microphones that sort of get the job done, but we recommend headphones or a USB Microphone to improve the quality of your voiceover.
Related: How To Set Up A DIY Home Video Recording Studio For Cheap
Now, let’s get into your voice-over options.
Skip ahead here.
Option 1: How to do a voice-over on Google Slides
Option 2: how to do a voice-over on powerpoint, option 3: how to do a voice-over with screen recording, option 4: how to do voice-over presentations with thinkific, follow these five tips for adding a good voiceover, final thoughts, 4 ways to do voice-over presentations.
There are two main routes you can take to record a voiceover for your presentations:
You may want to use PowerPoint or Google Slides to add a voiceover to each slide that plays as students navigate the presentation. PowerPoint has recording functionality built in, but with Google Slides, you must take some extra steps to record your audio and upload it to Google Drive before you can embed it on each slide.
Alternatively, you may want to ditch the slides and create a screen recording of the presentation. To do this, you can use any screen recording software as you talk through the slides and turn your presentation into a video lesson. And if you’re a Thinkific user, you can create voiceover slides with the Presentation lesson feature.
Use this list to skip to your preferred voice-over narration method:
- How to do a voice-over on Google Slides
- How to do a voice-over on PowerPoint (Microsoft Office)
- How to do a voice-over screen recording
- How to do voice-over slides with Thinkific
Google Slides doesn’t have built-in functionality to record your slides, but you can still accomplish the same with it with an extra step. You can add voiceover to Google Slides by uploading an audio file saved in Google Drive to each slide.
For this option, you only need Google Slides and a computer with a microphone.
Let’s go through the steps:
Step 1: Create your audio files for each slide and upload them to Google Drive.

Tip: Organize your files with a naming convention. You’ll need to locate these files in the next step. Following a naming convention for your audio files, including Course, Lesson, and Slide numbers, helps keep them organized.
Step 2: Insert audio to your slide and configure play settings
Next, you can insert audio from your drive into each slide individually.

The files you uploaded should be in the Recent tab, but you can also search for the file manually.

Step 3: Configure your audio settings
Google Slides allows you to specify how the voiceover should act. To open the Format options menu, click on the speaker icon, then go to Format options under the Format menu.

Voice-over formatting options for Google Slides:
- Autoplay- When a student clicks the slide, you can choose if you want the audio to play automatically or manually.
- Loop—You can define whether you want the recording to stop or repeat once it reaches the end.

- Button size and color– You can resize the button by dragging the corner and changing the color using the “Recolor” option.

An online course or membership site can be a wildly successful way to monetize content.
Need help figuring out where to start? Get free training and start building for free !
Microsoft PowerPoint has a feature that many average users don’t know about, which allows you to add voice-over narration to your PowerPoint. For this option, all you’ll need is Microsoft PowerPoint and a computer with a microphone.
On Windows computers:
Step 1 – in the top menu, go to slideshow >> record slideshow..
You can record from the beginning of the presentation or from the current slide you’re on.

Step 2- Start recording
Once you select which recording you’d like to go ahead with, you’ll be in full-screen mode with options to record, stop, and replay. Once you click record, there will be a countdown timer from 3.

Anything you type in the notes section of the PowerPoint can be viewed by clicking on the notes button at the top.

The recording will stop automatically once you make it to the final slide. You can also pause, stop, or replay a recording at any time by pressing the pause button in the top left of your screen.

You can also record a video of yourself in the corner by selecting the video option in the bottom right corner.

Step 3 – Testing your narration
Once you’re finished, a speaker icon will appear at the bottom right corner of all the slides with recorded narration.

You can play, skip to time, or adjust the volume of the narration by hovering over the speaker icon.

On Mac Computers:
Step 1 – click on slide show..

In the top menu, click Slide Show and choose the slide you want to start working on. Unlike on Windows, you will have to select the slide you want to work on manually. If it is the first slide you wish to choose, do so.
Step 2 – Click on Record Slide Show

Step 3 – Choose the input method

On the top of the screen, you can turn off the camera, if you wish to, or turn it on.
The next button helps you choose the voice input, whether your Mac’s built-in mic or an external device.
Step 4 – Add a voice-over to slides

As with the Windows version, add voice-over to the slides one by one and add notes if you wish.
Step 5 – Complete recording

Once your voice-over is complete, click the same button to stop recording. Again, you can add notes if you wish. Then, move to the next slide.
Step 6 – Click on tips for more controls

Click on Tips for several functions and shortcuts you can use on your Macbook to control your voice-over recordings. The Mac version of the PowerPoint tool is much easier to use.
Step 7 – Verify your voice-over for accuracy

After your voice-over is complete, return to your presentation and check that it is accurate by clicking on the “Play” icon at the bottom of each slide.
The last option involves recording your screen and audio as you discuss the presentation.
Check out our guide: How To Record Your Screen On Any Device .
We’ll show you free options and two paid options with advanced editing features:
Hit record on video conferencing software
The easiest and cheapest option for screen recording without additional software is to join a Google Meet or a Zoom call by yourself, share your screen, and press the recording button.
This may be easy for a simple presentation but may prove frustrating for a longer presentation—the inability to edit means you’ve got one shot at making it through without any mistakes.
Use a built-in screen recorder.
On Windows 10 or 11 , click Windows + G to open the Xbox Game Bar tool. Press “Start Recording” to begin. This native Microsoft solution allows you to record both video and audio or video alone.
If you’re on a Mac , you can video record the entire screen or just a portion of it. Shift-Command (⌘) + 5 will display on-screen controls for recording the entire screen. However, this method does not record audio, so you’ll need to record your voiceover while recording your screen, but you will need to use a separate device.
Then, you’ll need to combine the audio and video/visual files in an editing software of your choice.
Turn to dedicated screen recording tools.
If you want more control over recording and editing your video and audio, you’ll need to invest in dedicated recording tools like Screenflow or Camtasia .
While dedicated tools will often cost, they also come with a significant boost in editing power.
Here are our two favorite options :
| Price: Starting at $169.99 Operating system: iOS | |
| Price: Starting at $179.88 US Operating system: iOS and Windows | |
| Price: Starting at $15/month with a limited free plan Operating system: iOS and Android |

Screenflow is an Apple-exclusive application for video editing and screencasting. It’s one of the best options for screen capture.
This software functions well as a video editor for novice editors, but it lacks the more complex functionality of a tool like Adobe Premiere Pro.
| Pros | Cons |

Camtasia is an all-in-one screen recorder and video editor that works on both Windows and Mac. It’s one of the most widely used screen recording and video editing systems and is popular for its user-friendly interface.
| Pros | Cons |

Unlike Camtasia, Loom is a dedicated screen recording tool. It’s designed for online educators, corporate professionals, and others who need to communicate on a regular basis but want to offer something more engaging than an email or slide deck.
Users can record and edit video in seconds, using a browser plug-in or dedicated app. Additionally, the platform offers apps for desktops and mobile devices, AI functionality (as an add-on), transcriptions and closed-captioning, and more.
| Pros | Cons |
If you’ve created a presentation on an external platform like Keynote, PowerPoint, or Google Slides, you can use a Presentation lesson to display it within your Thinkific course !
This function enables you to record audio while speaking to specific slides. You can also upload a recording for each slide.
For online educators, trainers , or even other creators, this functionality allows you to create a custom, more personable experience for students without adding another tool to your workflow.
To create a Presentation lesson, you will need to upload a PDF file. Each page in your PDF will be converted to images that will be displayed as slides within your Presentation lesson for students to navigate through.
If you have created a presentation in an external platform like PowerPoint, you can simply export it as a PDF and upload it to Thinkific.
Here are the steps to create a Presentation lesson with voice-over on Thinkific .
With that, let’s explore what it takes to ensure a good voiceover.
- Invest in a good microphone – While most cell phones and computers come equipped with built-in microphones, they may not provide the professional-grade quality you’re looking for. If your budget allows, we recommend upgrading to a higher-quality microphone , even if it is on the low-cost side of the spectrum.
- Use a teleprompter – Some people are natural at public speaking, but most of us aren’t. So, try using a teleprompter. You can turn your phone or desktop into one with free apps, allowing you to read out your content rather than memorizing and filling in the details as you go.
- Clear your throat – Most people do not realize the importance of a good quality voice. In fact, voice-over artists are hired simply because of their excellent voices! While you don’t need to hire a professional to record your own videos, you can deliver better content with the right warm-up.
- Sound confident —Confidence doesn’t come with good-quality microphones and teleprompters alone. Practice talking in front of a mirror to ensure that you sound and look great.
- Edit audio if necessary – Despite our best efforts, people make mistakes. Listen to your slides repeatedly and make changes until you are completely satisfied with how you sound.
Whichever method you choose, turning a regular presentation into an engaging voice-over is sure to improve the quality of your presentation.
But here’s a thought: Why not monetize your presentations with an online course?
Sign up with us for free and try it out (we dare you) .
Not ready to take the leap but still interested in improving the quality of your production? Check out one of these related guides:
- Best Equipment & Software For Creating Online Courses
- How to be Confident on Camera (Tips from Jon Youshaei)
- The 5 Most Effective Teaching Styles (Pros & Cons of Each)
- How to Create Video For Your Online Coaching Course
This blog was originally published in October 2022, it’s since been updated in May 2024.
Colin is a Content Marketer at Thinkific, writing about everything from online entrepreneurship & course creation to digital marketing strategy.
- 10 Instructional Design Models For Creating A Winning Online Course
- How To Craft Magnetic & Compelling Learning Outcomes
- Essential Questions To Ask In Your Training Evaluation Survey
- Best Equipment & Software For Creating Online Courses
- How to Create a Compelling Sales Page for Your Online Course
Related Articles
Why your new year’s resolution should be to try online learning.
Whether you are curious about learning new skill sets online or looking to create your own online course, here is an overview of the in-and-outs of eLeaning. Dive into all you need to know about online learning, and why you should make this your New Year’s resolution.
What is a Creator Educator
Do you want to share educational content online? Become a Creator Educator! Learn how you can leverage your unique genius to make money.
Blended Learning & Scheduled Class Activities
Blended Learning - Stronger student communities result in improved learning outcomes as students are more engaged and more likely to complete each lesson.
Try Thinkific for yourself!
Accomplish your course creation and student success goals faster with thinkific..
Download this guide and start building your online program!
It is on its way to your inbox
10 Best Voiceover Apps For Quality Sound

Need to do a voice-over and looking for the right app? There are plenty of options out there, but not all of them are great. Some are better for quick projects, while others offer professional-level features.
In this list, we’ll share the 10 best voice-over apps to fit various needs. We’ll explain what sets each one apart, so you can pick the best one for your project. By the end, you’ll have a go-to app for all your voice-over work.
Table of Contents
What is a Voiceover App?
A voice-over app is a tool that lets you add a voice to videos, animations, or other media. These apps can turn written text into spoken words using computer-generated voices. It’s like having a digital narrator for your content.
Many voice-over apps offer different voice styles and languages. So, whether you want a voice that sounds happy, sad, or excited, or one that speaks in English, Spanish, or Hindi, these apps can help. They’re great for making videos, presentations, or even just reading out loud.
10 Best Voiceover Apps
Whether it’s for videos, presentations, or animations, there’s an app here for everyone. Dive into the of the top 10 best voiceover apps.
1. Speechactors

Speechactors is an online TTS AI platform that transforms written text into human like speech. Designed for simplicity and ease of use, it helps to a broad varieties of audience – from students to professionals.
Whether you’re looking to create a voiceover for a presentation or just want to listen to an article rather than reading it, Speechactors has got you covered. With a user-friendly interface, price offers and a variety of voice options, it stands out as a reliable choice for your Text-to-Speech needs.
- It can produce over 300 AI-generated voices across 140 languages.
- It provides a variety of role voices inspired by movies, cartoons, anime, and even celebrities.
- Every language offers voice choices in male, female, and kids’ categories.
- It has various range of accents for different languages.
- The platform has voice emotions such as sadness, excitement, and anger.
Pros and Cons
- 200 AI-generated voices.
- 50 languages.
- Male, female, and kids’ voices.
- Emotion in voice.
- Unlimited projects and voiceovers.
- Advanced Voice Customization.
- 12k characters limit per clip.

Murf Ai is a cloud-based platform that uses AI and deep machine learning to produce realistic text-to-speech voiceovers for various content, such as YouTube videos, podcasts, commercials, and e-learning materials.
With over 120 voices in more than 20 languages, it streamlines the traditional voiceover process, allowing users to quickly transform scripts into natural-sounding audio and even sync it with images, music, and videos all within the platform.
Murf offers a cost-effective and time-saving solution, making it easier for content creators to get high-quality audio for their projects.
- Natural voices that sound like real people.
- User-friendly interface No fuss, easy to operate.
- Collaboration of work with others seamlessly.
- Bring in or send out media/File handling.
- Supports many Languages with varied accents.
- Customizations to Make it fit your needs.
- Voice mimics to clone specific voices.
- 120+ realistic AI voices
- 20+ languages
- Easy to use
- Multiple tones and styles.
- Limited Features and Settings
- Free plan doesn’t allow downloads
3. Logic Pro

Logic Pro is a top audio tool. It’s known for its many features like sound effects, voice changes, and easy music-making. It’s user-friendly but still very professional. People can use it to make beats or songs easily.
Logic Pro is great for many types of music. It works well with different instruments, especially for dance music. However, only Mac users can use it, and it’s mainly for music makers.
- The new Logic Pro X GUI (Graphical User Interface)
- Quick Help feature.
- Smart Control.
Pros and cons
- Recording audio
- Mixing audio
- Mastering audio
- Handling multiple inputs
- Mixing livestream content
- Onboarding for new users
- plug-in availability
- interaction with more digital consoles
4. GarageBand

Apple devices like iPads or iPhones come with GarageBand . It’s a free, strong audio tool for Apple users.
You can record on multiple tracks and connect external mics like USB ones. It lets you edit by adding effects, cutting audio, and using multiple tracks.
If you’re new to editing, it might seem tough. But, this tool ensures top-notch recordings. You have control over audio quality and file types. For Mac users, it’s one of the best free choices.
- Grid Layout displays rows and columns, where each cell holds a musical loop or sample.
- Real-time Mixing Function to mix and match different cells to create a unique sound.
- Loop Varieties so you can use drum beats, bass lines, melodies, and more.
- Multitrack Recording.
- Easy to manipulate multiple tracks
- Simple export of MP3’s
- Offers different size MP3’s to export
- Lack of effects
- Lack of pre-sets to edit audio faster
- Only available on Apple devices
5. Audacity

Audacity is a favorite for many because it’s free and works on Mac and Windows. Despite being free, it offers clear audio recording in various formats. Whether you’ve got a USB mic or another type, Audacity is compatible.
Beyond just recording, it has some neat effects to enhance your audio and handy editing tools to fix any hiccups. Great for beginners and pros alike!
- Capture live audio on a PC.
- Turn music tapes into MP3 or CD.
- Edit sound types like MP2, MP3, and more.
- Combine or edit various sound files.
- Adjust sound speed or pitch.
- Easy to record.
- Boost volume easily.
- Quick save and share.
- Free for everyone.
- Fits Mac and Windows.
- Has sound effects.
- Tricky interface.
- Hard to multi-track.
- Only basic editing.
6. Speechify

Speechify is a top voiceover app. You can get it on Google Play and iOS. It’s got over 200 voices in 30 languages. Plus, it even has Snoop Dogg’s and Gwyneth Paltrow’s voices.
Speechify can turn text from pictures into speech. People who use a lot of graphics love this. You can also add stuff from Dropbox, Google Cloud, emails, and more. It can read super fast, like 900 words in a minute.
- Speechify lets you turn documents into audio.
- It reads web pages, PDFs, Word files, emails, and more.
- Snap a photo of text, and it’ll read it aloud, even offline.
- It’s available on Chrome, Safari, iPhone, iPad, Mac, and Android.
- Simple and user-friendly.
- OCR technology to read images.
- 60+ languages.
- Limit of 150,000 words monthly.
- Too many ads for the premium plan.
- Sounds robotic.
7. TwistedWave

TwistedWave is an audio editing software. It’s used to record, edit, and process sounds. You can use it on Mac, iPhone, and online in a browser. Features include cutting, copying, pasting, and applying effects to audio files.
It’s handy for podcasters, musicians, or anyone working with sound. It has a simple interface, so it’s pretty easy to get started with. Whether you’re making small tweaks or big edits, TwistedWave can help. If you’re working on sound projects, it’s a tool to consider.
- You can undo and redo actions.
- Listen to audio previews.
- Use fade in and out.
- There’s a normalize feature to tweak channels and levels.
- You can change the DB.
- Loop your audio.
- Supports many audio types.
- Use mono, stereo, or multitrack.
- Easy-to-use design.
- Handles multiple formats.
- Need to pay for full features,
- Limited storage in the free plan.
8. Natural Reader

Natural Reader is a text-to-speech software. It converts written text into spoken words. People use it for various purposes like reading eBooks, PDFs, web pages, and documents out loud. It’s helpful for individuals with dyslexia, vision problems, or those who just prefer auditory learning.
The software comes with different voices in multiple languages. It’s available for both Windows and Mac, and there are also mobile versions. Apart from personal use, there are versions for educators and business professionals.
- Scan text with OCR.
- Make audio files.
- Works with many file types.
- Use it on different platforms.
- Free use up to 20 minutes
- Works on Windows, Mac, and online
- WebReader tool
- sound robotic
9. Adobe Audition

Adobe Audition is a digital audio workstation developed by Adobe Systems. It stands as a comprehensive tool designed for recording, editing, mixing, and mastering audio content.
The software is equipped with a range of professional-grade features. These include a multitrack, waveform, and spectral display for creating, mixing, and editing audio content. Adobe Audition is frequently employed in the production of radio broadcasts, podcasts, music, and more.
- Capture and tweak sound clips.
- Make high-quality audio.
- Start a podcast.
- Adjust songs with Audition’s Remix to any length.
- Fixing audio and reducing noise.
- Loudness Meter for streaming.
- visual tools.
- film and TV audio standards.
- No MIDI support.
- Costly monthly subscription.
10. PreSonus Studio One

PreSonus Studio One is a digital audio workstation (DAW) developed by PreSonus, known for its intuitive single-window workspace, drag-and-drop functionality, and robust feature set.
The DAW stands out with its advanced features like the integrated Project Page for mastering, native 64-bit resolution, and support for up to 384 kHz audio. Another notable aspect is its unique “scratch pad” functionality, allowing users to test arrangements without disrupting their main projects.
Its compatibility with third-party plugins, coupled with its own suite of virtual instruments and effects, makes PreSonus Studio One a versatile choice for audio professionals across various genres and applications.
- Chord tracking to know th exact positions.
- Impact enhancements to improve quality
- Pattern features to identify the patterns
- Sample One updates.
- Quick process for recording, composing, and mixing.
- Chord and pattern compositions.
- New tools for live shows,
- Mastering options with DDP features.
- Busy interface and mixer.
- Needs fresh instrument sounds.
- New editor doesn’t print music sheets.
1. Are free voiceover apps any good?
Some free apps offer decent features and quality. However, paid apps usually provide more customization, better quality, and no watermarks.
2. Can I edit my voiceover within the app?
Most top-tier voiceover apps come with built-in editing tools for basic cuts, noise reduction, and audio effects.
3. Do voiceover apps work on both Android and iOS?
Some apps are available on both platforms, while others are exclusive to one. Always check compatibility before downloading.
4. How do I sync my voiceover with video?
Some apps offer video import and timeline features, allowing you to sync your voiceover directly within the app.
We’ve walked you through the top 10 voiceover apps for quality sound. These apps cover a variety of needs, whether you’re a pro in the voiceover field or just starting out.
Each app offers its own set of features that can make your voiceovers sound crisp and professional. Now that you’re aware of the best apps on the market, choosing the right one should be a lot easier.
Leave a Comment Cancel Reply
Your email address will not be published. Required fields are marked *
Save my name, email, and website in this browser for the next time I comment.
LIMITED TIME OFFER: For a limited time, enjoy 50% off on select plans.

How to Voiceover a PowerPoint or Google Slides Presentation
In the corporate world of flexible hours and hybrid working, it can be difficult to find a time when everyone is available to attend a live company presentation or training session. So, to make these resources available to all, why not upload your presentation to your internal resource website so employees can watch and learn at a time that suits them? You could even include an audio commentary to make it more engaging and more informative. If you’re not sure where to start, follow our guide on how to voiceover a PowerPoint or Google Slides presentation.
How to do a voiceover on Google Slides
While Google Slides doesn’t have a built-in tool specifically designed for voiceover, you can still create one in just a few simple steps. All you need is Google Slides and a computer or phone with a microphone.
1- Record an audio file for each slide
Rather than going through the time-consuming process of recording and re-recording Google Slides voiceovers until they’re perfect, why not optimize the process with an AI tool? LOVO AI’s text to speech tool allows you to create audio files in minutes from an existing script, saving you time and resources.
Once you have all your recordings ready, label each file clearly so you know which audio goes with each slide.
2- Upload each voiceover file to Google Drive
Make sure you create a new folder exclusively for these recordings so they’re easier to find in the next step.
3- Add the audio to each slide
Import the audio into your Google Slides document. You can import a different audio file for each slide by going to Import > Audio. The files you uploaded should be located in the ‘Recent’ tab, but you can also search for the file manually.
4- Adjust your settings
Tinker with your audio settings to achieve the desired result for your Google Slides voiceover. Simply click on the speaker icon which will have appeared on your slide in Step 3, then go to Format > Format Options. Some options to choose from include:
- Autoplay – do you want your audio to play automatically or after a viewer manually clicks?
- Loop – stop your audio after one play or repeat once it ends.
- Button size and color – change the way it looks on your slide.
How to voiceover a PowerPoint
There are two different ways you can voiceover your PowerPoint and take your presentation to a new level.
Option 1: Record a voiceover in PowerPoint
The software has several hidden features that the average user doesn’t know about, including the ability to add voiceovers. All you need is Microsoft PowerPoint and either a computer with a microphone, an external plug-in microphone, or earphones with a built-in mic.
Step 1 – In the top menu, go to Slide Show > Record Slide Show. You’ll have the option to record from the beginning of the presentation or from the slide you’re currently on.
Step 2 – Start recording. Once you choose your start point, you’ll be taken to the full-screen recording page with options to record, stop, and replay. Hit record and there will be a countdown timer from three.
FYI, anything you type in the notes section of the PowerPoint can be viewed in recording mode by clicking on the ‘Notes’ button at the top. The recording will stop automatically when you reach the final slide.
Step 3 – Listen back to your PowerPoint voiceover and check that everything’s okay. Just hover over the speaker icon in the corner of your slide to play. Head back to the recording page to fix any errors.
Option 2: Upload a media file
Instead of recording straight into the PowerPoint software, you can upload your own audio files into each slide. This is perfect if you don’t have the time to record your own voiceover, or simply don’t want your voice attached to the project. LOVO AI’s text to speech tool allows you to create realistic, human-like voice recordings in minutes, which can easily be integrated into your PowerPoint presentation.
Once you have your voiceover files, go to PowerPoint and click Insert > Audio > Audio from file. Choose your preferred setting: loop, autoplay, or play across slides.
You have two options here:
- Create one audio file per slide, which you can add to each slide individually. Set them to play automatically once you advance to the slide that the audio file is on.
- Create one single audio file for the whole presentation, and have it play across all slides.
Once the voiceover is added, you’ll see a small sound icon on your slide. You can use the picture format buttons on the Audio Format tab to add a frame, border, or other effects to the audio icon.
How to create a voiceover for slide presentations using LOVO AI
Save time and money by using an AI software like Genny to create incredibly realistic voiceovers and audio recordings. We have hundreds of different voices, for various uses, including some optimized for corporate learning and training videos. Best of all, our online software is incredibly streamlined and easy to use. Here’s how.
Step 1 – Copy and paste the audio script into Genny’s text editor.
Step 2 – Choose the AI voice that fits your brand and video. You can click on the play button on their profile picture to sample the voice. The hundreds of voices are available in a variety of languages and emotions.
Step 3 – Upload your own videos, audio, documents, images, and/or PowerPoint right into Genny’s editor by clicking ‘Add Resource’ or the cloud icon.
Step 4 – Explore the built-in library of third-party resources, including images, video, and audio, which you can add to your presentation.
Step 5 – Generate your voiceover. Select a chosen text block or hit ‘select all’, then click on the ‘Generate’ icon
Using AI to add voiceover to your corporate presentations is the easiest way to make it more engaging for all types of learners. Not only will it improve learning outcomes within the company, but you’ll also have the added bonus of surprising your audience with the most realistic and human AI voices in the world.
Need to see it in action before you decide? We’re letting you try Genny for 14 days for free .
Subscribe to our blog
Related blogs.

How To Make a YouTube Short: A 2024 Beginner’s Guide

5 Best Text-to-Speech Software for Students
Unsupported browser
This site was designed for modern browsers and tested with Internet Explorer version 10 and later.
It may not look or work correctly on your browser.
- Presentations
How to Add Voiceover Narration on Google Slides
Google Slides is a feature-packed, browser based presentation tool. You might use it to give in-person presentations or share slides from afar. Learn how to do a voiceover on Google Slides to capture your speaking voice adding thoughts to your presentation.
Voiceovers are useful even if you’re presenting live. Perhaps you've got a co-presenter who can’t attend. When you know how to add voice recording to Google Slides, you can add them in to share their portion of the slide deck. It’s a powerful way to make your presentations more accessible and engaging. Let's learn how, together.
Why Add Voiceovers in Google Slides?
Google Slides is a great tool for building presentations. With global teams working together, it’s a perfect way to collaborate. Google Slides exists fully offline. Users don’t have to install special apps and software to view and edit slide decks.
With the ability to build slides in a web browser, Google Slides is flexible and versatile enough for any project. In moments, you can share slides around the world. But what if you’re saving slides to share later? Maybe your audience can’t join in real time. Or you may want them to refer back to your presentation later. That means that you need to know how to do a voiceover on Google Slides.

A voiceover on Google Slides helps you add audio narration to your presentation. Why do this? It means that you don’t have to be available to present in real time. Instead, you can record your narration and save it right inside of Google Slides. This way, your audience can play back your slide deck on their own schedule.
How does this boost engagement? Consider what audiences will see if you simply email out a copy of your slides. Sure, they can review content visually.
But they’ll miss out on your narrative delivery - the anecdotes, inflections, and details that you share when speaking. With a voiceover, your audience will get the full impact of your slides anywhere, anytime. This is why learning how to do a voiceover on Google Slides will set your presentation apart.

Now, let’s learn how to add voiceover to Google Slides presentations fast! For our tutorial, we’ll work with the beautiful LEONE Google Slides template from Envato Elements. Download it today to follow along.
How to Do a Voiceover on Google Slides Quickly

We’ve explored the benefits of Google Slides voiceovers. Now, it’s time to learn how to record voice on Google Slides. By doing so, you can capture your Google Slides narration to share with an audience. Let’s get started.
1. Record Audio in MP3 Format
Google Slides is part of the larger Google Drive universe of productivity apps. Slides itself doesn’t have the capability to record voiceovers and narration built in. But fortunately, it’s still quite easy to do. While you can’t record in Slides, you can easily add and edit audio to play back during your presentation.
Google Drive itself is a cloud storage platform that lets you upload and work with files of many types. One of Google Drive’s supported file formats is .mp3 audio. MP3 files are extremely common, and they’re easy to record. Many popular audio recording apps record in MP3 format. As you learn how to record voice on Google Slides, you'll want to be sure that you've got a way to record MP3 audio.
You really have two options here:
- You can record in MP3 format.
- Or you can use an app like Apple's Voice Memos, which saves in .m4a format. Then, you can convert the recording to MP3 by using a free platform like CloudConvert .
For this example, we'll use the free app Audacity to record. It lets you save recordings in MP3 format, saving you the step of having to convert audio to a format that Google Drive and Slides support.

Let’s begin by recording our Google Slides audio. Start by launching your favorite audio recorder , like Audacity.
Be sure to work in a quiet environment. You don’t want background noise that'll distract your audience.
Then, launch your presentation in Google Slides. The way that I like to record is to navigate through my full slide deck in real time. I pretend to be speaking to an audience, working through my slides one by one. In the background, my recording is running.

To replicate this, be sure you’re recording audio. Then, click through your slides. This way, you can preserve the pace and timing of your presentation. Later, you can sync up your audio to match. Remember to use transition phrases.
For example, as you move to a new topic, try to say something like “ moving to the next slide ” or “ moving forward to our next topic. ” This keeps your audience in step with the slides you’re speaking about.
When you’re finished, end your recording and save the MP3 copy of your audio. Now, let’s move on and start learning how to add voice recording to Google Slides decks.
2. Upload Audio to Google Drive
With your voiceover recording saved in MP3 format, you now need to bring it to Google’s online apps. Begin by going to Google Drive’s homepage. There, you’ll see a list of files and folders that you already have saved.
To upload your MP3 audio, launch your file browser on your computer. Navigate to your saved audio file. Click on the title and drag it over the open Google Drive window. Drop it into place by releasing your cursor. Google Drive uploads the recording, saving it for use.

If you prefer a different process for upload, click New > File Upload in Google Drive. Then, repeat the same step of finding your saved recording and clicking on it to upload.
Just like that, you've recorded audio ready for use in Google Slides!
3. Insert Audio in Google Slides
With your audio uploaded to Google Drive, it’s time to add it to Slides. To get started, launch your presentation in Google Slides. With your slide deck open, go to the first slide in the deck. You can navigate by using the sidebar menu on the left.
To add audio to your presentation, find the Insert menu at the top of your Google Slides window. Click on it, and you’ll see a dropdown menu appear with a list of options. From here, select the third option from the top: Audio.

Slides launches the Insert Audio menu. By default, you’ll find yourself on the My Drive tab. This shows thumbnails for all audio files that you've saved in your Google Drive account. The recorded narration uploaded in the prior step will be in the top left corner of the gallery.

To insert your audio, click on your recording’s thumbnail. Then, click on the blue Select button in the lower left corner of the Insert Audio menu. Google Slides adds it to your presentation. It’s that easy!
4. Set Playback Settings
When your audio appears in Google Slides, you’ll notice a new sidebar menu opening on the right side of your screen. It’s the Format Options menu, and it’s the control center for audio in Google Slides.
By default, certain settings are specified. But to ensure that playback happens the way you want, you may need to make some adjustments. Begin by opening the Audio Playback section of the Format Options sidebar.
Your first option is to control how audio starts to play. You've got two options here:
- On Click. This means that audio plays only when a viewer presses the Play button.
- Your other choice is Automatically.

Think back to how we recorded audio. Since it’s designed to sync up with the full narrative of the slides, Automatically is the best choice here. This way, you can ensure that your audio plays at the time and pace that you had in mind when you recorded it. To specify this, simply click the Automatically bubble to make it the option in use.
Second, you need to specify whether audio plays across slides. Keep in mind - in this example, we recorded audio for the full presentation. Thus, you’ll want the audio voiceover to continue playing as viewers move from slide to slide. Click on the Stop on Slide Change box to uncheck it. This way, audio plays no matter where someone is in the slide deck.
This raises a key point: you can add audio for slides one by one . Here, you would add separate MP3 files to each slide in the deck. For them, you would want to use the Stop on Slide Change option to avoid confusing your audience. This is a useful option if you need audio only on selected slides in the deck.
5. Preview the Narrated Slides
We’ve just learned how to record voice on Google Slides! But there’s one last step. Before sharing with your global audience, it’s a good idea to preview your recorded audio. This lets you ensure that it plays back the way you've got in mind. Plus, you can check to be sure the sound quality is high and easy to listen to.

To preview your audio, go to View > Slideshow in Google Slides. Be sure the audio starts playing automatically on the first slide, as you’ve specified. Then, click through your slides. Notice that the audio plays across each of them, just as designed!
Just like that, you learned how to add voice over to Google Slides. It’s an easy and powerful way to engage with your audience from anywhere in the world, on their own schedule.
The Top Source for Stunning Google Slides Templates (With Unlimited Use)
Envato Elements is the top source for the best Google Slides templates. With thousands of options to choose from , you’re sure to find the perfect design for you.
The Elements offer is powerful. For a flat monthly fee, you access unlimited downloads of all of these premium Google Slides decks. Plus, Elements includes millions of other assets. You’ll enjoy fonts, music, stock photos, and so much more.
Explore Google Slides Templates

Elements is the best value for creatives in 2023. With expertly built designs, you don’t need to be a skilled designer to enjoy stunning results. It's a major assist as you learn how to record voice on Google Slides.
When you choose a premium design from Envato Elements, you’ll experience:
- Easy-to-use layouts. With pre-built designs, the hard creative work is handled for you.
- Inspirational designs. Placeholders mean you can drop in your own content quickly. Themed designs and layouts help inspire what to place on each slide.
- Powerful graphics and charts. These help you beautifully illustrate data and advanced concepts.
As you can see, you can’t afford to miss out on Envato Elements. Join today and start downloading new templates to work with!
You Just Learned How to Add Voice Recordings to Google Slides
Now that you know how to add voiceover to Google Slides presentations, you can share insight even while apart. This skill brings a more personal touch to a presentation even when you can't meet in-person.
What are you waiting for? The best time to put a new skill into practice is right away. Grab your microphone and practice how to record voice on Google Slides designs. Your audience will thank you later.

- Skip to primary navigation
- Skip to main content
- Skip to primary sidebar
- Skip to footer
Don't Miss a Post! Subscribe
- Guest Posts
- Educational AI
- Edtech Tools
- Edtech Apps
- Teacher Resources
- Special Education
- Edtech for Kids
- Buying Guides for Teachers
Educators Technology
Innovative EdTech for teachers, educators, parents, and students
Best Voice Over Presentation Apps
By Med Kharbach, PhD | Last Update: May 9, 2024

In today’s fast-paced digital world, presentations have transcended beyond traditional slides and bullet points. They have become more dynamic, interactive, and engaging, thanks in part to the integration of voiceovers. Whether you’re an educator creating a lesson, a business professional preparing a pitch, or a content creator sharing a story, the power of voice can significantly enhance the impact of your presentations.
Recognizing this, a plethora of voice over apps have emerged, each offering unique features to suit different needs. In this blog post, we explore the best voice over presentation apps available, helping you choose the right tool to bring your presentations to life. From simple recording apps to sophisticated editing software, we’ve covered a range of options to cater to both beginners and professionals alike.
What is A Voice Over?
A voice Over refers to a production technique in which a voice—that is not part of the narrative—is used in a radio, television production, filmmaking, theater, or other presentations. The voiceover is read from a script and may be spoken by someone who appears elsewhere in the production or by a specialist voice actor. It is pre-recorded and placed over the top of a film or video and commonly used in documentaries or news reports to explain information.
Voice Overs provide a range of functions, such as:
- Narration: Used in documentaries and feature films to provide background information, context, or a story.
- Character Voices: In animations and cartoons, voice actors give voices to animated characters.
- Commercial Advertising: In commercials, voiceovers are used to pitch products and services.
- Educational or Training Purposes: In e-learning modules or corporate training videos, voiceovers explain concepts and instructions.
- Public Announcements: In public venues like airports or event spaces, voiceovers provide information or instructions.
- Audiobooks: Voice actors read books aloud for audiobook recordings.
- Telephony: Used in automated telephonic systems like IVR (Interactive Voice Response) systems.
The effectiveness of a voice over depends on the quality of the script, the appropriateness of the voice actor (including tone, accent, speed, and emotion), and how well it integrates with the visual content. Voice overs are a key tool in creating an emotional or informational bridge with the audience.
Related: 5 Best AI Voice Changers
Voice Over Presentation Apps
Creating voice over presentations has become increasingly popular in educational, professional, and creative contexts. There are several apps that stand out for their ease of use, functionality, and quality. Here are some of the best voice over presentation apps available:
1. Speechify Voice Over Generator
Speechify stands out for its text-to-speech capabilities. It can convert any written text into spoken words, which is ideal for creating voiceovers without the need for actual recording. This app is particularly useful for those who prefer to write their scripts and have them read aloud by a digital voice.
2. GarageBand
Although primarily known as a music creation studio, GarageBand also offers excellent voice recording features. Its high-quality audio capabilities make it ideal for creating professional-sounding voiceovers.
3. Easy Voice Recorder
This app is designed for straightforward, no-frills voice recording. Easy Voice Recorder is ideal for quick voiceover work, especially when you’re on the go and need to record without complex editing tools.
4. TwistedWave
TwistedWave is an audio editor that allows you to record and edit voiceovers with ease. It offers a variety of editing tools, making it suitable for creating more polished and professional voiceover presentations.
5. Camtasia
While primarily a screen recording and video editing software, Camtasia is excellent for creating voiceover presentations. It offers more advanced editing options, making it suitable for high-quality production needs.
6. VoiceThread
VoiceThread is unique in that it’s specifically designed for creating presentations with voiceovers and allows for audience interaction. Viewers can add their own voice comments, making it ideal for collaborative projects and educational use.
Final thoughts
To wrap up, the realm of voice over presentation apps is vast and filled with diverse options, each catering to different aspects of voice over production. Whether your priority is ease of use, advanced editing capabilities, high-quality audio, or text-to-speech features, there’s an app out there that fits the bill. The key is to identify your specific needs and experiment with different apps to find the one that aligns best with your presentation style and objectives.
Remember, a well-executed voice over can transform your presentation from mundane to memorable, engaging your audience with a more immersive and impactful experience. So, dive into these apps, explore their features, and unleash the power of your voice to make your presentations truly stand out.
Join our mailing list
Never miss an EdTech beat! Subscribe now for exclusive insights and resources .

Meet Med Kharbach, PhD
Dr. Med Kharbach is an influential voice in the global educational technology landscape, with an extensive background in educational studies and a decade-long experience as a K-12 teacher. Holding a Ph.D. from Mount Saint Vincent University in Halifax, Canada, he brings a unique perspective to the educational world by integrating his profound academic knowledge with his hands-on teaching experience. Dr. Kharbach's academic pursuits encompass curriculum studies, discourse analysis, language learning/teaching, language and identity, emerging literacies, educational technology, and research methodologies. His work has been presented at numerous national and international conferences and published in various esteemed academic journals.
Join our email list for exclusive EdTech content.
How to do a voiceover on a PowerPoint presentation and add pre-recorded audio to your slides
- You can record a voiceover in PowerPoint and insert it into your next presentation using the software's Audio recording feature through the Insert menu.
- Recording and inserting a voiceover into PowerPoint is a relatively similar process on an Apple Macbook and Windows PC.
- Once you've recorded your audio, you can click the microphone icon that appears on your slide and playback your recording.
- Visit Business Insider's Tech Reference library for more stories .
Public speaking is a valid and common fear. And although you might be trying to hone your public speaking with your free time at home , there's a way you can incorporate your voice into your next PowerPoint presentation without the pressure of speaking on the spot.
How? Microsoft PowerPoint has a feature that lets you create narration for all slides as you see fit. This way, you can record — and re-record — voiceovers for your presentations that won't make you cringe.
The process is virtually identical for both Mac and PC users and you can use your computer's built-in mic or a headset. Whatever your operating system of choice is, easily record narration over a PowerPoint slide in a few quick steps.
Check out the products mentioned in this article:
Microsoft office (from $149.99 at best buy), apple macbook pro (from $1,299.00 at apple), acer chromebook 15 (from $179.99 at walmart).
SteelSeries Arctis 1 Wireless Headset (From $92.49 at Amazon)
How to record a voiceover for PowerPoint on a PC
1. Open a new or existing or presentation in PowerPoint.
2. From the top toolbar, select "Insert."
3. Toward the far right side, click "Audio."
4. Choose "Record Audio…"
5. Name your audio file.
6. Click the circle icon when you're ready to start recording.
7. Select "OK" when you're done recording.
8. A microphone icon will indicate the narration has been added to the slide.
How to record a voiceover for PowerPoint on a Mac
1. Open a new or existing or presentation in PowerPoint for Mac.
2. Find and select "Insert" from the top toolbar.
4. Select "Record Audio…"
5. Name the audio file, and click the circle icon when you're ready to start recording.
6. Click "Insert" when you're ready to finalize.
7. You can click the microphone icon on the slide to hear your recording.
Related coverage from Tech Reference :
How to download and access microsoft powerpoint on your mac computer, how to add a border to slides in powerpoint, and give your slideshow a sleek design, how to change and format the background of your powerpoint slides to custom designs, how to change your language settings in microsoft powerpoint in 3 different ways, how to copy or duplicate a powerpoint slide and put it anywhere in your slideshow.
Insider Inc. receives a commission when you buy through our links.
Watch: Apple just launched a $6,000 Mac Pro, available this fall
- Main content
- Promo Video
- Real Estate Video
- Corporate Video
- Trailer Video
- Tutorial Video
- Birthday Video
- Wedding Video
- Memorial Video
- Anniversary Video
- Music Video
- Travel Video
- Social Media
- YouTube Video
- Facebook Video
- Instagram Video
- Twitter Video
- TikTok Video
- YouTube Intro Video
Generate videos from your prompt, article, or URL
Generate scripts for any purpose
Paste the URL and turn your blog post into compelling videos with AI
Generate images in various styles
Turn text into natural-sounding voices
Create multi-language videos with ease
Generate subtitles or captions for your video automatically
Remove background from images automatically with one click
- Video Compressor
- Video Converter
- Video Trimmer
- Video Merger
- Frame Video
- Reverse Video
- Video Effects
- Screen Recorder
- Freeze Frame
- Video Collage
- Speed Curve
- Add Text to Video
- Text Animations
- Add Subtitle to Video
- Add Text to GIF
- Video to Text
- Audio to Text
- Audio Editor
- Audio Cutter
- Audio Converter
- Audio Joiner
- Add Music to Video
- Ringtone Maker
- Slideshow Maker
- Meme Generator
- Transparent Image Maker
- Photo Frame
- YouTube Thumbnail Maker
- Video Editing
- AI Video Creator
- Video Editing Tips
- Video Creation
- Best Video Editors
- Video Recording
- Video Capturing
- Best Video Recorders
- Video Marketing
- Video Marketing Tips
- Marketing Video Creation
- Video Conversion
- Video Format Conversion
Add Voiceover to Your Videos Online for Free
FlexClip's free voice-over video maker, a browser-based program, helps you create voice-overs for your video, describing, highlighting, explaining, or emphasizing something. Video highlights, ads, short films, documentaries, company presentations, tutorials, etc., need clear voice-overs to improve accessibility. Import pre-recorded voice-over tracks, record your voice-overs with FlexClip's built-in recorder, or paste your text to generate lifelike voice-overs. You can also trim, split, and adjust the applied audio and produce consistent subtitles with our auto subtitle generator. Apart from these, experiment with beautiful filters, stunning animations, seamless transitions, stylish text, appropriate music, etc., to adorn the video from start to end. No editing skills are required! Try it for free!
- Trusted by:
Why You Need to Create a Voiceover Video
Boost sales.
A compelling video can absolutely influence buying behavior, leading directly to sales.
Increase Traffic
Nothing can compare to the power of video content when it comes to driving traffic to your site.
Encourage Social Shares
Videos on social media platforms generate more likes and shares than images and text combined.
How to Create a Voiceover Video in 3 Easy Steps
Add videos or photos from computer or stock libraries to the scene.
Add text, music, and voiceover to customize your voiceover video.
Download your voiceover video in various ratios and definitions or share it online with the world.

Related Themes
- entertainment video
- YouTube caption video
- YouTube closed caption video
- YouTube game video
- youtube lyric video
- YouTube music playlist video
- YouTube subtitle video
- zoetrope video
- zombie video
- 30-second countdown video
- 3d birthday video
- 3d cartoon video
- 3D dinosaur video
- 3D dog video
- 3D elephant video
- 3D GIF video
- 3d logo reveal video

How-To Geek
How to record voiceover narration in powerpoint.

Your changes have been saved
Email Is sent
Please verify your email address.
You’ve reached your account maximum for followed topics.
Microsoft Office Files Have a Secret That Could Help You
Automakers need to stop with all the touch screens, how to clean a link before you share it (and why you should), quick links, preparation, record a voiceover for your presentation.
If you’re sending out your presentation instead of giving it in front of an audience, but you feel adding a vocal explanation would better help to deliver the message, record a voiceover narration. Here’s how to do it.
Before you begin your PowerPoint narration, you’ll need to make sure you’ve made the proper preparations.
Set Up Your Mic
First, you’ll need a microphone. Most modern computers have a built-in microphone that gets the job done, but investing in a USB microphone will increase the audio quality of the narration by quite a bit.
The built-in microphone will be set as your input device by default, so if you plan on using it for the PowerPoint narration, you don’t need to take any additional steps in setting it up. However, if you plan to use a USB microphone for the narration, be sure to set it as the input device.
To do this on Windows, right-click the volume icon found on the right of the taskbar. In the menu that appears, select “Open Sound Settings.”

The “Sound Settings” window will appear. Here, scroll down to the “Input” section and click the box under “Choose your input device.”

If you’re using a USB microphone, it will appear here. Select it to set it as the input device.
The steps for Mac users are extremely similar. The only difference is you should go to "System Settings" and select "Sound" instead of right-clicking the volume icon like on Windows. From there, the steps are the same.
Take Notes and Rehearse
With your mic set up, you’re ready to start recording, right? Well, not quite. While you may not be physically standing in front of the audience delivering this presentation, you still need to treat it as though you are. This means going through the basics---taking notes and rehearsing your delivery.
One thing you can do to help you record a successful narration is to write out a script. As with a live presentation, though, you don’t want to sound like you’re reading straight from your notecards. Practice reading through the script a few times so that it sounds natural and fluid.
Once you’re confident in your delivery, it’s time to start recording.
Open the PowerPoint presentation in which you would like to record a voiceover narration. Head over to the “Slide Show” tab and, in the “Set Up” group, select “Record Slide Show.” Once selected, a drop-down menu will appear. Here, you can choose to start the narration from the beginning or from the current slide. If you choose to start recording from the current slide, make sure that you’re on the slide you’d like to start recording from.
Related: How to Record Your Screen with Microsoft PowerPoint
In this example, we’ll choose “Record from Beginning.”

Now, you’ll be in full-screen mode. You’ll notice a few extra tools appear, including a record button at the top-left corner of the screen. When you’re ready to start recording, click this button.

When you select the record button, a countdown timer will appear, giving you a three-second delay between clicking the button and starting your recording.

You can now start recording your voiceover narration! Continue through the presentation by clicking the right arrow to go to the next slide.

You can pause the recording at any time by pressing the pause button in the top-left corner of the window. The recording will automatically end when you make it to the last slide. Alternatively, you can press the stop button, also located at the top-left corner of the screen.

If you want to play your narration back, you can select the replay button.

A speaker icon will appear at the bottom-right corner of each slide that has a recorded narration. You can also play your narration back on each slide by hovering over the icon and pressing the play button.
If you’re not satisfied with the narration, simply repeat these steps to re-record.
- Microsoft Office
- Microsoft PowerPoint
- office 2019
8 of the Best Voice Over Software & Apps for Top-Quality Audio (2024)

Looking for a seamless way to record voice overs?
If you’re a content creator and want to up your game, this is a quick way to take your recordings to the next level. Voiceovers increase the effectiveness or your video, make it easier to understand the core message, and could boost your return on investment (ROI).
Before you get started, you need to make sure you use the best voice over software for your needs. Luckily, you’ve come to the right place. In the following guide, we will look at what voice-over software is, what you should consider when choosing yours, and the best voice-over software and apps available. Here’s what you need to know.
What is voice-over software?
A voice-over is a recording that you overlay onto a video or audio track. Voice-overs usually describe what is happening on screen or give extra context to the audio.
Often enough, you add this to a recording after you have completed it. However, you may plan it out and even write it before you begin. As such, voice-over software is any app or program that allows you to record a voice-over track directly into the video. You can then add the track to the existing video or audio content before editing it and finalizing it.
What to consider when choosing voice-over software
When you’re looking for the best voice-over software on the market, there are some things you should consider. You don’t want to rush into getting the wrong app or software. Of course, different people will need different programs. Let’s take a look at some of the factors that you should keep in mind before you download that all-important software.
How much are you willing to spend on the best voice-over software? If you’re on a budget, there are plenty of free audio recorders and software with free plans that you can try for yourself. On the other hand, if you want a program or app with more professional features, it may be worth paying a subscription. In the following guide, we will take a look at both free and paid options.
What features are you looking for here? If you want your voice-over to sound crisp and clear, it may be worth looking for an app or program that includes voice reduction. Some content creators may also want to look for apps that have special audio or visual effects.
Noise quality
Voice overs play an important role in the world of content — making sure that your audience can understand yours is key. For that reason, it’s important to look for voice over apps or software that offer a high level of noise quality. You can check out online reviews or testimonials of each of the programs before you decide which one works for you.
Ease of use
It’s okay if you’re not a professional audio or video editor. Few of us are! If you’re new to this field, you should look for a voice over app or voiceover software that is easy to use. Some software may use AI-powered capabilities to give you automatic voice over tracks. Alternatively, many of the best options allow you to record the voice over yourself.
4 of the Best Voice-Over Software for Mac & Windows PCs
If you want to record your voice overs using either your Mac or Windows computer, there are many options out there. Let’s take a look at the best voice-over software you can use.
1. Riverside

Price: Free (Free Version), $15.00 (Standard Version), $24.00 (Pro Version)
Compatibility: Windows and Mac
Riverside is the best voice over software if you’re new to the realms of recording. Once you’ve signed up to the platform, you can set up your own online studio to record either high-quality video or audio content. Launch your studio, and you can start recording your voice overs in a matter of seconds. The platform features speaker detection which is handy when it comes to editing your transcript after you have finished recording.
The software has a selection of features that help to make recording content a breeze. There’s background noise removal feature and level normalization, which make your voiceovers sound professional. What’s more, when you’ve finished with your recording, you also get an immediate transcript available in more than 100 languages.
- Straightforward recording for voice overs and interviews
- Highly accurate AI Transcription in 100+ languages
- Speaker differentiation so you can easily navigate through your transcript
- Background noise removal and audio level normalization
- Built-in text-based editor for editing as easy as deleting text in a transcript
- Separate audio and video tracks for each particpant
- Launch online studios and invite up to 7 guests to join you
2. Adobe Audition
Price: $31.49 /month
Compatibility: Windows and Mac
Adobe Audition is a professional digital audio workstation (DAW) and voice-over software from Adobe Inc. It can be used for various tasks, such as sound design, podcast editing , music production, and post-production for film and television. Adobe Audition offers a multitrack editing environment that allows users to record, mix, and edit. You can use the platform to record voice over tracks and add them to your audio or visual content. You may also want to import a video and add an extra audio track to it.
Key Features:
- voice-overSimple audio recording feature for voice-overs
- Allows users to edit audio files without altering the original recording
- Provides a range of audio effects, including EQ, reverb, delay, and compression
- Offers multitrack editing to record, mix, and edit tracks
Best For: Multitrack editing and overall quality
3. Audacity

Price: Free
If you’re new to the world of voice over software, here’s a free option with an easy-to-use interface. Audacity is a free and open-source audio editing software that allows users to record, edit, and manipulate digital audio. Its open-source nature also means it has a large e community of users contributing to its development and support. You can record audio from your computer's microphone or any other external device. It also has a built-in noise reduction feature that allows you to remove background noise from your recordings.
Key Features
- Work with multiple audio tracks simultaneously
- Easy to create complex audio compositions
- Straightforward interface ideal for beginners to get started
- Supports VST plugins
Best For: Basic music production
4. Pro Tools
.webp "voiceover presentation app")
Price: Free (Intro), $9.99/month (Artist), $29.99/month (Studio), $99.00 (Ultimate)
If you’re looking for the best voice over software, look no further. From Avid Technology, Pro Tools allows users to record, edit, and mix audio and MIDI tracks with various tools and plugins. This one offers multitrack audio recording with up to 192kHz audio quality, allowing users to capture high-quality recordings. When you’re done, you can add your own voice over as an extra track after recording it using the software.
The software has many built-in plugins and effects, including virtual instruments, guitar amp simulators, and audio effects like delay, chorus, and distortion. Pro Tools is particularly popular in the music industry, popular in recording studios, broadcast facilities, post-production houses, and by musicians, producers, and sound engineers.
- Record your voiceovers in the software
- Comprehensive mixing console that allows users to mix and automate audio levels
- Effects such as EQ, compression, and reverb, for each track in their project
- Powerful MIDI sequencing engine to edit MIDI tracks
- Supports virtual instruments and MIDI controllers
Best For: Musicians and content creators
4 of the Best Voice-Over Apps for Android and iPhone Devices
Whether you want to create a voice-over on the go or prefer using your mobile device, there are many apps from which you can choose. Fortunately, finding the best voice over app doesn’t have to be a challenge. Here are four options that you can give a go now.
1. Dolby On

Price: Free
Compatibility: Android and iOS
Dolby On is an app that allows you to capture and enhance the sound of your recordings using its advanced audio processing technologies. The app uses advanced signal processing algorithms to reduce background noise and other unwanted sounds. If you want to create polished recordings with voiceovers, this is the best voice over app.
Dolby On offers simple voiceover features that anyone can use. It is also an excellent tool for journalists who need to record interviews or other audio content in noisy environments. The noise reduction and spatial audio features make interviews clearer and professional.
- Free to use and easy to get started
- Reduces background noises and sounds
- Offers spatial audio processing that adds depth and dimension
Best For: Recording interviews on the go
2. Voice Record Pro

Compatibility: iOS
Voice Record Pro is a voice recording app for iOS devices that allows users to record audio using their device's built-in microphone or an external microphone. This is the best voice over software for educators and students. That’s because you can use Voice Record Pro for recording lectures, presentations, and other educational audio.
If you want to open the app and get started with creating a voice-over, this is a good choice. You don’t even need to press record. The app's ability to add markers and bookmarks to recordings makes navigating through long recordings and finding specific sections easy. You can then lay the audio track over existing content to make a voice-over.
- Several recording modes, including stereo, mono, and automatic gain control
- Add markers to their recordings, to navigate recordings and find specific parts
- Automatically starts recording when the app is opened
- Easy to capture important moments without having to start the recording manually
Best For: Educators and students
3. WavePad Audio Editor

Price: $2.99/month (WavePad Home Edition), $6.99/month (WavePad Masters Edition)
WavePad Audio Editor is a professional audio editing software from NCH Software that you can use to make voice-overs. If you’re on the hunt for the best voice over app, it’s worth checking out. You can easily record a voice track using it and then start editing.
The app offers a comprehensive set of audio editing tools that enable users to record, edit, enhance, and convert audio files in various formats. WavePad Audio Editor has features for removing background noise, hiss, hum, and other audio imperfections. As if that wasn’t enough, there’s a text-to-speech tool and a voice changer that can change the pitch and speed of recorded audio. It’s great for advanced audio editing tasks, such as mixing and mastering, audio restoration, and spectral analysis.
- Background noise, hiss, hum, and other audio imperfections removal
- Edit and process multiple audio files at once using the batch processing feature
- Text-to-speech tool and a voice changer tools
Best For: Professional audio editors

Price: $12.99/month (Splice Sounds+), $19.99/month (Splice Creator), $39.99/month (Splice Creator+)
Splice is a popular voice over app for mobile devices and offers a range of features that allow users to edit and manipulate audio files easily. You can create loops and sequences of audio clips using the app’s simple drag-and-drop interface.
Creating a voice-over is easy. You can drag and drop your content into the program and then record a track over it. As a bonus, you get access to an extensive library of royalty-free sound effects and music loops that can be used in audio projects. The app's wide range of effects and filters and ability to splice and manipulate audio clips make it an excellent tool for creating custom sound effects and soundscapes.
- Extensive library of royalty-free sound effects and music loops
- Simple drag-and-drop interface, ideal for beginners
- Selection of effects and filters and ability to splice and manipulate audio clips
Best For: Creating voice overs with sound effects
Best Practices for Recording Voice-overs
Now that you know what the best voice over software and apps are, let’s talk about how to record crisp recordings. Here are some quick tips to help you get the job done.
Choose a quiet environment
First up, you need to make sure you’re in a quiet place. Select a location that is free from external noise, such as traffic, people talking, or loud appliances. You might want to consider using sound-absorbing materials like acoustic foam (or even cushions!) to minimize unwanted echoes or reverberations.
Utilize a top-notch microphone
Next up, you need a decent microphone. This is essential to produce crystal clear and crisp audio. A condenser microphone is an excellent option for recording voice-overs, as it captures more detail and nuance than a dynamic microphone.
Position the microphone correctly
Where you put the microphone matters when voice recording. Place it at a distance of about 6-12 inches from your mouth and at a 45-degree angle. This position will help capture the natural sound of your voice while minimizing pops and breath sounds.
Prepare your voice
Before you start speaking, make sure you know what you’re going to say (i.e. have a script) and prepare your voice. It's a good idea to warm up your voice before recording by engaging in vocal exercises like lip trills and humming. This step will help you achieve a smoother and more natural-sounding recording.
FAQs on the Best Voice Over Software
Is Audacity good for voice over?
Yes! Since Audacity has a multitrack feature and allows for in-program editing, it’s a good option when it comes to recording a voice over. The program is free to use and you can either record your voice over using an external microphone or the built-in microphone on your computer.
Is there an app to do voice overs?
There are many apps you can use to do voice overs. You can use Riverside — available on Android and iOS devices — to record clear and professional audio apps. You can then lay this track over your chosen content to create a voice over.
How do I voice over on my computer?
You will need an app or specific software to record voice overs. In this guide, we have taken a look at some of the best voice over software and apps you can use. Take a look at the list and see which of the above meets your criteria. There’s sure to be one for you!
How do I make voice over audio?
To make a voice over audio, you need to have some content and a script. Knowing what you want to say is the first step in the process. Next, you can use voice over software or an app to record. You can then lay the voice over over any content you want.
Kendall Breitman
leads Riverside's community. She has over ten years of experience in television and video production for places like NBC and Bloomberg News. You’ll find Kendall on our webinar, where she shares her expert insights on content production, branding, and more.
Table of contents:
Try Riverside today
Record in studio quality without the studio. Transcribe, clip, and edit within seconds.

Keep reading
.jpg)
Riverside resources
Audio recorder.
Record high-quality audio with Riverside’s remote audio recording software. Easy, reliable recording from anywhere.
Record high-quality, uncompressed audio files.

Podcast recorder
Record podcasts in studio quality from anywhere with Riverside’s podcast recorder.
Record podcasts in studio quality from anywhere.

Start creating with Riverside

Podcast guides
© 2023 RiversideFM, Inc.
You’re using an older browser version. Update to the latest version of Google Chrome , Safari , Mozilla Firefox , or Microsoft Edge for the best site experience.
- Products iSpring Suite iSpring Learn
- Use Cases Training organizations Onboarding Compliance Training Induction Training Product Training Channel Partner Training Sales Training Microlearning Mobile Learning
- Company About Us Case Studies Customers Partnership Course Development Contact Us Academy Blog Webinars Guides Experts on iSpring
- Knowledge Hub Knowledge Hub Academy Webinars Articles Guides Experts on iSpring
- Language EN English Français Deutsch Español Italiano Nederlands Português Polski 中文 日本語 العربية Indonesia
- Shopping Cart
Voice-Over PowerPoint Software
Ispring suite 11.7.
Turn your message into a video presentation fast and easy right in PowerPoint.
Create video presentations in PowerPoint
iSpring gives you powerful capabilities to create interactive online presentations. Right in your PowerPoint. Fast and easy. No training required!
How iSpring Suite works
With iSpring Suite you can rapidly create interactive presentations in PowerPoint, enhance them with rich media , branch viewing scenarios, polls and surveys, and immediately share them all worldwide.
Add a spokesperson to your slides
The easy-to-use video editor helps you add a presenter video and adjust it to your slides. Use your webcam or import a pre-made video file.
Energize your presentation
Engage your audience with rich-media content and interactivity.
- Use video in your slides, including YouTube and Vimeo
- Insert live, navigable web pages
- Use PowerPoint animations, hyperlinks and buttons
- Create polls, surveys, and drag-and-drop quizzes
Share your message in one click!
Easily publish your presentation to portable online formats and share it on YouTube, iSpring Cloud, or SharePoint, put it into an LMS, or just host it on your website or blog.
Go beyond PowerPoint
An iSpring presentation combines your slides and presenter video within a customizable, adaptive player to provide an outstanding user experience that goes far beyond PowerPoint.
Your branding
Add your logo and adjust the player to your corporate style.
Dynamic layout
Swap slides and presenter video on the fly to emphasize the key points of your message.
Adjustable controls
Show and hide, change color and language of every control to your preferences.
Custom player layout
Choose one of 8 standard layout presets or create your own custom player layout.
Color schemes
Use one of 16 standard color presets or create your own.
Smart navigation
Make your video presentation easy to navigate with a timeline, slide panel, etc.
Your presentation plays perfectly on any platform
The iSpring adaptive player accurately displays your presentation on desktop computers, laptops, tablets and smartphones with any screen size.
Windows Phone
Android Tablet
Android Phone
Deliver your presentation to millions
Put your presentation on Youtube directly from PowerPoint and make it available to millions on the world"s most popular video hosting site.
The iSpring video presentations software can be used with virtually all modern Learning Management Systems (LMS) to share your knowledge.
Your Website
For techies who know how to use FTP, etc., iSpring provides the option to upload presentations directly to a website.
iSpring Play Mobile Apps
The iSpring Play app allows you and your audience to store your presentations on iPad, iPhone or Android, and view them even on an airplane when there's no Internet connection.
Award-Winning Software
iSpring was awarded the Brandon Hall Gold Medal for Best Advance in Content Authoring Technology. The Brandon Hall Excellence in Learning Technology Awards are presented by the Brandon Hall Group, a leading training and development research firm.
Success stories from all over world
I really appreciate iSpring’s solution because it's simple to use, it's an invaluable tool, it aligns to my education and business priorities and it’s a definite priority necessity in my life!
I would like to recommend iSpring products as the product gives a very good presentation and it is so easy to use. The after sales service is exceptional.
We have been using iSpring for several years now. It’s truly an amazing product and our developers constantly find new uses for it. We use it to share presentations online and on our intranet, render browser-friendly videos for various uses, including eLearning, intranet sharing, and online resources.
iSpring’s software worked seamlessly with our existing PowerPoint slide presentations and the uploading process (to the Web) allowed our slides to be viewed on both desktop and mobile platforms without any extra coding on our part.
Although your products are easy to use and documentation is very thorough, what stands out for me is your customer service. You genuinely care for me, the customer. Your company is a great blend of excellence in heart and mind.
I Love iSpring because it was built on the concept of getting the results you desire with the minimum effort, maximum reliability, better user experience and above all within the shortest period of time!
Test-drive iSpring Suite
Start creating an awesome digital story in PowerPoint. It's fast and easy.
We use cookies to collect info about site visits and personalize your experience. See our Cookie Policy for more details.
Manage your cookies
Essential cookies are always on. You can turn off other cookies if you wish.
Essential cookies
Analytics cookies
Social media cookies
How to Add Voiceovers to Microsoft Presentations? Check Ultimate Guide to Add Audio to PowerPoint!

- July 8, 2024
Table of Content
Ever felt your PowerPoint presentations lack that extra punch? You’ve poured your heart into the slides, but the delivery feels flat. Here’s where the magic of voiceover narration comes in!
Imagine this – instead of static text and bullet points, your audience hears your voice guiding them through the presentation. You can explain complex ideas, highlight key points, and even tell captivating stories – all while keeping your audience engaged. Studies show that adding a voiceover to Microsoft presentations can significantly improve information retention. Think about it – a financial advisor using voiceover to explain investment options in a clear, conversational way. It’s far more impactful than simply listing numbers on a slide.
Voiceover isn’t just about clarity, it’s about connection. You can add personality, inject enthusiasm, and even answer unspoken questions before they arise. It’s like having a personal guide for your audience, ensuring they grasp the full message of your presentation. Ready to unlock powerful presentations with voice overs? In this article, we will show you exactly how to add voiceover to your Microsoft Presentation and transform it from good to great!
What is a Voiceover in Microsoft Powerpoint?
A voiceover in Microsoft PowerPoint is an audio narration that accompanies a PowerPoint presentation. It involves recording audio that plays sequentially with each slide.
There are two main ways to add a voiceover in PowerPoint –
- Record audio for individual slides directly in PowerPoint . From the Insert tab, choose Audio > Record Audio. This allows recording commentary specifically for that slide.
- Record a single audio file outside of PowerPoint that narrates the entire presentation . Use audio software like Audacity to record a single linked narration. Then import the audio file into PowerPoint.
For example, a teacher created a lesson about photosynthesis. She recorded a 180-second audio file, explaining each concept as the corresponding slide appeared. This allowed her to narrate seamlessly from “Introduction” to “Conclusion” while keeping students engaged.
Alternatively, a marketer recorded brief 5-second narrations directly onto individual slides about different product features. This approach provided targeted audio commentary in sync with each visual.
In both cases, the voiceovers have the capacity to bring the dry slide content to life, guiding the audience through the presentation and keeping them focused on key messages.
Do you want to start an online business as an educator? Inquire now by providing your contact number below and experts at Classplus will contact you to kickstart your business online!
Why Should You Add a Voiceover to Microsoft Presentation?
Adding a voice over to your Powerpoint Presentation can make your slideshow more engaging and easy to follow for the audiences, who might otherwise find it dry and decontextualized. Voice overs make your PowerPoint presentations live live presentations, where you as a presenter, get the opportunity to talk “between-the-lines” or what is not present on the slides. The following are few reasons why you should add a voiceover to your Microsoft Presentation –
- Flexibility: Recorded presentations with voice overs can be viewed at any time and don’t require the presenter to be physically present. This is especially useful for asynchronous learning or remote presentations.
- Professionalism: A well-rehearsed voiceover can add polish and make your presentation sound more professional.
- Improved Comprehension: Voiceovers allow presenters to add explanations and insights that may not be readily apparent from the slides alone. This can improve audience understanding of the material, as you are also explaining what is “between the lines.”
Also check this Beginner’s Guide on How to Create an Online Course?
How to Add a Voice-Over to Your Microsoft Presentation?
Adding a voice over to your PowerPoint Presentation can be a game changer for your presentation. It’s like having a personal guide for your audience, keeping them engaged and understanding your message better. Think of a complex sales pitch – a voiceover can explain the features and benefits in a clear, conversational way, making it easier for potential customers to remember the key points. So, elevate your Microsoft presentations by adding effective voiceovers using the steps given below –
Step 1 – Write a Script
Before you hit record, having a well-structured script acts as your roadmap for a clear and concise voice-over. Here’s how to craft an engaging script:
- Know Your Audience: Tailor your language and examples to resonate with your listeners. Are they technical experts, potential investors, or a general audience?
- Start Strong – Grab Attention: Hook your audience from the beginning with a thought-provoking question, a surprising statistic, or a captivating story related to your topic.
- Organize Your Content: Create a logical flow that guides your audience through the key points of your presentation. Use transitions like “Next, let’s discuss…” or “Building on this point…” to connect ideas smoothly.
- Keep it Concise: Resist the urge to cram everything onto the slides. Focus on highlighting the essential information and let your voice-over elaborate.
- Speak in Conversational Language: Avoid overly technical jargon or stiff, formal speech. Aim for a clear, professional tone that feels natural and engaging, like you’re having a conversation with your audience.
- Examples are Powerful: Use relatable anecdotes, case studies, or data to illustrate your points and make your presentation more memorable.
For instance, if you’re presenting a new marketing strategy, your script could begin with a surprising statistic about the decline of traditional advertising methods. Then, you could introduce your company’s innovative approach with a clear explanation and a real-world example of its success.
Step 2 – Record Your Voice Over
With your script in hand, it’s time to bring it to life with your voice. Here are some tips for a professional-sounding recording:
- Find a Quiet Space: Background noise can be distracting for listeners. Choose a room free from echo or background sounds like traffic or phone notifications.
- Warm Up Your Voice: Do some simple vocal exercises to loosen up your vocal cords and improve your articulation.
- Practice Makes Perfect: Read your script aloud a few times beforehand to get comfortable with the flow and timing.
- Speak Clearly and Confidently: Maintain good posture and project your voice for clarity. Enunciate each word carefully and avoid speaking too quickly.
- Embrace Pauses: Strategic pauses can add emphasis to important points and give your audience time to absorb the information. Avoid filler words like “um” and “ah.”
- Use Different Vocal Techniques: Vary your pace and pitch to avoid monotony. Lower your voice for dramatic effect or raise it to emphasize key points.
Imagine you’re delivering a presentation to a small group of colleagues, not a vast auditorium. This conversational approach will make your voice-over feel more natural and engaging.
Step 3 – Add Voice Over to Your PowerPoint Presentation
Microsoft PowerPoint offers two main ways to integrate your voice-over recording. These are –
Method A: Recording Directly in PowerPoint (Synchronized Narration)
This method is ideal if you want your voice-over to be in perfect sync with your slides. Here’s how to do it:
- Navigate to the “Slide Show” tab.
- Now, in the “Set Up” section, click on “Record Slide Show.” This will open a recording toolbar.
- Decide on your starting point. Do you want the narration to begin from the current slide or the entire presentation? Select the desired slide and click the red “Record” button.
- Speak Clearly and Confidently! A countdown will appear, then begin your narration following the tips from Step 2.
- Advance Slides and Annotations (Optional): While recording, use the keyboard shortcut “Ctrl + Click” to bring up a menu for advancing slides, inserting screen blackouts, or using a laser pointer.
- Pause and Regroup: Made a mistake? Simply press “P” to pause and correct yourself when you resume.
- End Recording: Once finished, click the “Esc” key to stop recording.
Method B: Inserting Pre-Recorded Audio (More Flexible)
This method is more flexible if you want to pre-record your narration in a separate audio editing software or have an existing audio file you want to use. Here’s how to do it:
- Prepare Your Audio: Ensure your audio file is in a compatible format like MP3 or WAV. Edit the audio for clarity and background noise reduction using audio editing software (if needed).
- Insert the Audio: Go to the “Insert” tab and navigate to the “Audio” section. Here, you can choose between “Audio on My PC” to browse and select your pre-recorded file or explore online options with “Audio Online.”
- Positioning and Playback: Once inserted, drag the audio icon to the desired location on the slide. You can right-click on the icon to access playback options. Choose “Play in Sequence” if you want the audio to play automatically when you reach that slide during your presentation. “Play across slides” will make the audio play continuously throughout the presentation.
Examples and Engagement Tips for Adding Voice Overs to PowerPoint
- Highlight Key Points: Use your voice-over to emphasize important information on your slides, rather than simply reading the text verbatim.
- Vary Your Delivery: Change your vocal pitch and pace to keep your audience attentive. Add pauses for emphasis and use storytelling techniques to make your presentation more engaging.
- Background Music (Optional): Consider adding subtle background music to enhance the overall mood of your presentation, but ensure it doesn’t overpower your narration.
By incorporating these methods and tips, you can transform your static slides into a dynamic and informative presentation with the power of voice-over narration.
Step 4 – Sync the Audio with Slides
When recording narration directly in PowerPoint (Method A from Step 3), the magic of automatic syncing happens! PowerPoint captures the timing of your speech between slides, creating a seamless link.
- Preview and Fine-Tuning:
Play the slideshow to hear your voice-over with the slides. Right-click the audio icon on the slide thumbnail to access “Trim Audio” or “Fade In/Out” for minor adjustments.
- Need a Bigger Fix?
For significant timing issues on a specific slide, you can re-record just that part using “Record From Here” in the Slide Show tab. This maintains the previous slide sync while letting you perfect the one needing attention.
Let’s Sum it Up!
Level up your PowerPoint presentations with the power of voiceover! Just like you cracked the code on crafting a captivating script, mastering the recording process is a breeze with PowerPoint’s user-friendly tools. Whether you choose synchronized narration for a perfectly timed flow or pre-recorded audio for ultimate flexibility, voiceover takes your slides from static visuals to dynamic experiences. It’s like adding a personal touch that supercharges audience engagement and memory retention. So, ditch the monotonous slideshow and embrace voiceovers for Microsoft Presentations to add the “wow” factor to your presentations!
How to Add Audio to PowerPoint? FAQs
To add a voiceover in PowerPoint, follow the below steps – 1. Open your PowerPoint presentation. 2. Go to the Slide Show tab and then, click “Record Slide Show” button. 3. Next, click the “Record from Beginning” option. 4. Narrate your presentation by clicking through slides and recording your audio. 5. Click “Stop” button when finished. Your recording will be saved and played back with your presentation.
To voice over text in PowerPoint: 1. Select the text box or shape containing the text you want to narrate. 2. Then, go to the Insert tab and click the “Audio” button. 3. Select “Record Audio” and start recording to narrate the selected text. 4. Click “Stop” when done. The audio will be attached specifically to that text object. 5. You can also create speaker notes containing the text you want to voice over and record audio for the notes.
The easiest way is by recording directly in PowerPoint. It allows you to record directly into the program and edit mistakes easily without having to re-record completely.
Yes, you can record a presentation using PowerPoint’s built-in presenter mode. However, it only allows for a single take with no editing. Using a separate audio recording program provides more flexibility to record multiple takes and edit the audio file before adding it to your presentation.
The most common file formats for voice overs that can be imported into presentation software are WAV and MP3. WAV provides higher quality audio but takes up more storage space. MP3 is a smaller file size with slightly lower quality.
In PowerPoint, you can manually advance slides by clicking through them while recording your audio in presenter mode. When adding a pre-recorded audio file, align the start of the audio with the first slide and PowerPoint will automatically advance slides as the audio plays.
Yes, popular presentation software like PowerPoint and free video editors allow you to add caption/subtitle (SRT) files to your voiced presentation for accessibility and searchability purposes. The captions can be generated automatically during audio editing or manually added later.

Shivangi Bhatia
- Classroom Management
- Online Classroom
- Online Teaching
- 10 minute read
Digital Classroom: Definition, Meaning, Equipment List & Tips to Create Digital Classrooms
- July 14, 2024
- Teach Online
- 6 minute read
How to Teach French Online & Earn Money as an Online French Tutor?
- July 11, 2024
- Growth Tips From Experts
- Online Growth
How to Use Email Marketing Effectively to Sell & Promote Online Courses?
- July 10, 2024
- 8 minute read
How to Start a Life Coaching Business? Your Ultimate Guide in 7 Steps!
- July 9, 2024
Take the power of AI on the go with the Copilot Copilot app. Your everyday AI companion.

What will you do with Copilot?

Answers are just the beginning
Find out more about what you can do with AI-powered search.
Search for anything
Ask any question – short or long, specific or vague. Then follow-up in chat.
Find answers, faster
Get summaries. Make comparisons. Request personalized explanations.
Kickstart your creativity
Write emails, poems, meal plans and more with just a prompt. You can even create images.
Microsoft Edge is the best browser for Copilot experiences.
The future of browsing and searching is here with Microsoft Edge, now with the new Copilot built in. Ask complex questions, get comprehensive answers, summarize the information on a page, dive deeper into citations, and start writing drafts — all side-by-side while you browse, with no need to flip between tabs or leave your browser. Just click the Copilot icon in your sidebar.
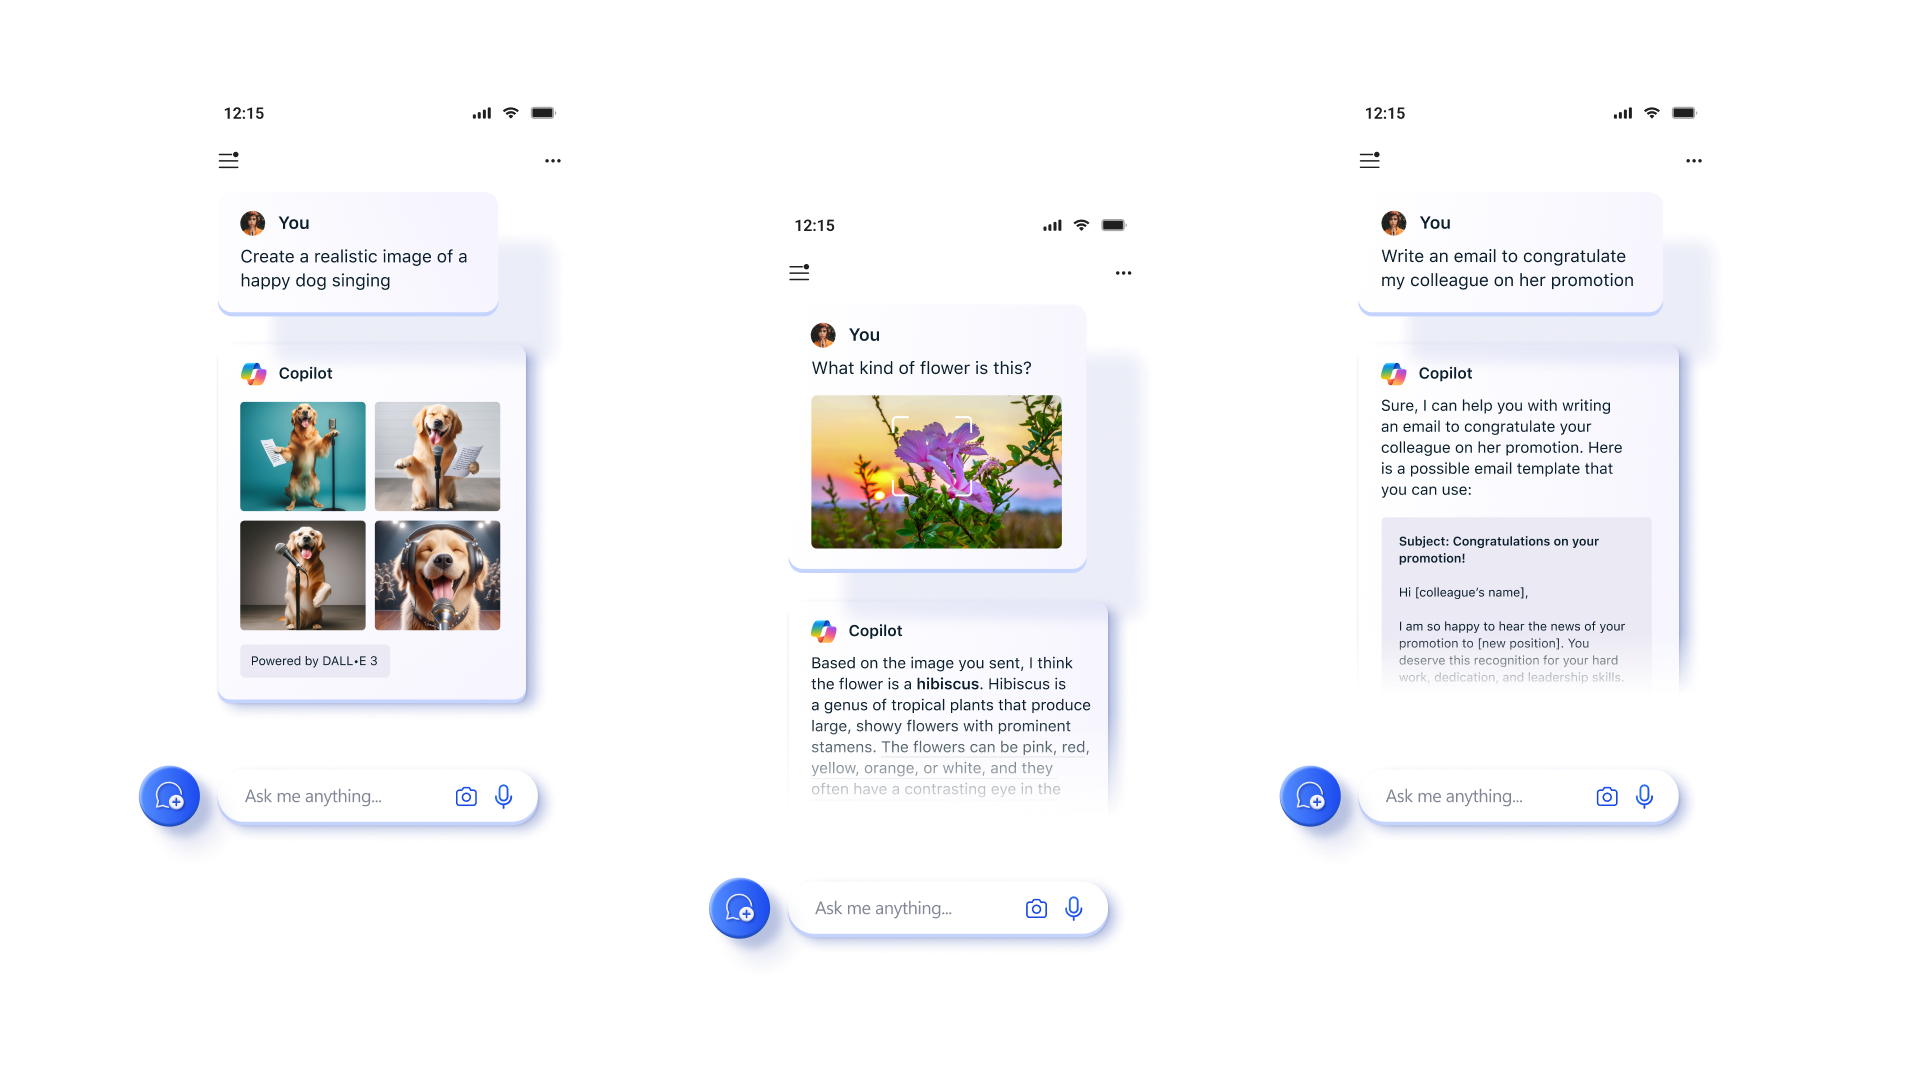
Bring your Copilot on the go
With the new Copilot app, you can search and access your Copilot anytime, anywhere. Ask your Copilot anything you want, from trivia questions to creating images. Like a friend, Copilot will give you quick and helpful answers, along with suggestions for what to do next. You can even use voice to search or chat, and your history and preferences will sync across all your devices.
Frequently Asked Questions
Copilot is like having a research assistant, personal planner, and creative partner at your side whenever you search the web. With this set of AI-powered features, you can:
- Ask your actual question. When you ask complex questions, Bing gives you detailed replies.
- Get an actual answer. Copilot looks at search results across the web to offer you a summarized answer and links to its sources.
- Be creative. When you need inspiration, Copilot can help you write poems, stories, or even create you a brand new image.
With the Copilot experience, you can also ask follow-up questions such as, “can you explain that in simpler terms,” or, “give me more options” to get different and even more detailed answers in your search. However, in Copilot, each conversation will have a limited number of interactions, to keep the interactions grounded in search.
Copilot builds on the existing Bing experience to provide you with a new type of search.
- Beyond generating a list of relevant links, Copilot consolidates reliable sources across the web to give you a single, summarized answer.
- Search in a way that feels natural to how you talk, text, and think. Copilot takes your complex searches and shares back a detailed response.
- In the Copilot experience, you can chat naturally and ask follow-up questions to your initial search to get detailed replies.
- When you open the Copilot experience on the Edge sidebar, you can also search and summarize in reference to the specific webpage you are viewing without changing tabs.
- Copilot can be used as a creative tool. It can help you write poems, stories, or even share ideas for a project.
- Ask questions as if you were talking to a person. This means including details, asking for clarification or more information, and telling Copilot how it can be more helpful to you. Here’s an example: “I’m planning a trip with my friends in September. What beaches are within a 3-hour flight from London Heathrow?” Then follow up with something like, “What should we do when we get there?”
- Ask directly for tips on how to interact with Copilot. Try things like, "What can you do?" "Can you help me with X?" "What are your limitations?" Copilot will let you know when there's something it can't help with.
- Copilot tries to keep answers fun and factual, but given this is an early preview, it can still show unexpected or inaccurate results based on the web content summarized, so please use your best judgment. We’re always learning, and we welcome feedback to help Copilot improve. Use the feedback button at the bottom right of every Copilot page to share your thoughts.
When in creative mode in Copilot, you can now ask Copilot to create a brand new image for you, using only your words. Just say ‘create me an image of’ or ‘draw me an image of’ and finish off with exactly what you’re looking for. Image Creator works best when you’re more descriptive, so get creative and add details like adjectives, locations, or even artistic styles such as ‘digital art’ and ‘photorealistic.’
Here’s an example: instead of typing ‘create me an image of a creature,' try typing ‘create me an image of an orange panda bear wearing sunglasses on the beach, digital art.’
Copilot searches for relevant content across the web and then summarizes what it finds to generate a helpful response. It also cites its sources, so you’re able to see links to the web content it references.
At Microsoft, we take our commitment to responsible AI seriously. Copilot is being developed in accordance with our AI principles . We are working with our partner OpenAI to deliver an experience that encourages responsible use. For example, we have and will continue to partner with OpenAI on foundational model work, we have designed the Copilot user experience to keep humans at the center, and we have developed a safety system that is designed to mitigate failures and avoid misuse with things like content filtering, operational monitoring and abuse detection, and other safeguards. The waitlist process is also a part of our approach to responsible AI. We'll be taking user feedback from those with early access to Copilot to improve the tool before making it broadly available. Visit the Bing blog for the latest on our learnings and progress.
Responsible AI is a journey, and we'll continually improve our systems along the way. We're committed to making our AI more reliable and trustworthy, and your feedback will help us do so.
To learn more about how to use Bing responsibly, please see our Terms of Use and Code of Conduct .
Think of Copilot as an intelligent companion with a wealth of knowledge – almost like a librarian. And just like a librarian who ensures that the information shared is appropriate and helpful, AI has certain guidelines it follows. These are in place to make sure that Copilot:
- Respects privacy: It won’t dive into personal data or sensitive topics that could compromise someone’s privacy.
- Stays safe: It avoids creating content that could be harmful or offensive.
- Keeps it legal: It steers clear of discussions that could lead to illegal activities.
- Protects the boundaries of human-to-AI conversation: It focuses on providing information that’s beneficial and avoids engaging in controversial topics that may indicate it’s anything other than artificial intelligence.
So, if Copilot doesn’t respond to a certain topic, it’s likely because it’s following responsible AI guardrails to ensure a positive and safe experience for everyone.
While Copilot works to avoid sharing unexpected offensive content in search results and has taken steps to prevent its Copilot features from engaging on potentially harmful topics, you may still see unexpected results. We’re constantly working to improve our technology in preventing harmful content.
If you encounter harmful or inappropriate content in the system, please provide feedback or report a concern to Copilot by opening the menu at the top right corner of a response, and then clicking the flag icon. You can also use the feedback button at the bottom right of every Copilot page. We will continue working with user feedback to provide a safe search experience for all.
Copilot aims to base all its responses on reliable sources - but AI can make mistakes, and third-party content on the internet may not always be accurate or reliable. Copilot will sometimes misrepresent the information it finds, and you may see responses that sound convincing but are incomplete, inaccurate, or inappropriate. Use your own judgment and double check the facts before making decisions or taking action based on Copilot’s responses.
To share site feedback or report a concern, open the menu at the top right corner of a response, and then click the flag icon. You can also use the feedback button at the bottom right of every Copilot page.
You can access Copilot at https://copilot.microsoft.com/ or with the Microsoft Edge browser , via the Edge sidebar by clicking the Copilot icon on the top right. To learn more tips about using Copilot in Edge, and other AI features in the browser, visit AI tips page .
You can now chat with Copilot on your phone in the Microsoft Edge app to get answers from the web, create written content, gather trip planning ideas, and more - all generated by AI. You’ll also soon be able to access your chat history, share and export chats, and ask questions about the content you’re viewing such as summarizing a page or asking for recipe substitutions. These capabilities will start rolling out to Edge mobile soon. Each conversation will have a limited number of interactions, to keep the interactions grounded in search.
Copilot in the Edge app also supports audio interactions—just tap the microphone icon and you can ask Copilot your question and hear a voice response.
To share feedback or report a concern in the Edge app, tap and hold on the response and then select either thumbs up or down option for feedback. We welcome your concerns and will continue to work with user feedback to the improve the Copilot in Edge app experience for all users.
You can now chat with Copilot with Skype to get answers from the web, create written content, gather vacation planning ideas, and more—all generated by AI. You can chat with Copilot in Skype in a one-on-one conversation or add it to a group with your friends, family, or colleagues.
When Copilot is part of a group in Skype, it can only access the chat when mentioned using @Copilot. Copilot will also refresh its memory and start over with every new mention.
However, there a few key things to remember:
- When summarizing a conversation, Copilot may get your pronouns wrong. If this happens, you can tell Copilot to correct your pronouns using @Copilot in the message.
- Copilot does not support audio or video interactions in Skype, and it will not access or participate in any audio or video conversation.
- Copilot aims to base all its responses on reliable sources, but AI can make mistakes, and third-party content on the internet may not always be accurate or reliable. Use your own judgement and double check the facts before making decisions or taking action based on Copilot’s responses in Skype.
This is a preview experience, and we are consistently working on providing all users with a positive Copilot in Skype experience. To share feedback or report a concern, right click on your response for desktop or tap and hold on your response for mobile, then select Report a Concern.
You can now chat with Copilot on GroupMe to get answers and inspirations from the web, create written content, design new images, ask for study tips, and more—all generated by AI. You can start a chat with Copilot on GroupMe in two ways: you can tap on the Copilot icon at the top of the GroupMe chat list, or you can take action to “Ask Copilot” by long-pressing on any chat message.
GroupMe users can sign into their Microsoft personal account to access even more features with Copilot. By signing in with your Microsoft personal account, you will gain access to Copilot chat history, ability to generate images, and increased daily conversation limit.
To share feedback or report a concern on any Copilot response you find on GroupMe, navigate to Copilot chat then tap the More (…) menu and select Feedback. We welcome concerns and feedback from our community to improve the Copilot in GroupMe app experience for all users.
Visual Search allows you to input images into Copilot and ask questions about them. You can ask questions about images that are difficult to describe, for example; get a recipe for a dish you don’t know the name of, identify a dog breed you don’t recognize, and much more. To use Visual Search, click on the camera icon in the input bar in Copilot, upload a picture from your device or provide a website link, and ask away!
Yes, the conversations you have with Copilot are saved in the sidebar within Copilot. We call this “Chat history” and you can view, access, and download each conversation you previously had with Copilot. For example, if you ask Copilot for information about the first person to walk on the moon, the conversation you have will be saved in Chat history, which you can return to at any time.
By default, we store Chat history data for 90 days from the last update to the conversation.
There are two settings available in Copilot Settings to control Copilot data:
- You can turn off Chat history. Note that turning this off also turns off personalization if you have it enabled.
- You can turn off personalization. If you use this setting, you will still have access to Chat history and all future chats are saved, but Copilot responses are not personalized.
If you are looking to remove chat conversations from your Chat history, you may do so by: (on desktop) clicking on the trashcan icon that appears when you hover over the chat name; or (on mobile) loading a chat from the Chat history page and then tap on “...” on the top right corner. This will remove your conversations that are stored within Copilot history and the chat will no longer be used to personalize your experience. You can also turn off Chat history entirely, which prevents your search history from being saved as part of these in-product controls.
If you are looking to completely delete your Chat history including the underlying search queries stored in your Search History, in addition to the step described above, you will also need to navigate to the Microsoft Privacy dashboard, click Search History, and delete all instances that appear as “Copilot AI.”
Yes, we keep some of your chat history, including some prompts, to provide and improve the service. Your prompts are maintained in accordance with our Privacy Statement and used to monitor performance, troubleshoot problems, diagnose bugs, prevent abuse, and for other product performance analytics necessary to provide and improve the service. In addition to the controls that have been available on the Privacy Dashboard, we are now providing new in-product controls to view and delete the chats used for personalized answers. Only the data visible in Chat history in product is used for personalized answers.
To understand more about Microsoft Privacy Practices, review the Microsoft Privacy Statement and our privacy center .
To help with quality and improve our products, human reviewers may read, annotate, and process your Copilot conversations. Please do not enter or upload confidential information in your conversations or any data you would not want a reviewer to see or Microsoft to use to improve our products, services, and machine-learning technologies.
If you turn on personalization, we will use your chats in Chat history, including inferences we may make from the context of your prior chats, to personalize your experience. Copilot cannot delete Chat history through a chat request. If you do not want us to personalize using a specific conversation from your Chat history, on desktop you can remove that specific conversation by hovering over a Conversation title and clicking the trash can icon. On mobile, first open the specific chat by going to Chat history page then tap “...” on top right corner to see the Delete option. You can turn off personalization at any time by visiting the Copilot Settings page through the settings in the top right corner of the page.
You can control what Chat history is used to personalize your experience. Copilot cannot delete Chat history through a chat request. If you don’t want Copilot to personalize using a particular chat, delete the chat from Chat history. Once deleted, the chat will not be used to personalize the answers.
Allowing personalization means you’re letting Microsoft use your Chat history to make Copilot more personalized for you. Copilot remembers your Chat history and may make inferences from that Chat history about your interests, hobbies, etc., to provide personalized answers.
You may need to turn on personalization to get a more tailored experience with personalized recommendations from Copilot. In the Copilot box, you’ll be informed about personalization or asked affirmatively to turn on personalization. You can check your personalization setting using the Settings menu. You can toggle the personalization control on or off at any time.
We’re following our Responsible AI practices and rolling out this feature slowly—as a result, the feature may not yet be available to certain audiences or locations.
You can turn off personalization through the personalization setting in the Copilot Settings menu. With personalization on, you also can control which chats are used for personalization by deleting Chat history that you do not want used for personalization.
Yes, you can turn off personalization of Copilot within Copilot settings at any time. Turning off personalization won’t turn off Chat history. You can turn off Chat history in Copilot Settings. You can use Chat history without personalization, but you cannot use personalization without Chat history since there is no Chat history available to personalize your experience.
If a user changes personalization consent from “yes” to “no”, we will delete the user personalization profile. We will still keep your Chat history unless you delete Chat history, so you can view your past conversations, but your future Copilot responses will no longer be personalized.
Regardless of your user settings, Copilot is designed not to personalize interactions based on some topics to protect your privacy and to prevent the use of potentially sensitive information. For example, we take steps to exclude context from your past conversations that may be considered sensitive, even if Chat history and Personalization are set to “ON” in your settings. Users should use caution in sharing any information they consider to be sensitive with Copilot.
- * Feature availability and functionality may vary by device type, market, and browser version.
- * The content on this page may have been translated using AI.
Voice Dream - Read Out Aloud 4+
Text to speech reader, voice dream llc.
- 4.6 • 9.6K Ratings
- Offers In-App Purchases
Screenshots
Description.
Apple Design Award Winner! Voice Dream - Read Aloud lets you listen to PDFs, textbooks, Web pages, emails, and books using advanced AI Text To Speech! Featured by Apple as Best New App and App of the Day in 81 countries. Voice Dream - Read Aloud is also part of App Store Permanent Collections in Education. ---------------------------------------------------------------------------------------------------- “Both experts recommend Voice Dream Reader as the best app in the text-to-speech space.” - Wired “This app is one of the best educational finds of my entire career.” - Forbes “As a user myself and as a mother of a child with dyslexia, I am blown away by the features of Voice Dream.” - Quartz “Voice Dream Reader is hailed by many as the best mobile text-to-speech (TTS) app.” - Examiner ---------------------------------------------------------------------------------------------------- Text-to-Speech - 36 built-in iOS voices in 27 languages are also available for free. - 200+ additional premium voices in 30 languages from Acapela, NeoSpeech and Ivona available. - Correct pronunciation with your own pronunciation dictionary. - All voices work offline and play in the background even with the screen locked. Supported Document Formats - PDF, Plain text, MS Word, MS PowerPoint, RTF, and Google Docs. - Textbooks - Web articles. - Bookshare Books. - EPUB eBooks. (DRM-free books only. Kindle, iBooks and most commercial eBook platforms are not supported.) - DAISY text-based books and audiobook. - Audiobooks in MP3, MP4 or zipped MP3 format. - Rich text and image support for all documents. Built-in Scanner - Scan paper documents with the camera for text-to-speech. - State-of-the-art A.I. is fast and accurate, even in poor lighting conditions. - Works entirely on device: No need for internet and your data stays private. - Only languages using Latin alphabets are currently supported. Reading Styles - Tee-up a list of articles and play while you drive, walk or run. - Spoken word is highlighted to improve comprehension and retention. - Auto-scrolling and full screen, distraction-free mode to help reader focus. - Finger reading. For beginners to read by at running a finger under each word. - Pac-Man. Harvard and MIT developed speed-reading method for everyone to read at 2x speed with no loss of comprehension. - High contrast and large font size for low vision readers. - Optimized for VoiceOver, Braille and switch control. Tools - Recognize text for scanned PDF documents. - Bookmarking, text highlighting and annotation. Highlights and notes can be exported. - Full-text search. - Built-in dictionary. - Automatically skip text in PDF header and footer. Content Sources - Native support for Dropbox, Google Drive, iCloud Drive, Pocket, Instapaper and Evernote. - Native access to Bookshare. - Safari extension to save Web pages and Web addresses. - Support for Box and OneDrive via iOS Document Picker. Library Synchronization - Your entire library, including folders, reading locations, bookmarks and annotations are synchronized across all your devices using iCloud Drive A subscription is required to access the app. A free trial is offered to new users. Terms of Use: https://www.apple.com/legal/internet-services/itunes/dev/stdeula
Version 4.36.3
- Improvements to article parsing - Support for Personal Voice - Fix search for VoiceOver - Bug fixes
Ratings and Reviews
9.6K Ratings
Editors’ Choice
Kids aren’t the only ones who like being read to. Whether you’re listening to a story on your commute or you’d like to hear your big work presentation read back to you, Voice Dream Reader can helpfully turn text into speech.
Long overdue review
I purchased this app several years ago. Since I purchased it I have used it to “read” hundreds of books and articles. Most of the material I have “read” with this app is not available as a professionally narrated audio and never will be. This includes many obscure religious and medical texts and manuscripts — more than I can count. I am constantly on the go and almost never have time to sit down and read a printed or digital book. Yet, with this app I have been able to get through many thousands of pages of material that never would have been possible otherwise. I listen nearly every day while I drive, walk, jog and sometimes while I work. Although the app is not perfect (pronunciation is sometimes incorrect) it is good enough for me to understand. I appreciate that the developer has continued to improve the product. For example, in the last year I discovered I can use it to listen to podcasts and even videos that I download for offline use. I would be ungrateful not to leave a 5 star review, because without exaggerating I can say that this has changed my life. I now have a steady stream of valuable information flowing to my mind. This is information that was simply out of reach to me before — mainly due to constraints on my time. This has helped me immensely with preparing to teach classes and in my medical career.
Legacy Perspective
This is a really amazing app, and I am very happy about the recent decision to allow legacy users to continue to use it. The interface is easy to use, the font size and voices and speed choices are great, I can’t say enough positive things about what the app has meant to us. It was a shock to realize it could go away, as Voice Dream Reader has become so important in our family, and although occasionally something has gone wrong briefly, it’s always quickly gone back to working smoothly. I am sad about the move to subscription, and at such a high price. I know it would be complex, but hope that the developers if they ever go to subscription only, will keep legacy people in mind and find a way to allow items to be exported. I am sad that the subscription price is likely to be an obstacle to young children ever benefiting from this app, as it takes awhile to learn to use assistive technology and it’s hard to imagine parents wanting to spend so much on something their child will not be ready to use for some time, maybe months, after trying out. Still, I hope that the app can be enjoyed and appreciated by as many as possible, and although most will likely not be young children anymore, this app is worth trying for anyone who needs or wants to listen to text.
App Privacy
The developer, Voice Dream LLC , indicated that the app’s privacy practices may include handling of data as described below. For more information, see the developer’s privacy policy .
Data Used to Track You
The following data may be used to track you across apps and websites owned by other companies:
- Identifiers
Data Linked to You
The following data may be collected and linked to your identity:
- Contact Info
Data Not Linked to You
The following data may be collected but it is not linked to your identity:
- User Content
- Diagnostics
Privacy practices may vary, for example, based on the features you use or your age. Learn More
Information
English, Arabic, Bulgarian, Catalan, Croatian, Czech, Danish, Dutch, Finnish, French, German, Greek, Hebrew, Hungarian, Italian, Japanese, Korean, Norwegian Bokmål, Polish, Portuguese, Romanian, Russian, Simplified Chinese, Spanish, Swedish, Turkish
- Annual Subscription $79.99
- Premium $79.99
- James (NeoSpeech US English Voice) $4.99
- Paul (NeoSpeech US English Voice) $4.99
- Salli (Ivona US English Voice) $4.99
- Hugh (NeoSpeech US English Voice) $4.99
- Will (Acapela US English Voice) $4.99
- Annual Subscription $59.99
- Amy (Ivona British English Voice) $4.99
- Developer Website
- App Support
- Privacy Policy

Family Sharing
Some in‑app purchases, including subscriptions, may be shareable with your family group when family sharing is enabled..

Get things done within this app using just your voice.
More by this developer.
Voice Pack: US English
You Might Also Like
Speech Central AI Voice Reader
Fluentjoy: Learn English
Aloud!, text to speech reader
BoldVoice: Pronunciation App
Sharpen – College Study App
VIIO - Text reader
How to add voice overs to PowerPoint presentations

Looking for our Text to Speech Reader ?
Featured In
Table of contents, what is powerpoint, why add voiceovers to your powerpoint presentations, steps for creating a voiceover for your powerpoint presentation, check your gear, always prepare, eliminate noises, be confident, incorporating background music and sound effects, using animations and transitions effectively, speechify - record narration for powerpoint presentations with text to speech, what is the benefit of voiceover on a powerpoint, what is the best first slide in a powerpoint, what other text to speech apps are available.
Adding a voiceover to a PowerPoint presentation makes it more engaging. Here’s how to create a voiceover with TTS technology.
Microsoft PowerPoint is an incredibly versatile collaborative tool. It offers so much flexibility, design options, and facilitates easy sharing. Business professionals, teachers, students, and others can create presentations about a specific topic. If you need to prepare a presentation for work or school, perhaps you’re wondering how to make a slide show more interesting. Adding a voiceover presentation is an excellent solution. By following the best voiceover practices, your entire presentation becomes more exciting and easier to follow. This article explains why voiceover is important and how to record narration over a PowerPoint presentation.
PowerPoint , or PPT for short, is a presentation software. Part of the Microsoft Office suite, you can use PowerPoint to create a slide show containing charts, images , videos, and other vital information. Using PowerPoint to present a project or an idea in a corporate setting is common. Which options you’ll have access to depends on your version of PowerPoint. But some features have remained the same since the original iteration. PowerPoint also offers features like transitions, animations, templates, and different layouts. If you’ve purchased a Microsoft 365 package or a business version of the operating system, you can access PowerPoint. It's also vital to point out that users can export slides in various file formats, including JPG, PDF, XML, and GIF.
Imagine you're watching a silent movie. While the visuals might be captivating, without an audio icon or sound, you might feel something's missing. The same goes for presentations. While slides with text and images in your slide deck can convey information, adding your voice can bring that content to life. Firstly, voice overs give your presentation a personal touch. Instead of just reading slides, your audience hears your voice guiding them through the content. By simply clicking on the audio icon in the top left of the slide, they can hear your narration. It's like having a conversation rather than giving a one-sided lecture. This can make your audience feel more connected to the material and to you as the presenter. Secondly, not everyone processes information the same way. Some people are auditory learners , which means they understand and remember things better when they hear them. By adding voice overs, you cater to these learners, ensuring that more of your audience grasps and retains the information you're sharing. And if you're on a budget, there are text to speech software free options available that can help you create these voiceovers. Additionally, voice overs can provide clarity. Sometimes, text on a slide can be ambiguous or open to interpretation. With voice overs, you can explain complex ideas, emphasize important points, and give context where needed. It's like having a helpful narrator explaining a story, ensuring that everyone is on the same page. And with the check box feature, listeners can mark points they want to revisit later. Lastly, let's not forget about the convenience factor. If someone missed your live presentation, having a version with voice overs means they can still get the full experience on their own time. They can pause, rewind, and replay sections they find challenging, making it a flexible learning tool. In short, adding voice overs to your PowerPoint presentations makes them more engaging, clear, and accessible. It's a simple step that can make a world of difference in how your content is received and understood.
The good news is that it’s pretty easy to create a PowerPoint presentation with a voiceover. The software has a built-in feature, so you don't need to rely on third-party apps. Whether you're using a Windows or Mac computer, it doesn't matter. The steps are identical for both. However, to r ecord sound , you need to make sure the audio on your device works. You can either use the integrated mic on your laptop or a headset. Follow this tutorial to record a slide show and add a voiceover:
- Launch PowerPoint on your Mac or Windows computer.
- Open an existing presentation or start a new one.
- Navigate to the “Insert” menu from the main toolbar.
- Select "Audio," and click on the drop-down arrow, click on “Record Audio.”
- Name the audio file and select record button when you’re ready.
- When you’re done, select the Play button to listen to the playback from the dialog box.
- If you’re happy with the results, click on the “Insert” button.
- Go to the File tab and select the "Save As” option to save the new PowerPoint presentation.
Note: You can press the "ESC" button on your keyboard to exit the record audio function. Make sure to follow the slide timings as you record the voiceover. If you don’t like the audio recording, click the cancel button and start re-recording. Also, recording voiceover is not the only solution in PowerPoint. You can also create a video that follows your PowerPoint slides. If you go to the Slide Show tab, you'll find the "Record" button, which allows you to record video and voice.
Tips for creating a great voiceover
Audio narration is straightforward in theory. However, there’s a lot you need to consider when recording an excellent voiceover . Here are a few tips that can help.
It's essential to make sure your audio is clear and crisp. You don't need high-end equipment, but you must ensure everything works. Check the audio settings on your device and use a microphone stand if necessary.
You can prepare for a voiceover in several ways. First and foremost, write a script. PowerPoint voiceovers work best if you’re reading from a script. If you didn’t write it, make sure to read through it at least once. Moving from the current slide to the next slide without preparing well will result in poor-quality voiceovers. Finally, have a glass of water next to you as you record in case your mouth gets dry.
You may not notice background noises at first, but your audio equipment likely will. Before you click on the speaker icon in PowerPoint and start recording, close the windows and doors. Turn off all notifications and remove the clock from the room if it’s noisy.
If you're not confident about the subject you're narrating, the audience will pick up on it. Being confident is often easier said than done, but that's truly the key to a great voiceover. Your presentation will be much better and more interesting if you add some personality to the script and deliver your lines like a pro.
Enhancing your presentation with additional features
Now that your voice-over is successfully integrated into your PowerPoint slide deck, you can further enhance it by incorporating additional features. Consider the following:
Background music and sound effects can add depth and impact to your presentation. Use them sparingly and strategically to evoke emotions, emphasize key points, or create a particular atmosphere. Ensure that the volume levels are balanced, and the audio does not overpower your voice-over or distract your audience from the main content.
Animations and transitions can bring your presentation to life and make it visually engaging. Use them strategically to guide your audience's attention, highlight important information, or create smooth transitions between slides. However, be cautious not to overuse animations, as excessive animations can be distracting and diminish the professionalism of your presentation.
There’s another way to include a voice in your PowerPoint presentation. If you have a Speechify account, you can start recording the voiceover whenever and include the audio file later. Speechify is a text to speech software that reads any digital text aloud . Text to speech is a type of assistive technology and a fantastic tool for creating voiceovers. If you’re ready to start recording voiceovers for your PPT presentations, check out Speechify today for free.
The main benefit of voiceover on a PowerPoint is that it adds an explanation to the presentation. If you can’t present your slides in person, using a voiceover is the next best solution. The same applies if you're uncomfortable presenting in person but use a voiceover instead.
The first, or opening slide in PowerPoint, impacts the viewers' expectations. It's crucial to grab attention using statistics or an interesting piece of data. You can also write a short joke or ask an important question. Sometimes, a quote is an excellent way to start a PowerPoint Presentation.
Speechify is one of the best text to speech apps on the market. However, there are other options available. Users can consider Amazon Polly, NaturalReader, Speech Central, Voice Dream Reader, and several others.
Ultimate guide to NaturalReader and reviews
Read Aloud: Transforming the Way We Experience Text

Cliff Weitzman
Cliff Weitzman is a dyslexia advocate and the CEO and founder of Speechify, the #1 text-to-speech app in the world, totaling over 100,000 5-star reviews and ranking first place in the App Store for the News & Magazines category. In 2017, Weitzman was named to the Forbes 30 under 30 list for his work making the internet more accessible to people with learning disabilities. Cliff Weitzman has been featured in EdSurge, Inc., PC Mag, Entrepreneur, Mashable, among other leading outlets.
Search results for
Affiliate links on Android Authority may earn us a commission. Learn more.
WhatsApp on Android is finally getting voice message transcription
Published on July 10, 2024
- WhatsApp’s voice message transcripts feature is finally rolling out to Android users on the beta channel.
- It automatically transcribes voice messages and currently supports transcriptions in five languages.
- The feature relies on your device’s speech recognition capabilities to provide end-to-end encrypted transcripts.
WhatsApp is finally rolling out its long-awaited voice message transcription feature on Android, over a year after it debuted on the iOS version of the app. The feature is reportedly rolling out to users on the beta channel, and it currently supports voice message transcription in five languages.
WABetaInfo reports that the feature is available for some users in WhatsApp beta version 2.24.15.5. If you’re enrolled in WhatsApp’s beta program and have received the feature, you can enable it by heading to the Chats option in the app settings.
After enabling the feature, WhatsApp will prompt you to download a language data pack to start transcribing voice messages, as it relies on your device’s speech recognition to provide end-to-end encrypted transcripts. The feature will then automatically transcribe voice messages and the transcripts will appear in the selected language within the voice message bubble.

As you can see, the feature currently supports voice message transcriptions in English, Spanish, Portuguese (Brazil), Russian, and Hindi. This suggests that WhatsApp might initially release the feature for Android users in regions where these languages are widely spoken. However, since the iOS version supports more languages, it may reach more regions at a later date. WhatsApp has not shared any details about the rollout, but we expect the feature to arrive on the stable channel in the coming weeks.
Have you received WhatsApp’s voice message transcripts feature on your device? Let us know in the comments.
You might like
Video captures chaotic moment when Trump reportedly shot on stage at rally

Former President Donald Trump was speaking at a rally being broadcast from Butler County , Pennsylvania, Saturday when he was rushed off stage by U.S. Secret Service after a multiple shots were fired - one of which grazed the candidate's ear.
Video captured the moment the chaotic scene erupted.
Live updates on Trump rally: Donald Trump rushed from stage at rally after apparent gunshots; 1 person and shooter dead
At least six bangs that sound like gunfire are heard while the Republican candidate is on stage - some as he stands behind a podium and after he appears to crouch down behind the podium after the first bang.
Video showed Trump being removed from the site by Secret Service, with his fist raised, after the shots.
It also showed some members of the crowd scatter after initial shots were fired. Others are seen in the video crouching down in stands, some filming the melee with cell phones.
The gunman was killed by Secret Service agents, officials said. One spectator was killed and two others were "critically injured," the Secret Service said.
The ex-president released a statement not long after the shooting:
"I was shot with a bullet that pierced the upper part of my right ear," Trump wrote. "I knew immediately that something was wrong in that i heard a whizzing sound and immediately felt the bullet ripping through the skin."
Where was Trump rally? Butler County, PA appearance was site of shooting Saturday
Where was the Trump rally?
The rally took place in Butler, a rural community at the Butler Farm Show , a fairground in Butler County.
As of the last census the city's population was just over 13,000 and, according to the United States Census Bureau , is 2.7 square miles.
'The former President is safe'
United States Secret Service Chief of Communications Anthony Guglielmi released the following statement shortly after the incident took place.
"An incident occurred the evening of July 13 at a Trump rally in Pennsylvania. The Secret Service has implemented protective measure and the former President is safe. This is now an active Secret Service investigation and further information will be released."
In a statement issued later, Gugliemi reported the suspected shooter fired multiple shots toward the stage at approximately 6:15 p.m. He said the shooter was in an elevated position outside the rally.
Steven Cheung, spokesperson for Trumo, confirmed in a statement that the former president was "fine" but being treated at an area medical facility.
Natalie Neysa Alund is a senior reporter for USA TODAY. Reach her at [email protected] and follow her on X @nataliealund.
IMAGES
VIDEO
COMMENTS
Create video from images and audio. Narakeet is a text to speech video maker, allowing you to turn a script to voice over, and edit videos as easily as editing text. Script the entire video using Markdown, and embed visual assets from images, screen recordings and video clips. Make video screencasts, tutorials and announcements in minutes.
AI Voice Generator for Presentations. By using Murf's AI voice generator, you can generate the right voiceover presentation in a fraction of the time. You can upload a pre-recorded audio file of your entire presentation and convert it into an AI voice over. Well, that's not all! You also get to save some money along the way.
Here's how to do a presentation with voice over using Visme. Record your own audio by clicking on the "Record" option to the top right of the "Add Audio" tab. Once chosen, you will see a red record button appear below your slide. To start recording your own narration within Visme, simply click on the red button and speak into your microphone.
Canva's free video presentation maker lets you record your voice and face as you present your slides online. You can also share your recordings with others, edit them with Canva's design tools, and access features like remote control and screen recording. Learn how to create engaging video presentations with Canva.
Step 1: Create your audio files for each slide and upload them to Google Drive. Tip: Organize your files with a naming convention. You'll need to locate these files in the next step. Following a naming convention for your audio files, including Course, Lesson, and Slide numbers, helps keep them organized.
Many voice-over apps offer different voice styles and languages. So, whether you want a voice that sounds happy, sad, or excited, or one that speaks in English, Spanish, or Hindi, these apps can help. They're great for making videos, presentations, or even just reading out loud. 10 Best Voiceover Apps
Step 1 - In the top menu, go to Slide Show > Record Slide Show. You'll have the option to record from the beginning of the presentation or from the slide you're currently on. Step 2 - Start recording. Once you choose your start point, you'll be taken to the full-screen recording page with options to record, stop, and replay.
Use a voice recording tool or software like Audacity or Voice Memos on your Mac or Windows computer to record your voiceover. Save the audio file in the appropriate format, such as wav or mp3. Upload the audio file to Google Drive. Insert the audio file into your Google Slides presentation. Customize the audio settings to fit your needs.
To add audio to your presentation, find the Insert menu at the top of your Google Slides window. Click on it, and you'll see a dropdown menu appear with a list of options. From here, select the third option from the top: Audio. Go to the Insert > Audio menu to find your uploaded MP3 recorded voiceover.
Low cost professional narration software for producing audio presentations and videos for home, family, school and community. Includes Heather and Ryan, premium quality TTS voices from Acapela Group with a personal license for using the voice. One-time purchase: $99. (32-bit only) Speech-Over adds professional text-to-speech voice-over ...
SlideVoice is a productivity app that makes it incredibly easy to add AI voiceover to your slide deck. Simply type your speaker notes in PowerPoint, and SlideVoice will create a professional-sounding voiceover to accompany your slides. No need to record your voice or hire a voice actor - SlideVoice does it all for you. With SlideVoice, you can create engaging and polished presentations in no time.
Using a voice over generator for PowerPoint adds style, professionalism, and natural properties to your presentation. Here's how. Voice over generator for PowerPoint. PowerPoint (PPT) is Microsoft's app for making and editing presentations. As part of Microsoft Office, PowerPoint is available on Mac, PC, and mobile devices.
Voice Over Presentation Apps. Creating voice over presentations has become increasingly popular in educational, professional, and creative contexts. There are several apps that stand out for their ease of use, functionality, and quality. Here are some of the best voice over presentation apps available: 1. Speechify Voice Over Generator
In this step-by-step tutorial, learn how to add a voice over / narration to a PowerPoint slide presentation. You'll learn three different methods to adding a...
How to record a voiceover for PowerPoint on a Mac. 1. Open a new or existing or presentation in PowerPoint for Mac. 2. Find and select "Insert" from the top toolbar. 3. Toward the far right side ...
FlexClip's free voice-over video maker, a browser-based program, helps you create voice-overs for your video, describing, highlighting, explaining, or emphasizing something. Video highlights, ads, short films, documentaries, company presentations, tutorials, etc., need clear voice-overs to improve accessibility. Import pre-recorded voice-over ...
Faster development time. Speechify Voice Over Generator - The new tool for your presentations. Downloading audio files of speeches. Access to lots of different voices. Ability to edit audio files in the reader's chosen program. Faster voice over recording. Uses AI to create realistic voices. Wide range of uses.
Open the PowerPoint presentation in which you would like to record a voiceover narration. Head over to the "Slide Show" tab and, in the "Set Up" group, select "Record Slide Show.". Once selected, a drop-down menu will appear. Here, you can choose to start the narration from the beginning or from the current slide.
WavePad. Price: $2.99/month (WavePad Home Edition), $6.99/month (WavePad Masters Edition) Compatibility: Android and iOS. WavePad Audio Editor is a professional audio editing software from NCH Software that you can use to make voice-overs. If you're on the hunt for the best voice over app, it's worth checking out.
iSpring Suite 11.7. Turn your message into a video presentation fast and easy right in PowerPoint. Free Download Pricing. For Windows 11/10/8/7. 32- and 64-bit. Microsoft Office. 2007, 2010, 2013, 2016, 2019, 2021, Office 365.
How to Add & Record Audio in Microsoft PowerPoint Presentations? Source: Microsoft 365. Examples and Engagement Tips for Adding Voice Overs to PowerPoint. Highlight Key Points: Use your voice-over to emphasize important information on your slides, rather than simply reading the text verbatim. Vary Your Delivery: Change your vocal pitch and pace to keep your audience attentive.
* Feature availability and functionality may vary by device type, market, and browser version.
Featured by Apple as Best New App and App of the Day in 81 countries. Voice Dream - Read Aloud is also part of App Store Permanent Collections in Education.-----"Both experts recommend Voice Dream Reader as the best app in the text-to-speech space." - Wired "This app is one of the best educational finds of my entire career." - Forbes
If you use the free version, Castro is an average podcast app for iPhone. However, if you upgrade to Castro Plus, you get the Sideload feature, which lets you upload any content you want to play ...
Follow this tutorial to record a slide show and add a voiceover: Launch PowerPoint on your Mac or Windows computer. Open an existing presentation or start a new one. Navigate to the "Insert" menu from the main toolbar. Select "Audio," and click on the drop-down arrow, click on "Record Audio.".
WhatsApp is finally rolling out its long-awaited voice message transcription feature on Android, over a year after it debuted on the iOS version of the app. The feature is reportedly rolling out ...
Search for Microsoft 365 (Office) on the Microsoft Store app. Install and open it. Sign in with your Microsoft account. Alternatively, press "Create free account" if you don't have one yet.
Former President Donald Trump was speaking at a rally being broadcast from Butler County, Pennsylvania, Saturday when he was rushed off stage by U.S. Secret Service after a multiple shots were ...
successful lake restoration program should strive to. manage both external and internal nutrient sources." (MPCA) In‐Lake: WQ3D integrates science‐based (testing) and (restoration)
Earlier this week, AI company ElevenLabs said it is bringing digitally produced celebrity voice-overs of deceased actors, including Garland, James Dean and Burt Reynolds, to its newly launched ...