How-To Geek
The beginner's guide to google slides.

Your changes have been saved
Email Is sent
Please verify your email address.
You’ve reached your account maximum for followed topics.

How to Clean a Link Before You Share It (And Why You Should)
Today's nyt connections hints and answer for july 15 (#400), check out google's hidden easter eggs from your favorite movies and tv shows, quick links, what is google slides, how to sign up for an account, how to create a blank presentation, how to import a microsoft powerpoint presentation, how to check your spelling in google slides, how to collaborate on presentations, how to see all recent changes to a presentation, how to link to a specific slide, how to insert special characters into a slide, how to use google slides offline.
If you’re just getting started with Google Slides, its extensive features and add-ons can be a little overwhelming. Here are some tips to help you get going with this powerful alternative to Microsoft PowerPoint.
If you’ve heard of Google Slides before, feel free to skip ahead; if you haven't, here’s a crash course on what you need to know. We’ll go over the basics and get you brushed up on what Google Slides is and how you can get started right away.
Slides is a free, web-based presentation program designed to compete with Microsoft Office PowerPoint. It's part of G Suite---Google's complete office suite (though some people refer to it all as Google Docs). The other main services included in the cloud-based suite are Sheets (Excel) and Docs (Word).
Related: What is Google Workspace, Anyway?
Google Slides is available on all devices and platforms; all you need is an internet connection and a web browser (or, in the case of mobile, the Android and iOS apps ). Google does the rest and handles the brunt of the heavy lifting, while it runs the software in the cloud.
Slides supports several file types, including .ppt, .pptx , .odp, .jpg, .svg, and .pdf. This makes it easy to view or convert Microsoft Office files directly from Google Drive or insert images directly into a slide.
Related: What Is a PPTX File (and How Do I Open One)?
And since Slides is an online presentation program, you can share and collaborate with multiple people on the same file, and track revisions, changes, and suggestions, all in real-time.
Have you heard enough? Let’s get started.
Before you can use Google Slides, you have to sign up for a Google account (an @gmail account). If you already have one, feel free to move on to the next section. If not, we’ll go over the simplest way to create a Google account and get you set up with Slides.
Head over to accounts.google.com , click "Create Account," and then click "For Myself."

On the next page, you provide some information---first and last name, username, and password---to create your account.

Also, you have to verify your phone number, so Google can make sure you’re not a bot.

After you verify your phone number, the subsequent pages require you to provide a recovery email address and your date of birth and gender. You must also agree to the privacy statement and terms of service. After that, you’re the proud new owner of a Google account.
Now that you have a Google account, it’s time to create your first presentation. Head over to Google Slides and place the cursor on the multicolored "+" icon in the bottom-right corner.

The + turns into a black pencil icon; click it.

Pro Tip: Type
into the address bar from any browser and hit Enter to automatically create and open a new blank document.

Even if you’re new to Google Slides, you might already have a collection of Microsoft PowerPoint files you’d like to be able to use. If that’s the case, then you have to upload all your presentations before you can view them. While it might not support some of the more advanced features and effects of some PowerPoint presentations, it works pretty well.
When you import a PowerPoint presentation, you can use either Google Slides or Drive to upload your files. Both methods let you drag and drop a file from your computer directly into the web browser for easy uploads. Your Drive houses all of your uploaded files, but---for the sake of convenience---when you go to the Slides homepage, it only shows you presentation-type files.

From the Slides homepage, click the folder icon in the top right, and then click the "Upload" tab. Now, drag and drop any files you want to upload directly into this window.

Once the file uploads, Slides opens it automatically, and it's ready for you to edit, share, or collaborate.
To open a PowerPoint presentation that you want to edit, click the filename with the "P" next to it from your Google Slides homepage.

Click to either view the PowerPoint file or edit it in Slides.

After you’ve finished editing your file, you can download and export your presentation back into a Microsoft PowerPoint format. Just go to File > Download As, and then click the "Microsoft PowerPoint" option.

If you’d rather download your presentation as a PDF, ODP, JPEG, TXT, etc., you can do that here, as well.

Related: How to Import a PowerPoint Presentation into Google Slides
Now that you have a few presentations, it’s time to make sure your spelling and grammar are correct . Slides is equipped with a spellchecker. If you misspell something, it underlines the error with a squiggly line and prompts you to make a change.
This should be on by default, but you can make sure in Tools > Spelling > Underline Errors.

To see spelling corrections and suggestions, right-click the word with the line underneath. Alternatively, press Ctrl+Alt+X (Windows) or Command+Alt+X (Mac) to open the Spell Check and Grammar tool.

Along with a spellchecker, Google Slides comes loaded with a built-in dictionary and thesaurus. To use them, highlight a word, right-click it, and then click "Define [word]."
![Click "Define [word]."](https://static1.howtogeekimages.com/wordpress/wp-content/uploads/2018/12/x2018-12-01_09h28_56.png.pagespeed.gp+jp+jw+pj+ws+js+rj+rp+rw+ri+cp+md.ic.ffEHQWWNZF.png "presentation about google")
While this should get you started, we have a deeper dive into Google’s spelling and grammar checker if you want more info.
Related: How to Check Your Spelling in Google Docs

One of the best features of Google Slides is its ability to generate a shareable link. Anyone you share the link with can view, suggest edits to, or directly edit the presentation. This eliminates the hassle of sending a file back and forth between collaborators. Each person has her own text entry cursor to use on her computer.
To do this, click the orange "Share" button in the file you want to share. Next, choose how and with whom you want to send a link to the file. You can type email addresses or click "Get Shareable Link" in the top corner to hand out the invitation yourself.

From the drop-down menu, you can select one of these options for what other users can do:
- Off: Sharing is disabled. If you’ve previously shared a link with others, it will no longer work and revokes any permissions they once had.
- Anyone with the link can edit: Gives the shared users full read/write access. They still can’t delete it from your Drive, though---this is just for the contents of the file.
- Anyone with the link can comment: Allows shared users to leave comments which is handy for team projects.
- Anyone with the link can view : Shared users can view the file, but can’t edit it in any way. This is the default action when you share a file, and it's the best option if you’re trying to share a file for download.
You can do a lot more with these shareable links, as they also work with other Drive files and on mobile. For a deeper look at how links work and how to generate them, check out our post .
Related: How to Create Shareable Download Links for Files on Google Drive

When you share documents with others, it’s difficult to keep track of all the small changes that happen if you’re not present. For that, there’s revision history . Google keeps track of all the changes that occur in a document and groups them into periods to reduce clutter. You can even revert a file to any of the previous versions listed in the history with a click of your mouse.
You can view a list of all recent changes by clicking File > Version History > See Version History. Alternatively, you can press Ctrl+Alt+Shift+H (Command+Option+Shift+H on Mac).

Related: How to See Recent Changes to Your Google Docs, Sheets, or Slides File
You can also share a link to a specific slide in your presentation with a friend or coworker, without having to mention which one you're referencing. When someone clicks the link and the presentation loads, it jumps directly to the slide you're referencing. You do have to enable file sharing before you can link to a specific slide in your presentation, though.
Because each slide has a unique URL, all you have to do to link to one is click it in the left pane, and then copy the URL from the address bar.

Google Slides also has a character insertion tool. This allows you to insert special characters into your presentation without having to remember any Alt-codes. There are tons of symbols, characters, languages, and so much more. So, whether you want an arrow, different language scripts, or if you just want a few silly emojis to spruce up your presentation, Google Slides makes it easy to include them.
To open the character insertion tool, click "Insert," and then click "Special Characters."

From here, you can manually search for specific characters with the drop-down menus.

Use the search bar to find a specific character or emoji.

You can also use your drawing skills to search.

Related: How to Insert Symbols into Google Docs and Slides
What happens if you need to access Google Slides but don’t have an internet connection? Although Slides is a web-based product, that doesn’t mean you can’t use it offline . Any changes you make to the file offline will update the next time you connect to the internet. First, download the extension for Chrome.
To enable a presentation for offline use, go to the Google Slides’ homepage and, in the top-left corner, click the Hamburger menu > Settings. Once here, toggle "Offline" to the On position, and then click "OK."

To save storage space on your local machine, Google only downloads and makes the most recently accessed files available offline. To manually enable a file, click the three dots icon, and then toggle "Available Offline" to On.

Related: How to Use Google Docs Offline
Google Slides is a powerful, feature-rich alternative to Microsoft Office's PowerPoint. It's also completely free to use with an internet connection and a Google Account, making it a legitimate competitor for Microsoft.
- Google Slides
What is Google Slides? The ULTIMATE Guide!
By: Author Shrot Katewa

With the onset of remote working and online education, collaboration tools have gained in popularity. Google Slides is a prime example of that. But, what exactly is Google Slides?
Google Slides is a FREE web-based presentation tool provided as part of the Google Suite. Google Slides allows you to create, modify, and deliver a presentation; all through a web browser. Google Slide is also known for its best-in-class real-time collaboration features.
If you are new to Google Slides or perhaps curious to know more about this tool, then this article is the perfect place for you to start as I will be discussing, in detail, about various key aspects of Google Slides and how to use them properly.
What is Google Slides? What is it used for?
As previously mentioned, Google Slides is an application developed by Google. It was released in 2006 as part of Google’s office applications and was previously known as “Google Presentation”. However, it was officially renamed as “Google Slides” in 2012.
Google Slides is a presentation tool that is used for creating presentations, editing an existing presentation, or delivering a presentation/debriefing your audience in an academic or professional setup. It is very useful in delivering lesson plans and works really well with Google Classroom .
There are several other use cases for Google Slides. More and more startups and corporate organizations are starting to use Google Slides and it is gaining in popularity.
Is PowerPoint the same as Google Slides?
Google Slides is akin to Microsoft PowerPoint or Keynote. It is similar in its objective as the goal of both the applications is to be the most helpful tool for its users in enabling them to create a presentation. However, PowerPoint and Google Slides is not the same as they are two different presentation applications .
While there are several differences between PowerPoint and Google Slides, one of the major differences is that Google Slides doesn’t require you to download a software.
Google Slides completely works on a web-based interface! This means, you don’t have to be using your own computer to access your presentation anymore!
Your Google Slides presentation can be accessed through web browsers such as Google Chrome, Safari, Mozilla Firefox, and Microsoft Edge. It can also be used on iOS and Android devices through its mobile application.
Is Google Slides FREE to Use?
Unlike many of its competitors, Google Slides has the upper hand when it comes to being accessible to people. Google Slides is completely FREE for use and packs most of the basic essential tools for creating presentations. Hence, it is a perfect option for people who are occasionally in need of making a presentation.
Students, small-scale entrepreneurs, teachers, non-profits, or other individuals who are looking for a presentation tool on a budget will definitely find Google Slides as a far more financially viable option as it is completely FREE.
The best part is that in addition to being free to use, Google Slides packs in most of the features and tools required to build an awesome presentation for which many of its competitors charge high prices.
While you surely get additional features when using other presentation applications, but, most users won’t need those features for making a simple presentation. Makers of Google Slides have truly understood the key requirements of the users of a presentation application.
What are the Key Features of Google Slides?
Google Slides comes packed with some unique and awesome features that literally sets it apart. Of course, it definitely has the basic tools that you would expect in any presentation application such as adding and editing text, working with shapes, formatting shapes and fonts, adding background color, etc.
I’ll just list down some of the key features that make Google Slides stand out!
1. Your Presentation is Always Accessible
Since Google Slides is a cloud-based presentation tool that is accessed through a web browser, you don’t have to necessarily be next to your computer to access your presentation.
It offers great flexibility in the ways you can open and edit a presentation. You can literally use any computer that has access to an internet connection and you’ll be good to go.
2. Your Presentation is Auto-saved
One of the best features of Google Slides is that your presentation is always saved.
In this modern technology era, you may be wondering why would any application be built without a feature to save the progress automatically? However, if you have ever used PowerPoint or Keynote before, you surely can relate to the agony of losing hours of hard work simply because you perhaps forgot to press Ctrl+S or save your presentation.
With Google Slides, you never have to worry about saving your files. They are always saved automatically.
3. Awesome Collaboration Tools
One the best features of Google Slides is its ability to allow users for a real-time collaboration on the same project.
This means, multiple users can work on the same presentation at the same time and Google Slides will sync it automatically in real-time!
This feature alone has been one of the key reasons for the rapid adoption of Google Slides among users. Although other presentation applications are now slowly catching up and also building this feature, but Google Slides is way ahead of the curve!
4. Adding YouTube videos to your Presentation
Another unique but useful feature that Google Slides provides is the ability to directly embed YouTube videos in your presentation.
This is a great value add especially for teachers who want to use YouTube video as an educational tool for its students. Likewise, even students can use to embed videos to showcase case studies and examples. Moreover, embedding YouTube videos allows your presentation to be relatively small in size while still showcasing a video.
I wrote a detailed post on how to embed videos (and other elements) in another article on this website. Make sure you check this out. You can click on this following link –
How to Embed in Google Slides? The ONLY Resource You Need!
5. Publishing your Presentation to the Web
This is an extremely powerful feature that currently only Google Slides has to offer.
In addition to sharing your presentation with your audience, team members or even your clients, you can also publish your presentation to the web.
You might wonder what is the difference between sharing a presentation and publishing it on the web. When you publish your Google Slides presentation to the web, Google essentially creates a lightweight webpage (which has its own unique URL) that can be accessed by anyone with the link . You don’t need to own a domain name to publish your presentation on the web.
With this feature, you can now have hundreds of people see a presentation without the need to even own a website. Moreover, it also allows you to make changes to the source file without making it visible to your audience.
This feature is great for giving conference presentations or education institutes that can restrict access to certain group of students.
One thing to note is that publishing your Google Slides to the web can only be done if you/your company has a GSuite account with Google. (which is not free and comes at a price)
6. Huge Font Library
One of the other features that set Google Slides apart is the huge font library.
Although other common presentation applications such as PowerPoint and Keynote also provide a fairly large font library, what sets Google Slides apart is that it uses Google Fonts as part of its fonts library.
This means, your presentation will always look the same even when the recipient doesn’t have the fonts installed on his computer that you have used for your presentation.
Google Fonts are a collection of fonts that are used by the web. This allows your presentation to not just look great and in line with the latest design trends, but also ensures that your presentation looks just the same when you share it with others.
How to Use Google Slides?
Now that you know that Google Slides is FREE and it comes with some awesome features, I’m assuming you may want to give it a try.
If you are new to Google Slides, I shall be sharing with you what you need to start using Google Slides, basic steps on how to get started, and few key customizations that you can make to your Google Slides presentation.
This section will surely be enough to help you get started, and once you get a hang of it, you will be able to explore additional features.
1. Pre-requisites for using Google Slides
If you want to use Google Slides, you don’t have to do much of preparation. In fact, you don’t need to pay for anything, and you don’t need to download any software.
All you need for using Google Slides is a Gmail account. If you don’t have a Gmail account, you can create one for free . Simply click on mail.google.com , and create a new account by providing some basic details. It will just take a couple of minutes.
You’ll also obviously need to have an internet connect. But, since you are reading this, I don’t think that should be a worry for you.
With that, you are all set and good to proceed ahead.
2. How to Open a New Google Slides Presentation?
Once you have created an account, type in slides.google.com in your address bar, and it will directly lead you to Google Slides Application. If you are not signed in already, you may be prompted to sign in using your Gmail account.
The first screen will be something similar to what has been showcased in the image below –
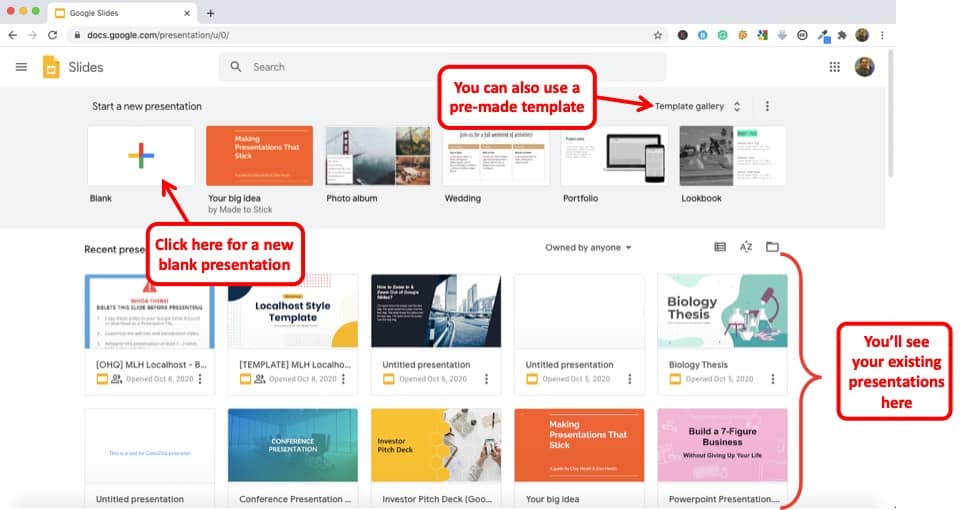
To create a new presentation, you will either need to click on “ Blank ” or choose a pre-existing template from the “Template Gallery”.
Clicking on blank will open up a new blank presentation on Google Slides.
All the presentation that you have created previously will be visible under the “Recent Presentation” section (as indicated in the image above).
The functionality of Google Slides and its contents are the same on both Windows PC and Mac OS . Likewise, you can also use all the functionalities of Google Slides on a mobile device. Thus, you don’t have to really worry about any device restrictions.
3. How to Work on a New Google Slides Presentation?
Google Slides usually houses all the basic tools you would expect yourself to need whenever you’re planning to make a presentation.
Thus, I’ll be showing you how to utilize the most basic functions and tools in Google Slides to get yourself started with making presentations using Google Slides.
Some of the very basic actions to do once you get started with Google Slides are as follows –
Start by simply opening a new Blank Presentation as mentioned above in the article.
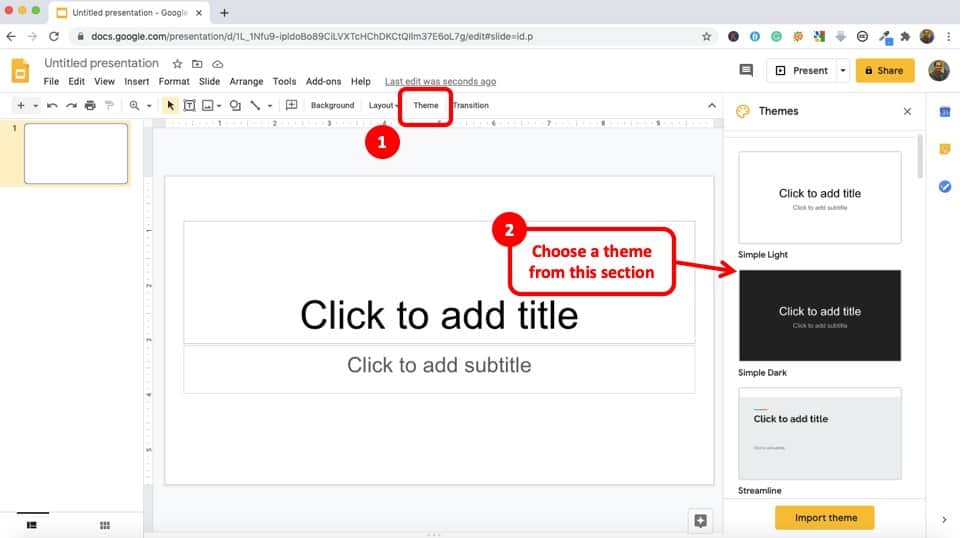
Next, choose a theme of your preference by scrolling through the side-bar on your right. You can also import themes from external sources if you wish by clicking on the ‘ Import Theme ’ icon.
It is up to your creative skills and organizing skills to use the basic functions to make your desired presentation. But, if you struggle with designing a presentation, don’t worry, I’ve covered this in the latter part of this article.
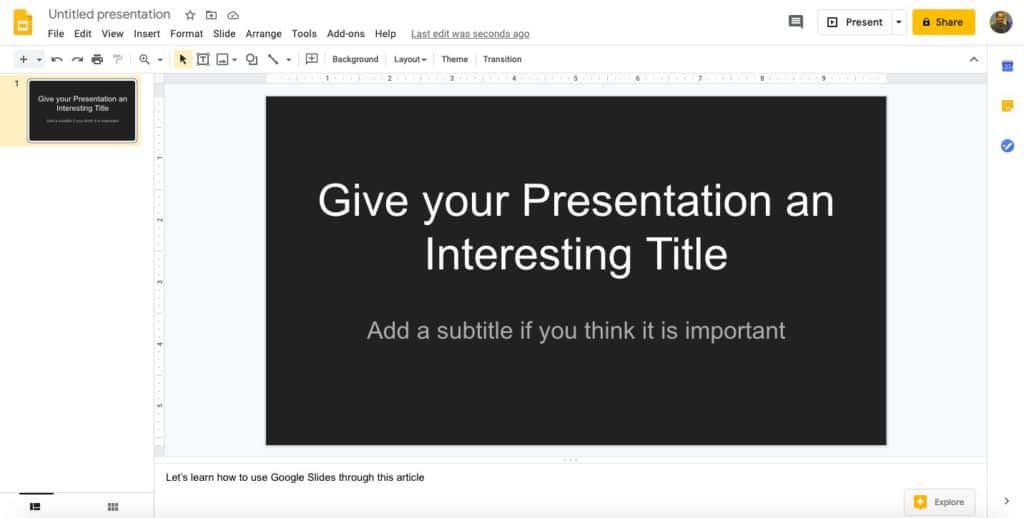
The very first slide can be used to come up with your title. You can also choose the font size, color style, etc. as they appear on the tool-bar above.
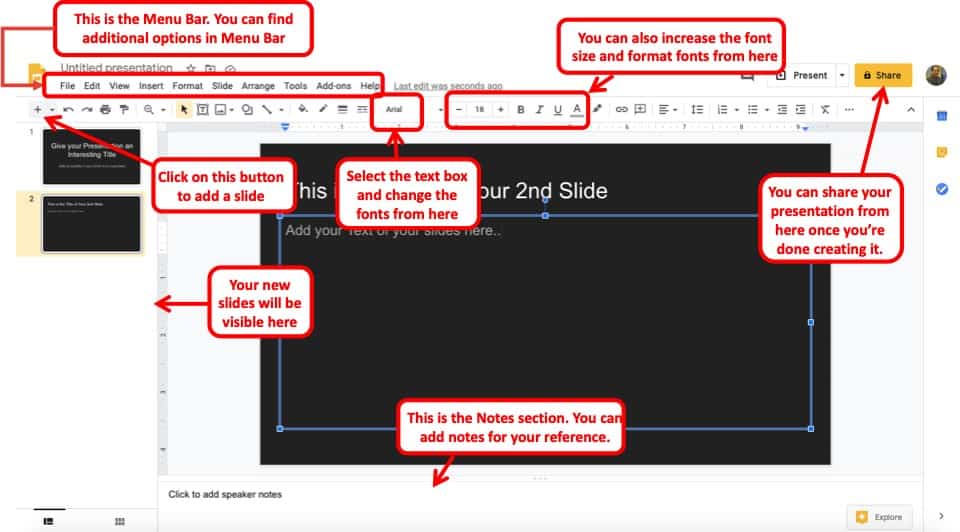
To change the font, simply select the text box in which you type the text, and then choose the fonts from the title bar.
To create a new slide simply click on the ‘+’ icon on the top left corner of your screen. You can also select the first slide from the filmstrip view on the left (slide preview on the left panel of the screen), and press “ Enter ” to add another slide.
If you want to delete any of your slides, simply select it from the panel on the left by clicking on it and then press ‘delete’ from your keyboard.
These steps mentioned above will give you a basic overview of the interface and by now you should have a fair understanding of how to add and delete slides, how to change fonts and few other editing options.
You can play around a little bit until you get a hang of things.

You can also add media to your presentation such as images, videos, etc. For instance, if you want to add an image, simply click on “ Insert “, then from the dropdown, select “ Image ” and choose the source of your image file.
Likewise, you can also insert other elements such as Text Box, Video, Audio, Tables, Charts, etc.
Now, let us move onto understanding a few other features that will help you get the ball rolling.
4. How to Animate Objects in Google Slides?
Sometimes, you want to avoid a monotonous presentation which may otherwise bore your audience. In such a scenario, you may want to animate the objects on your presentation.
Animating objects like shape, images and other elements is pretty simple in Google Slides.

First, select the object that you would like to animate in Google Slides. Then, click on “ Insert “. A dropdown menu will appear. Scroll down and click on “ Animation “. (Note – if you have not selected the object or element, you will not be able to choose this option).
Then you will see an animation panel on the right side of the screen. This panel provides you with various options to animate objects in Google Slides.
From the Animation Panel, you can start by choosing the animation effect (as indicated in the image above). Then, choose how you want the animations to appear. This could be “ On click ” or “ With or After Previous “.
Choosing “On Click” will allow you to control the animation manually by a click of a button or a mouse click while presenting while the other two options will automatically make the animation appear with or after the previous/other animations.
You can also add multiple animations to your presentation or even to the same object. For instance, first animation can be an “Appear” animation, whereas the second animation on the same object can be set to “Disappear”. This will make the object appear and disappear either automatically or manually during the slideshow.
5. How to Add Transitions in Google Slides?
You can also add slide transitions in Google Slides. Transitions are basically animating or adding an effect between two slides.
Adding transitions in Google Slides is also quite easy.
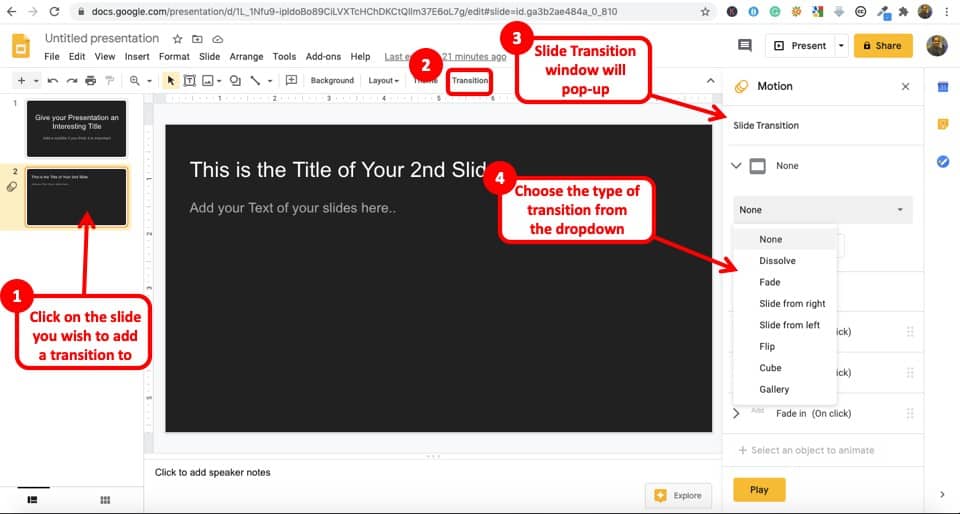
First, click on the slide that you want to add the transitions. Then, click on “ Transition “. You’ll notice the “ Animation Panel ” appear on the right side of your screen.
Then, under “ Slide Transition “, click on “ None “. A dropdown will appear. Choose any transition effect from the dropdown. That’s it!
You will now notice that the transition effect has been applied. You may also notice a small icon under the slide number tab on the left slide of the screen. This icon means you have some motion effect applied on the slide. (Check slide 2 and slide 1 in the image above for comparison).
6. How to Send (or Share) your Google Slides Presentation with Others?
Once you are done creating your presentation, you may need to share it with your boss or your clients. You may perhaps also want to share it with your colleagues in case you want to leverage the real-time collaboration feature of Google Slides. Either way, you need to know how to share your Google Slides presentation with others.
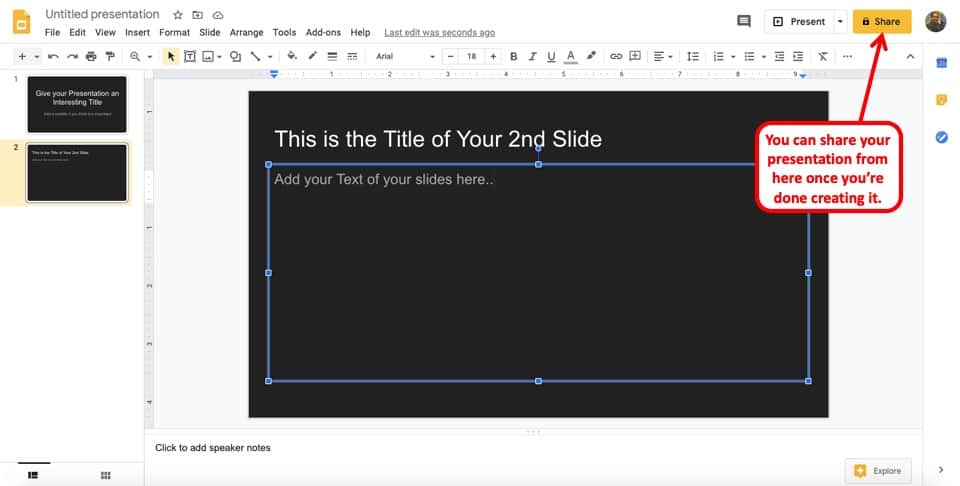
To share your Google Slides Presentation with others, simply open the presentation and click on “Share” on the top-right corner of your presentation screen. Then, simply add the email ID of the person you intend to share the presentation with or copy the link and share it with the person in a separate email.
TIP – When sharing the presentation with others, make sure you have assigned the appropriate permissions so that the recipients of your presentation do not face an “Access Denied” error.
While sharing the presentation, make sure you have provided appropriate permissions for the intended person to access the presentation file. Otherwise, they may get a “Access Denied” error.
I wrote a detailed article on the various reasons why people get this error and how you can avoid it too. Make sure to check it out!
[FIXED!] Access Denied/You Need Permission Error on Google Slides
I’ve also explained the correct process of sharing the file with others in the above link. So, do make sure to check it out!
7. How to Access your Saved Google Slides Presentation?
There are times when you need to refer back to your presentation that you had created a few weeks back.
Accessing your saved Google Slides presentation might seem confusing at first since it works a bit differently from the traditional methods of saving a file on your computer.
Nevertheless, the process is pretty straight-forward. If you remember the initial few steps of opening a new google slides presentation, then this will be quite easy for you to follow.
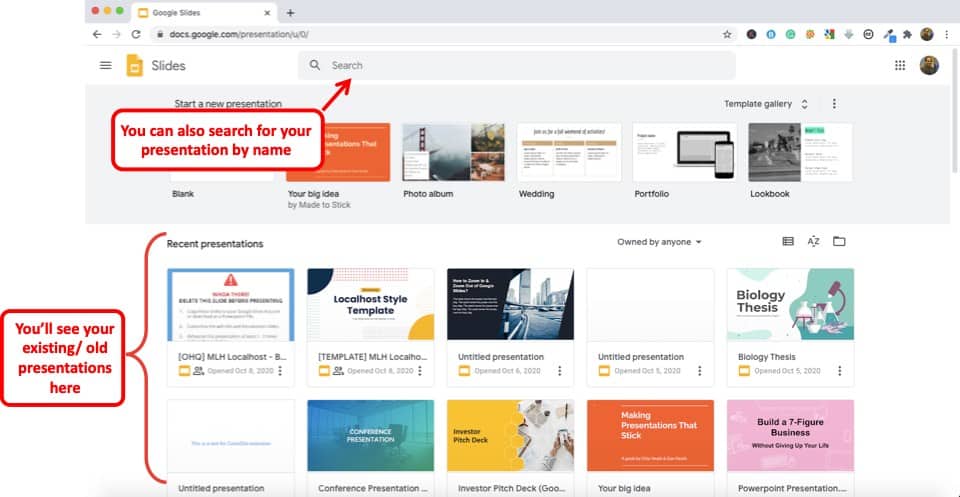
Simply type in your address bar slides.google.com (or click on this link). Make sure you are logged in to your Google Account.
You will be welcomed with a screen that may look similar to the image above.
You can easily access your previously saved Google Slides presentation under the “ Recent Presentations ” section. Alternatively, you can also directly search by the name of the presentation by entering it in the search bar.
You can also access your Google Slides presentation files from your Google Drive. The process will be similar to what I’ve just mentioned. However, instead of visiting the link mentioned above, you will need to go to your Google Drive page. Make sure you are logged in to your Google account when accessing your Google Drive.
Personalizing Your Google Slides (Themes, Add-ons, and Other Modifications)
The virtual aesthetic of your slides is also crucial to captivate your audience with your presentation. And, Google Slides does not leave any stones unturned when it comes to personalizing your slides according to your preference.
Themes/Templates
As mentioned previously in an earlier paragraph, you have access to both built-in themes and you even have the option to import templates from external sources to further amplify the visual aesthetics of your slideshow. There are a few third-party vendors from where you can get your Google Slides templates although most of them are paid.
This feature outshines Google Slides as you can further extend this program’s capacity of tools by installing easy-to-use plugins. There’s already a dedicated button for installing Add-ons on the navigation bar.
Thus, you can always get your hands on some cool add-ons. A lot of these add-ons you will come across will let your add icons, charts, diagrams, gifs, and various other things that you usually can’t do with the basic tools of Google Slides
Other Modifications
Depending on your Google Slides usage, there are a few other modifications that you may want to consider.
One of the most important modifications would be to install an offline extension service to run your Google Slides program on your browser even with no internet access. We’ll talk about this in detail later in the article.
You can also add new fonts from external sources in Google Slides. Adding fonts from Google Fonts library is a great place to start.
Can you Use Google Slides Offline?
Google Slides also provides you with the ability to not just work online but also continue working offline in case you internet gets disconnected.
Although using Google Slides offline eliminates the possibility to collaborate with others since that will require an internet connection, it still is a great feature especially if you are in a poor network zone or when you want to work while traveling on a flight.
However, you will need to activate Google Slides’ offline feature before you get disconnected. Fortunately, you don’t have to download any software for this either.
While the mobile application has a built-in feature to support offline, the browser version on laptops and computers has some prerequisites.
In order to run Google Slides offline, you need to go through the following steps –
Step 1 – Install Google Docs Offline extension on Chrome
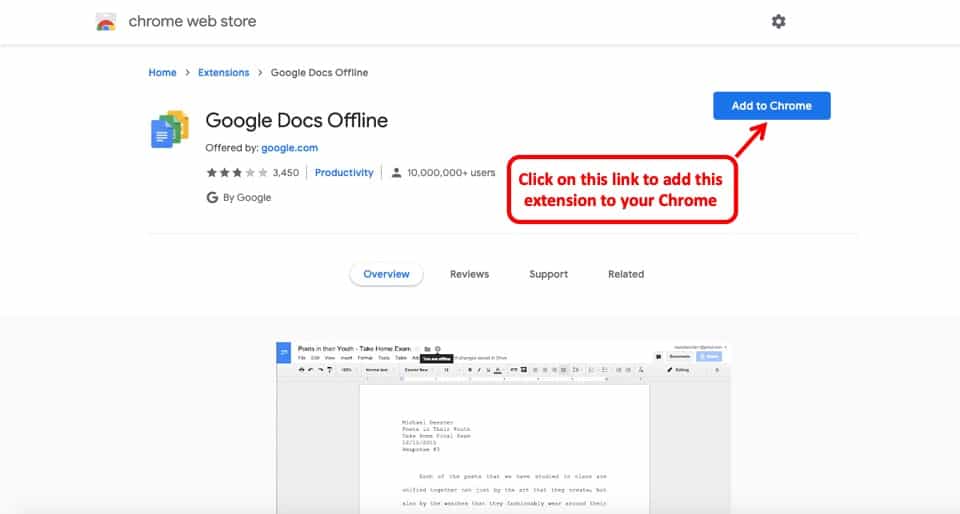
Install the “ Google Docs Offline extension ” on your Chrome browser by either going to the Chrome Web Store OR by clicking on this link which will lead you to the extension. (Make sure you are using a Chrome Browser)
When the page opens, click on “ Add to Chrome ” to add the extension to your Chrome Browser. Google Chrome will automatically add the extension and activate it for you.
Step 2 – Enable Offline Editing in Google Slides
You need to remember that the offline extension only works if you have the Google Chrome browser. Furthermore, make sure your browser is updated to the latest version for the extension to work correctly.
Now, go to your Google Slides page by visiting slides.google.com (make sure you are logged in to your correct Google Account).
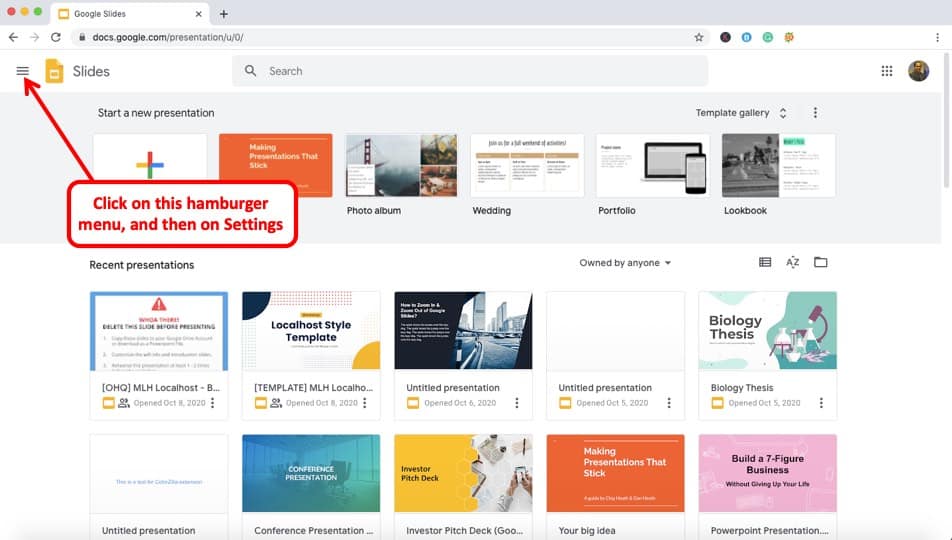
On the top left corner of your screen, click on the hamburger menu (as indicated in the image above).
You’ll then see a drop-down menu on the left side of your screen. Then click on “ Settings “.
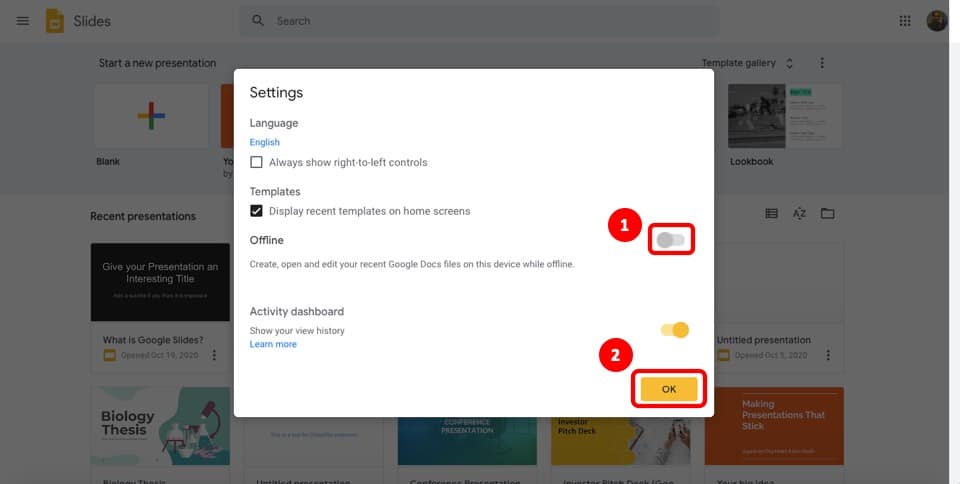
A new settings window will pop open. Make sure you toggle the “Offline” button to activate offline editing of Google Slides. Then, click “ OK “
A word of caution here – Working offline on Google Slides still lacks a few key features. Thus, it is best to always work online mode. However, use the offline version when you expect a lack of internet access. This is more of a stop-gap arrangement.
How to Download Google Slides on your Computer?
Downloading your slides on from Google Slides is a very easy task which I’ll be covering in this section.
PRO TIP! The best format to save your presentation file is in the .pptx as we can easily open it in Google Slides, Microsoft PowerPoint as well as other presentation applications.
Furthermore, a PPTX file format is usually compatible with most presentation applications. It is important to remember that most companies will still prefer that your presentation be delivered in PowerPoint rather than Google Slides.
You can also save your Google Slides presentation directly on a flash drive. Either way, you will need to first download your Google Slides presentation.
I wrote a detailed article explaining the various ways in which you can download your Google Slides presentation on a flash drive. I’ll leave a link to that article below –
How to Save Google Slides on a USB Flash Drive? [EASY WAY]
Here’s how to download your Google Slides presentation in a few simple steps –
- Click on the ‘File’ tab and then proceed to the ‘Download’ option on the drop-down menu.
- Another drop-down menu on the side will appear with a list of formats to choose from to save your file.

- As I have discussed above, the safest and clear option is to save the File as PowerPoint (.pptx) format as it is both compatible with slides and PowerPoint.
- The file will be automatically downloaded, and then you will have to open the file click on the Save As option.
- If you want to save the presentation to a flash drive, then navigate through your folders in the Flash drive dialog box and hit ‘save’ to successfully download your project with a title.
How to Open PowerPoint Presentations using Google Slides?
There are various ways to open PowerPoint files on Google Slides. Though some methods may seem more complicated than others, I’ll focus on the easier method of converting a PPTX into Google Slides Format and vice versa.
Here are the steps that you need to follow in order to open a PowerPoint file in Google Slides –
Step 1 – Open Google Slides, a Bank Slide for a presentation will show up.
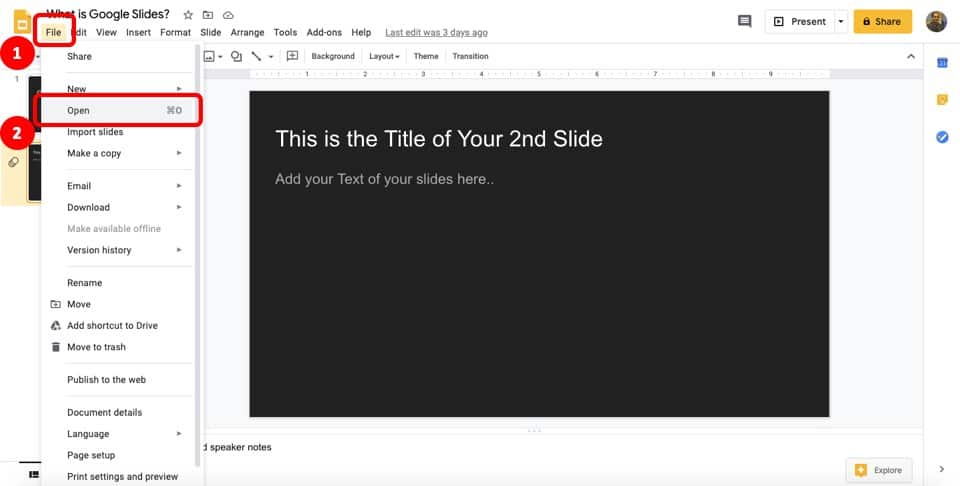
Step 2 – Click on the ‘ File ’ tab and then proceed to ‘ Open ’ on the drop-down menu.
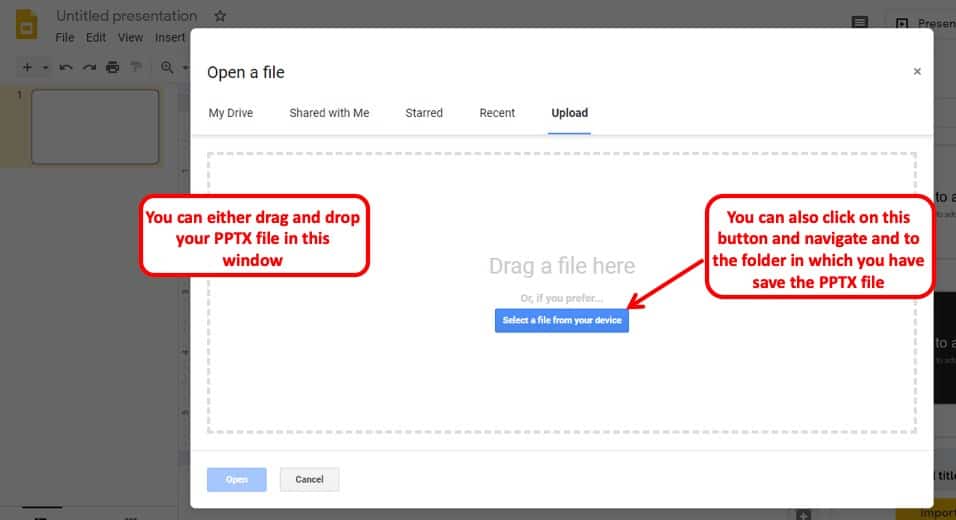
Step 3 – A dialog box will appear that will allocate several bars for you to choose your PowerPoint file from. If your (.ppt) slides are saved in your computer, choose ‘ Upload ’ and proceed to your folders to find the desired file and click ‘ Open ’.
If it is shared or uploaded to your drive, then resort to the ‘Shared with me’ or ‘My Drive’ section of the dialog box and open accordingly. Step 4 – Voila, now you can access your PowerPoint presentation in Google Slides with ease!
Is there an App to Use Google Slides on the Phone?
Google Slides not only can be accessed on a browser, but it also comes with an app.
Google Slides has an app for both Android and iPhone. It can easily be accessed from the play store on android and the app store on iPhone.
The Google Slides app is great for reviewing presentations. You can also use the app to deliver a presentation directly from your phone. However, the Google Slides app is limited in functionality. You can edit text on the app, but working with shapes is rather difficult.
The best use of the Google Slides app is really to view the presentation, download the presentation, make it available for offline use or even deliver a presentation using the phone directly!
That said, if you want to create a presentation, I wouldn’t recommend using the app. In fact, your time would be best served if you create a presentation on a computer.
Is Google Slides App FREE to Use?
The Google Slides app, just like the application itself, is completely FREE to download and use. It is FREE for both Android and iOS devices.
That said, as mentioned above, the app doesn’t have the full functionality of Google Slides that you can see on a browser. It only has limited use cases and works well for the purpose it is designed for.
Can You Use Google Slides on an iPad?
You can definitely use Google Slides on iPad too. You can download the Google Slides app for an iOS device to use it on an iPad. However, in my opinion, the best way to use Google Slides on an iPad is by installing a Chrome Browser!
By using Google Slides through a Chrome Browser on an iPad, you get many more functionalities than a traditional Google Slides app.
Simply open your Chrome Browser, and visit the Google Slides Home Page . Make sure you log in to your Google Account while using Google Slides. Then, on your chrome browser on your iPad, go to the settings tab, and enable the desktop version of the site.
Google Chrome will then convert your browser to a desktop version providing you with many more functionalities such as adding and removing transitions, working with shapes, and adding animations to your Google Slides presentation directly on your iPad!
Benefits and Limitations of Using Google Slides
If you are still unsure of using Google Slides, let me share with you some benefits as well as limitations of using Google Slides.
I hope these will help you make your decision.
In fact, I wrote a detailed article highlighting several benefits and limitations of using Google Slides. I would highly encourage you to check it out. I’ll leave a link below –
17 Pros and Cons of Google Slides! (Should You Use it?)
For your convenience, I’ll list a few key benefits and limitations below. However, I’d highly recommend that you check out the above article.
Benefits of using Google Slides
Here are a few key benefits of using Google Slides –
- Google Slides is FREE to use.
- Accessibility – Google Slides presentation is always accessible.
- Cross-platform availability.
- Google Slides is a web-based tool. It doesn’t require a software.
These are just a few of the benefits. For a full list and a comprehensive explanation, make sure you check out the other article by clicking on this link .
Limitations of using Google Slides
Here are some of the key limitations of using Google Slides –
- Limited number of built-in themes.
- Lack of Advanced features.
- Limited options for animations and transitions.
These are just a few of the limitations. For a full list and a comprehensive explanation, make sure you check out the other article (mentioned above) by clicking on this link .
Is Google Slides Safe to Use?
When it comes to safety concerns regarding Google Slides, one thing to consider is the fact that it’s developed by Google. Google’s security protocols include strict password protection.
They have also pledged to protect your privacy and data unless you’re willingly sharing your files.
All your data and files are protected on secure data servers where they stay protected and out of reach from others. Google refuses to discuss in-depth about their data protection protocols for security measures, however, rest assured, you don’t have much to worry about your data or files being hacked as Google’s servers are some of the most secure in the world!
According to Google’s copyright policies, Google claims no content from its users is exploited and all users hold their ownership rights. Thus your Google slides files will always be safe from exploitation. If you’re still concerned about safety measures, try changing your password once in a while and link your Google Account to a backup account. Make sure your Google Drive stays private at all times and only share your files with trusted contacts.
Lastly, when sharing presentations with others, share it by adding the email address of the concerned person rather than creating a shareable link. This will act as a deterrent and will serves as another way to avoid unwanted intruders from accessing your Google Drive files.
Google Slides vs PowerPoint vs Keynote – A Quick Comparison
You might be wondering; how does Google Slides compete with its more renowned competitors? Well, let’s understand this in a quick comparison.
PowerPoint is the earliest presentation program and has many dedicated users. This makes it the most reliable and popular presentation application in the market. Bigger and more professional companies will prefer a presentation made using PowerPoint due to its compatibility.
The number of ways you can use PowerPoint for design projects is also quite large. In that sense, it is a more complete program when it comes to presentation design. While it can be used by beginners, but it is most well-suited for pro-level presentation creators.
PowerPoint has a better reputation and many more features than any of its competitors. That said, it is also the most expensive of the three. However, PowerPoint houses the most number of animations and effects in its default library. It is also available on mobile devices, Windows, and Mac OS. You will also find a lot of help if you choose PowerPoint as your go-to presentation application.
Keynote, on the other hand, only works on Mac OS and is free on the latest ones but needs to be bought for previous versions of Mac. It has more features as compared to Google Slides but less than PowerPoint.
Using Keynote does give you a premium feel and also helps you bring out your creativity. But, it still lacks the charm of both Google Slides and PowerPoint when it comes to having unique features. Moreover, it is not really compatible enough as it is not available for Windows and can only be used with Apple devices. Keynote also lacks a huge community due to its lower number of users as compared to PowerPoint. That said, it is a robust presentation software. If you are a Mac user and do not want to spend money using PowerPoint, Keynote is a great alternative!
Google Slides is the only free option that comes with a full package filled with the basic tools to execute a perfect presentation option. It is even compatible with PowerPoint formats. You can further extend the tools in its inventory.
Google Slides has the strongest collaboration features out of all. You can share and backup your files with ease. However, being a web-based free app has its drawbacks. It lacks the more advanced features compared to its other full-featured desktop presentation competitors.
That said, in my opinion, it is THE BEST tool for beginners, students or even people who need to create presentations but are not comfortable spending money on a presentation software.
Final Thoughts
Starting from, “ What is Google Slides ?” to “How to use Google Slides?” I’ve discussed various basic aspects there is to know about Google Slides. I hope I’ve been able to cover all of your concerns and questions about Google Slides, and that this article has made it easier for you to make your decision.
Hopefully, the knowledge you attained throughout reading this article was helpful and productive.
Our goal of this site is to provide you with similar helpful content. Make sure that you bookmark this site, and if you have any questions or topics that are related to presentation, make sure you check it out on our website!
20 Google Slides Tips to spice up your Presentations
Google Slides tips, 20 great tips to push your presentation slide show to the top of the list, make people listen and get your message across clearly, professionally and with style.
- Share on Facebook
- Share on Twitter
By Lyudmil Enchev
in Insights
4 years ago
Viewed 16,702 times
Spread the word about this article:
If you need to make a presentation, you want to give yourself the best chance of success. To sell the product or yourself, to inform, to get your message across – the better the presentation the better the chances. Slide show presentations are a common way of doing this, but they are no less useful for that. They have many advantages, it’s why they are so popular, they can get the information across clearly, concisely, and memorably if done well. One of the most important decisions is which software to use. One option is Google Slides, but the software alone will not a great presentation make. In this article, we’ll give you some tips on how to really spice up that Google Slides presentation to create something you are proud of and more importantly will get the job done.
What is Google Slides?
Google Slides is a specialized presentation program that is part of the Google Drive service and it is free or there is a paid-for business option – G suite. It is available as a desktop application and also as a web app or mobile app, so it can be used in pretty much any situation by anybody with computer access.
Put simply Google Slides enables anyone to create a presentation and edit it , and significantly can allow you to collaborate with other users in real-time . It is designed for online use and is regularly updated with new, fresh features. Crucially, it is also incredibly easy to use .
You’ve got the resource, you’ve got the concept, so the only question that remains is how do you make it something special? Here are the top 20 design tips to consider when using Google Slides:
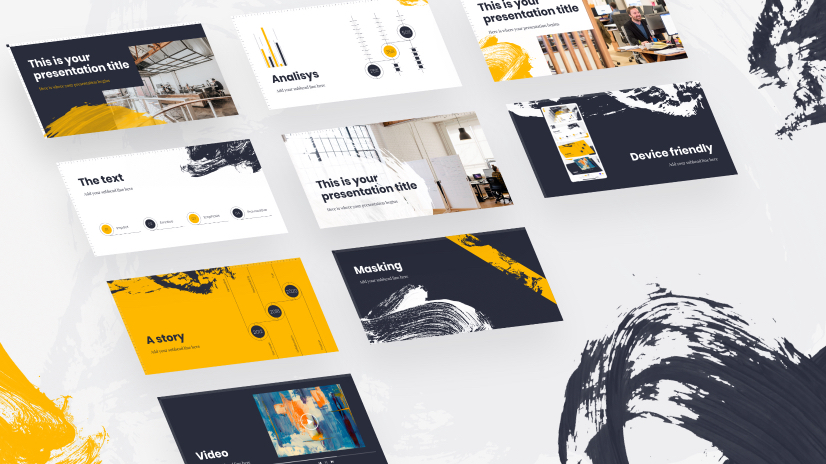
Tip 1: Use templates Tip 2: Use plenty of images Tip 3: Experiment with typography Tip 4: Add diagrams and infographics Tip 5: Get creative with your images Tip 6: Be careful with color Tip 7: Add animated transitions Tip 8: Collaborate with your team Tip 9: Add videos Tip 10: Hold back on the text
Tip 11: Make it a story Tip 12: Make reference Tip 13: Add links Tip 14: Take questions Tip 15: Make notes Tip 16: Add bullet points Tip 17: Make it device friendly Tip 18: Use numbers Tip 19: Finish with C.T.A Tip 20: Don’t extend too much
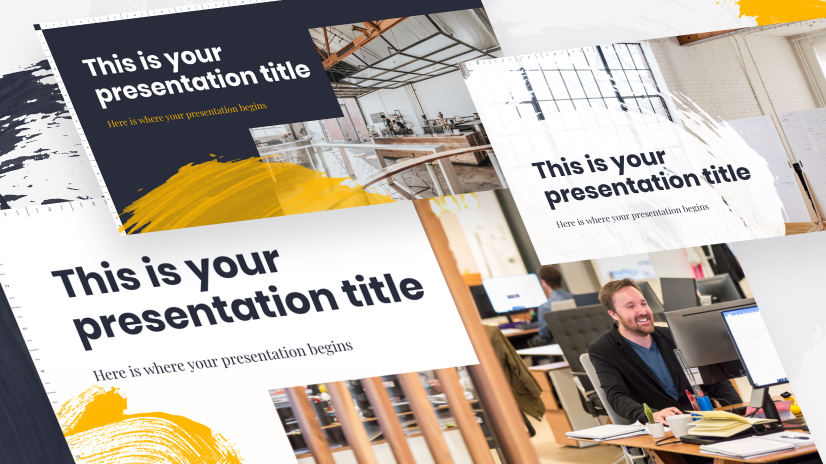
Tip #1: Use templates
The theme of your presentation should be represented by the theme of your slideshow. It will hold everything together.
Unless you are a designer yourself, it can be tricky and time-consuming to design a presentation from scratch that looks the part. The professional designers know what they are doing and give you plenty of options. It isn’t lazy, it doesn’t reflect on your design skills (you aren’t a designer anyway), and nobody questions your creativity.
In actual fact, using the numerous professionally designed templates available on Google Slides does two really useful jobs, if, in fact, they notice at all. Firstly it shows the audience that you know your limits and more importantly, it gives you time to focus on the content of the presentation. It is after all the content that is your principal goal. Plus it gives you extra time to concentrate on your all-important presentation skills.
The templates are all exceptionally designed, and completely and easily editable including the addition of images, layout, color, and background color. Really what more could you need?
Tip #2: Use plenty of images
Presentations need to be visual. We remember images, we understand images, we recognize and associate with images, and we are brief visual creatures. You need to use images, but we wish it was that simple. don’t just throw them in for the sake of it!
The images you use have a huge effect. The key is to use powerful and appropriate images such as photos and illustrations that help you get your message through. Images that emphasize and enhance your words, stoke up emotion and clarify a complex issue, all these images are useful and powerful. They help you deliver what you want, they help you get your message across and you need to get them into the presentation as thoughtfully as possible.
So you know, you want images so then you need to decide on the right ones. Either use your own images previously downloaded or created and saved and insert them or use Google image search. If you use Google’s image search which has a tremendous number of options, we’re talking in the millions here, it isn’t even necessary to download them first, just add them via your browser tab, insert, image, type in keywords and search away then click on your choice and it’s done.
The type of images you add is important and well worth thinking about. Illustrations can show creativity, originality, and imagination. They are great for illustrating more abstract or complex ideas. You can choose between artistic, hand-drawn, graphic, geometric, simple outlines, etc, all will generate a different tone and feel. Photographic images can present reality, credibility, and honesty. With either choice, you can get really creative, grab the attention, hold the attention, and be remembered.
Be aware that heavy files can result in lagging, which is the last thing you need. Run the presentation through, to check it’s smooth.
Tip #3: Experiment with typography
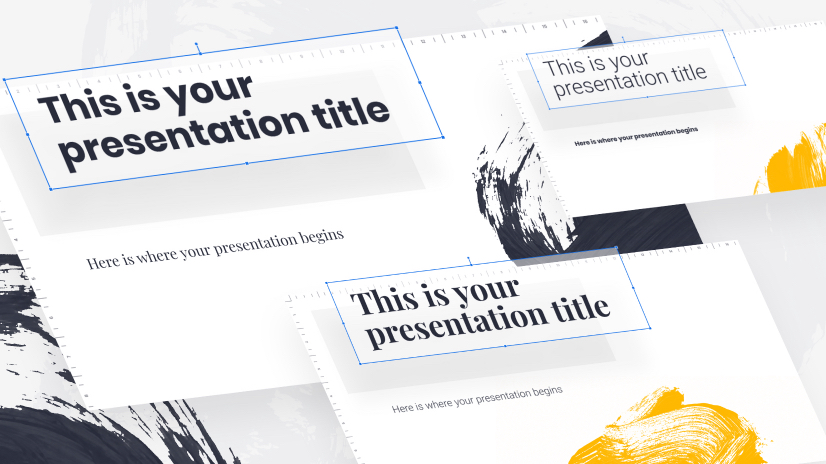
If you’ve got great content, and we’re sure you have, why go with a bog-standard font. Let’s get creative and choose the font that will suit your theme, your content, and your style, a font that will catch the eye and set you apart. In Google Slides when you click on a text box you get a font option, including size, color, etc. There is a great range but selecting “more fonts” at the top will direct you to the free Google Fonts service. Here you can get really funky. Don’t be afraid an unusual font can have a wow effect but remember it needs to be readable too. You can add your own custom fonts too.
And that’s not all, clicking on the More option on the menu bar (far right) gives you room to play with the text you have, from the usual rotation, size, text fitting, and positioning to the more interesting drop shadow and reflection options. (including opacity, and translucency slide bars.) These add interest and an extra dimension and look like you’ve really made an effort.
Tip #4: Add diagrams and infographics
As with the images above, infographics and diagrams are ideal for presentations. They convey masses amount of information in accessible chunks in a visual way. If you’ve got stats and data or even a complex idea to explain there is little as confusing and frankly dull as long lists of figures or long-winded explanations. This is where the latest craze for infographics really comes into its own.
You can create infographics independently of Google Slides and simply insert it, in the correct spot. Alternatively, you can create a chart or graph, a flowchart, or a diagram straight in Slides, using google sheets or one of the standard menu options. Again these are flexible and editable.
Tip #5: Get creative with your images

We’ve already established that you need images, right? If you’ve selected the appropriate powerful ones, now is the time to put in a tiny bit of effort to add a little extra style. Google Slides contains an option for masking images, meaning you can play with the edges, round off the corners, change image shape and add other stylistic elements. These little things make a huge difference so get creative and experiment, you can always undo, the many options by simply clicking on the image, then the Mask image icon (the little triangle).
Tip #6: Be careful with color
We all know colors can improve a presentation but it is equally true that they can ruin it too. A tendency to throw colors around willy-nilly can look childish and distract from your main aim, so think carefully.
Colors carry associations and are emotive(be aware that they are also culture-sensitive) and can be a great psychological tool when presenting. But you have to make some decisions about what, where, and how much.
- Brand Colors – if you’re presenting your brand, colors are a fantastic way of creating a strong flow of identity throughout. You can stick to the exact colors or use tonal variations and still keep the consistency.
- Bright Colors – catch the attention, but don’t overdo it. Combinations work well, especially regarding images and texts.
- One dominant color – A theme that eases from slide to slide, when used cleverly focuses the eye and highlights key points.
- Black and White – a classic for a reason, dramatic yet clear, elegant yet simple, and you can add grey or occasional pops of color that really stand out.
- Trends of 2022 – colors go in fashions too, check out the most trendy colors and combinations in 2022 .
- Gradients – Gradients and color transitions are very popular.
- Backgrounds – full or part, transparent or semi-transparent, plain, pattern or texture – background really help draw the eye to a particular section. You can also add your own.
Google Slides makes it easy to edit colors into your work, the difficult bit is making the decision in the first place.
Tip #7: Add animated transitions

The visual effect given when moving from one slide to the next, transitions is one of the simplest methods of adding a professional feel to the overall presentation. In Google Slides, just click on the “Transitions” button on the menu and choose from the many options available. The rule of thumb is to find one you like and stick to it during the whole presentation, there are lots of options but don’t be tempted to mix them up. A great transition will keep the interest and create a dynamic flow, a cacophony will distract.
It’s worth noting you should try to keep the number of slides and therefore transitions as low as possible, too many slides is too much movement and not enough focus.
Tip #8: Collaborate with your team
A great advantage of Google Slides is that as it’s online, anyone with permission can see where you are at with the design and even edit it. If you are working with a design team or content writers this is ideal, if you want another opinion it’s a great option too. Another set of eyes can offer insights, and advice, and often see mistakes that you haven’t even noticed. And always get your presentation proofread to avoid potential embarrassment, the last thing you need is to be talking over a glaring typo, hours spent putting together a great presentation can be lost in an instant.
All edits are tracked by the user and indicated by color coding and you can give various levels of permissions. With a revision history that tracks changes to the presentation.
Tip #9: Add videos

It may be appropriate to do something a little different and add a video, it will cause a stir. If you think this is an option that will add to your presentation and isn’t just there because you can do it, then it’s easy to do in Google Slides.
By clicking on “Insert” then “video”, you can add either form your own saved video to your Google Drive account or search YouTube videos. Be sure to watch the video before embedding it, you don’t want an embarrassing surprise. Then edit or format your video as you wish, you can change position or size and playback options, it’s easy but a great way of impressing the audience.
Tip #10: Hold back on the text
Your presentation is an aid to your speech, a guide, and in addition, it is not a document to be read. A text overload will do one of two things either people will focus on the writing and you’ll lose their attention, or worse you’ll lose them altogether and they’ll focus on neither.
The rule is to be brief, the shorter the better. Strong impacting, emotive, emphasizing, provocative – these are the words you are looking for, nobody wants long explanatory texts (that’s what your images are for).
Experts recommend up to six words per slide is enough to gain the attention and get the audience to listen to what you have to say.
Tip #11: Make it a story
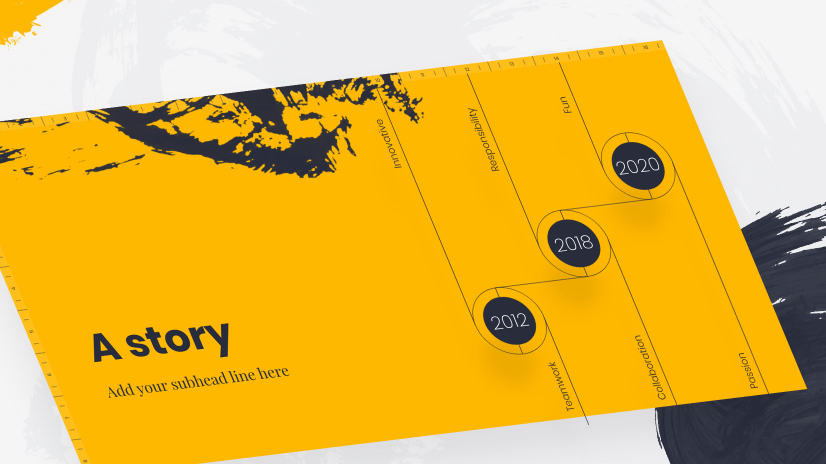
We are surrounded by stories from the earliest fairy tales of childhood to the binge-watched Netflix dramas of present times. If you want your presentation to really strike a chord, storytelling is the way to go. Stories, anecdotes, and personal snippets all will allow your key communicative aim to be understood. They also give you a chance to show your personality, humor, humility, experience, and knowledge, and liven things ups.
The slide show is used as a guide through your story, a background that will hold the key concepts and arguments, keep them clear, and hold the focus. But essentially they supplement and add whilst you do the work.
Tip #12: Make reference
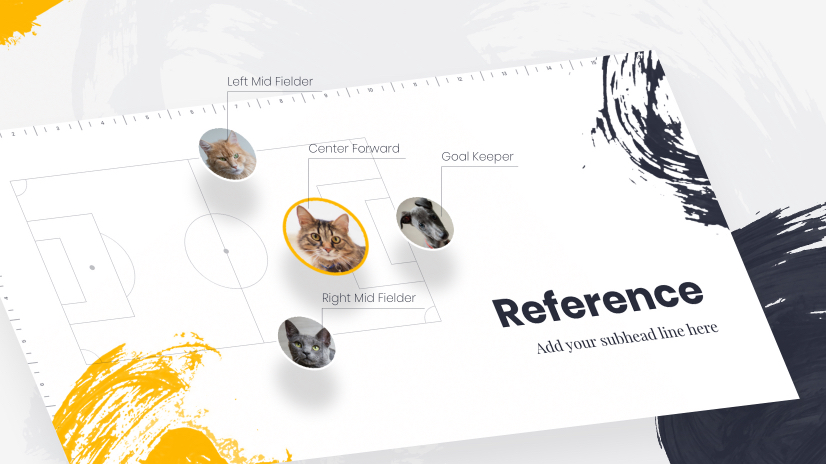
By referring to current events, and culture you kill two birds with one stone. Firstly, the audience can relate to your message and can link your ideas to what they are familiar with. Secondly, it keeps things topical, relevant, and up-to-date and that includes the images of you. It forms a vital link with the audience, you are part of them and not apart from them.
But beware you need to know your stuff, what you may think is topical could fall on deaf ears. Research and know your audience, think of age and cultural differences – you don’t want your witty observation to fall on stony ground. And everything should be focused back on your main point, link it to the presentation.
Tip #13: Add links
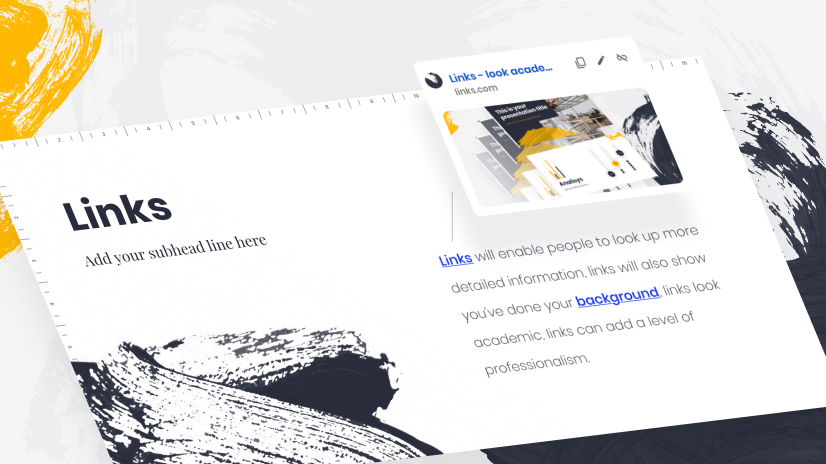
Links will enable people to lookup more detailed information, links will also show you’ve done your background, links look academic, and links can add a level of professionalism.
With Google Slides there is a research tool, which makes it simple to add links to websites but also to images or additional files in your Drive account. A very useful way of allowing you to be brief and focused but supplying all information that is needed. You can even type into the Google Slides to search for relevant images and sites.
Tip #14: Take questions (often)

Don’t wait until the end to invite questions, people often forget what they were going to ask or are just desperate to get to the free buffet! Questions should be invited throughout, interaction is good, and it makes the audience feel part of the process. In a physical presence in a meeting room or conference hall, this should be scheduled into your time, it is easy to forget and move on.
Google Slides has a Presenters notes section that only you can during the presentation, this is an excellent place to remind yourself to ask for questions.
If your presentation is virtual then Google Slides can create a link for you to send to your audience. Through this link, the viewers can post questions which then appear in the box. An excellent way of increasing active viewing.
Tip #15: Make notes
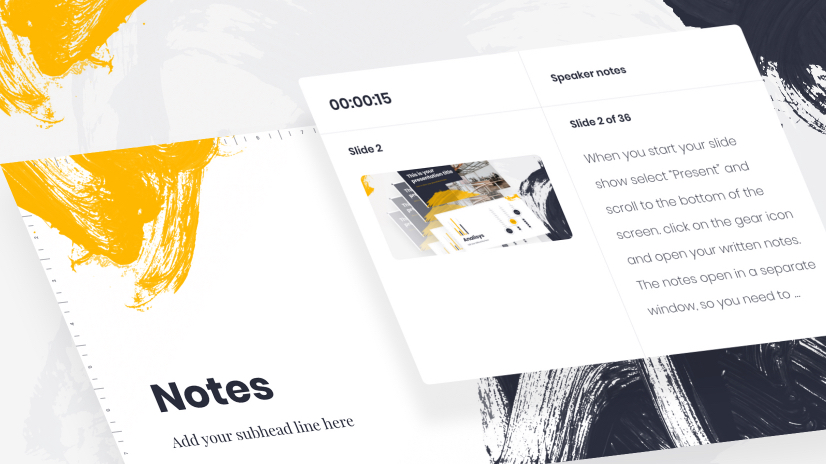
As we’ve established your slide show is not a complete presentation, your skills are absolutely vital. You need to be prepared for the pressure and the performance. Google Slides provides a “Presenter Notes” option where you can create a guide for each slide, or a script if you wish. There is a good chance you will forget something or get lost at some point unless you really know your stuff – and even then it’s more than possible.
When you start your slide show select “Present” and scroll to the bottom of the screen. Click on the gear icon and open your written notes. The notes open in a separate window, so you need to arrange your setup so you have different screens meaning the audience doesn’t see the notes. The notes follow the slide you are on, forwards or backward, and at whatever speed you are working.
Tip #16: Add bullet points
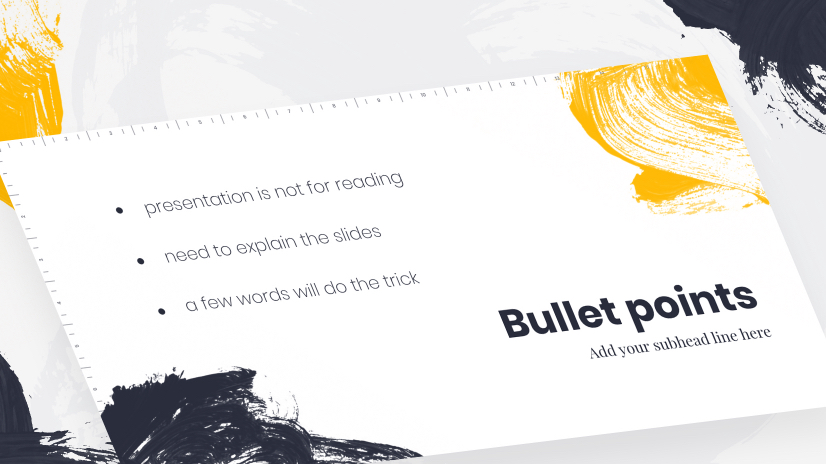
In an article, proposal, or report, bullet points are great, they break up texts, highlight key points, and make scanning easier but these are text for reading. A presentation is not for reading. You need to explain the slides, the bullets don’t. If it’s worth a bullet point it’s worth a slide of its own. Don’t patronize your audience with obvious point breakdowns when a few words will do the trick. If they need a breakdown, or explanation add a link.
Tip #17: Make it device friendly

You may well be using your presentation slide show in a very standard, typical way, perhaps projecting it onto a screen behind you from your laptop. Remember Google Slides is online so you can access it from a mobile device or tablet. This means that it is possible to cast from your device to a screen. You don’t necessarily have to carry around your laptop for your presentation.
It is also great for working on your presentation remotely, where ever you may be. You get a great idea on the train, take out your phone and access your presentation.
It’s also worth bearing in mind that others can access your presentation from their device too, so remember when doing the design that your presentation needs to look at the part on the small screen.
Tip #18: Use numbers
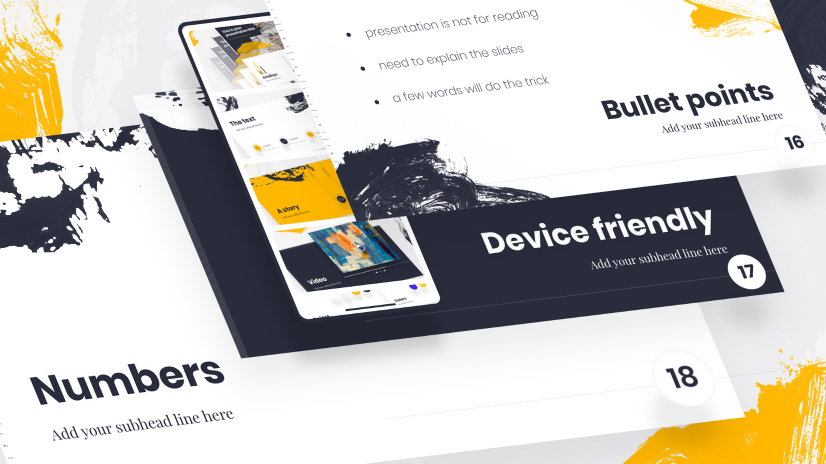
Numbers add clarity, help the listeners know where you are, act as a guide through the process, and make it feel like you are progressing. If you number each slide there is a sense of drawing to a goal, it’s a simple rule but one of the best. They take seconds to add on Google Slides and are proven to help.
Tip #19: Finish with C.T.A
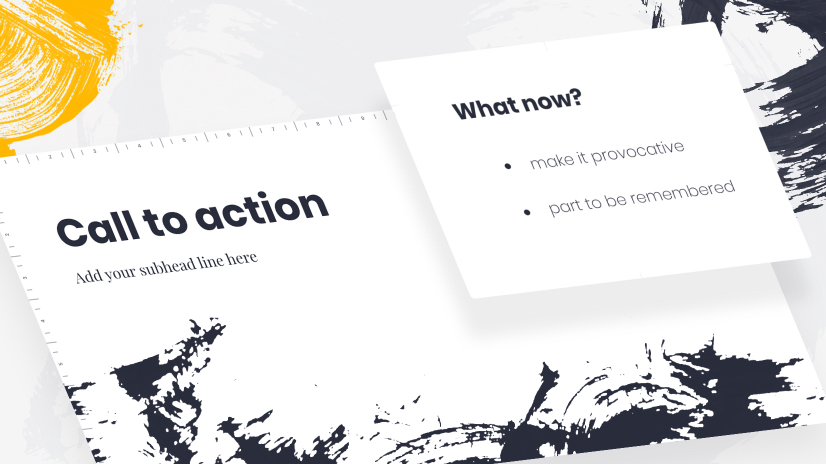
A call to action is a great way to finish. It has the dual function of closing the presentation and opening the next dialogue. Devote a whole slide to it, make it provocative, you want this part to be remembered.
Thank your audience, of course, it pays to be polite… but please don’t waste a slide on this. Your ending needs to be dramatic and memorable. The questions you need to pose at the end of your presentation, and the questions the audience needs to be asking themselves is… what now? Tell them what you want them to do – directly.
Tip#20: Don’t extend too much
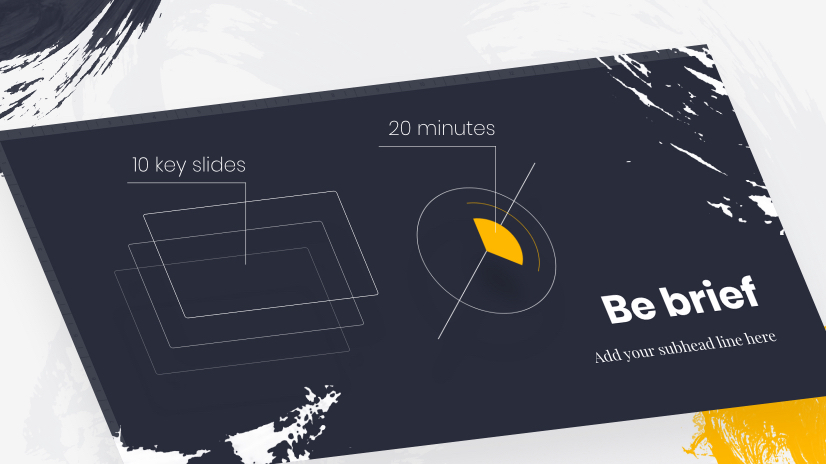
We’ve left it to the end, it’s so important but be brief. Nobody will thank you for needlessly extending, you sat in presentations yourself and you know exactly what everybody is thinking. Let’s get this over and done, yes? This is what the experts say and who are we to argue.
- Ten key slides – Seems harsh and obviously, it’s only a guide but it’s a good guide. This is the optimal number of slides in a Slide Show presentation, as most people don’t cope well with more than ten key ideas in one session.
- Twenty minutes – If your presentation talk is planned for 20 solid informative minutes it’s plenty. You can have a brief intro (but keep it brief) and clearly, it’s flexible for additional questions and discussions but your actual presentation time should be around 20 minutes.
Presentation construction and the presentations themselves are not necessarily dull. These key tips are both general and Google Slide specific. The idea is to create something that will wow your audience, look professional, create a buzz, and most importantly of all – achieve your main goal. Substance and style rather than one over the other.
You and your design are a team, working together to get the information and message across. The design should, of course, look the part and these tips will help you there – but it shouldn’t dominate.
You are a focal point too, and here are some things to remember:
- Have energy – if you are not enjoying it, no one will.
- Practice – eye contact, voice, and gestures, they all go a long way to selling the message and keeping people with you. Practice in front of a mirror, in front of friends and family, even a pet -it makes a difference when you do it in front of an audience – you’ll get the feel.
- Prepare – double-check the equipment, and proofread the presentation (better get it to proofread).
- Feel Comfortable – get there in good time, check the room and facilities, wear clothes you feel good in, it all helps your confidence.
- You can’t please all the people all the time – remember some people will always be bored, and won’t react, hit the majority and you’ll be fine.
These Google Slides tips are exactly that tips, you use what you want, what you think will work for you, and you will work for your audience. The Slides will help, they are the magic wand but you are the one waving it and speaking the magic words.
You may also be interested in these related articles:
- 35 Free Google Slides Infographic Templates to Grab Now
- 39 Free Google Slides Templates For Your Next Presentation
- 70 Inspiring Presentation Slides with Cartoon Designs

Add some character to your visuals
Cartoon Characters, Design Bundles, Illustrations, Backgrounds and more...
Like us on Facebook
Subscribe to our newsletter
Be the first to know what’s new in the world of graphic design and illustrations.
- [email protected]
Browse High Quality Vector Graphics
E.g.: businessman, lion, girl…
Related Articles
20+ secrets to taking amazing photos for blogs and social media, the best image formats to use in 2021, 12 canva alternatives to easily manage your designs [free and paid], brand equity: how to build and maintain a strong brand that people love, mascot design – 10 brilliant transformations of famous mascots, 500+ free and paid infographic templates compatible with google slides:, enjoyed this article.
Don’t forget to share!
- Comments (0)

Lyudmil Enchev
Lyudmil is an avid movie fan which influences his passion for video editing. You will often see him making animations and video tutorials for GraphicMama. Lyudmil is also passionate for photography, video making, and writing scripts.

Thousands of vector graphics for your projects.
Hey! You made it all the way to the bottom!
Here are some other articles we think you may like:

How to Design Your Own T-shirt: Best Practices & 40+ Examples
by Iveta Pavlova

Free Vectors
Character clipart: a collection for every taste & every project.

by Nikolay Kaloyanov
Looking for Design Bundles or Cartoon Characters?
A source of high-quality vector graphics offering a huge variety of premade character designs, graphic design bundles, Adobe Character Animator puppets, and more.

Cloud Storage

Custom Business Email

Video and voice conferencing

Shared Calendars

Word Processing

Spreadsheets
Presentation Builder

Survey builder

Google Workspace
An integrated suit of secure, cloud-native collaboration and productivity apps powered by Google AI.
Tell impactful stories, with Google Slides
Create, present, and collaborate on online presentations in real-time and from any device.
- For my personal use
- For work or my business

Jeffery Clark
T h i s c h a r t h e l p s b r i d g i n g t h e s t o r y !

E s t i m a t e d b u d g e t

Make beautiful presentations, together
Stay in sync in your slides, with easy sharing and real-time editing. Use comments and assign action items to build your ideas together.

Present slideshows with confidence
With easy-to-use presenter view, speaker notes, and live captions, Slides makes presenting your ideas a breeze. You can even present to Google Meet video calls directly from Slides.

Seamlessly connect to your other Google apps
Slides is thoughtfully connected to other Google apps you love, saving you time. Embed charts from Google Sheets or reply to comments directly from Gmail. You can even search the web and Google Drive for relevant content and images directly from Slides.

Extend collaboration and intelligence to PowerPoint files
Easily edit Microsoft PowerPoint presentations online without converting them, and layer on Slides’ enhanced collaborative and assistive features like comments, action items, and Smart Compose.

Work on fresh content
With Slides, everyone’s working on the latest version of a presentation. And with edits automatically saved in version history, it’s easy to track or undo changes.

Make slides faster, with built-in intelligence
Assistive features like Smart Compose and autocorrect help you build slides faster with fewer errors.

Stay productive, even offline
You can access, create, and edit Slides even without an internet connection, helping you stay productive from anywhere.
Security, compliance, and privacy

Secure by default
We use industry-leading security measures to keep your data safe, including advanced malware protections. Slides is also cloud-native, eliminating the need for local files and minimizing risk to your devices.
Encryption in transit and at rest
All files uploaded to Google Drive or created in Slides are encrypted in transit and at rest.
Compliance to support regulatory requirements
Our products, including Slides, regularly undergo independent verification of their security, privacy, and compliance controls .
Private by design
Slides adheres to the same robust privacy commitments and data protections as the rest of Google Cloud’s enterprise services .

You control your data.
We never use your slides content for ad purposes., we never sell your personal information to third parties., find the plan that’s right for you, google slides is a part of google workspace.
Every plan includes

|
|
| $12 USD info Or $14.40 per user / month, when billed monthly
|
|---|---|---|
| content creation | done | done |
| Secure cloud storage | 15 GB per user | 2 TB per user |
| remove | done | |
| Secure email | done | done |
| remove | done | |
| Video and voice conferencing | 100 participants | 150 participants |
| remove | done | |
| Centralized administration | remove | done |
| remove | done | |
| Self-service online and community forums | 24/7 online support and community forums |
Collaborate from anywhere, on any device
Access, create, and edit your presentations wherever you are — from any mobile device, tablet, or computer — even when offline.

Get a head start with templates
Choose from a variety of presentations, reports, and other professionally-designed templates to kick things off quickly..

Photo Album

Book Report

Visit the Slides Template Gallery for more.
Ready to get started?
- PRO Courses Guides New Tech Help Pro Expert Videos About wikiHow Pro Upgrade Sign In
- EDIT Edit this Article
- EXPLORE Tech Help Pro About Us Random Article Quizzes Request a New Article Community Dashboard This Or That Game Popular Categories Arts and Entertainment Artwork Books Movies Computers and Electronics Computers Phone Skills Technology Hacks Health Men's Health Mental Health Women's Health Relationships Dating Love Relationship Issues Hobbies and Crafts Crafts Drawing Games Education & Communication Communication Skills Personal Development Studying Personal Care and Style Fashion Hair Care Personal Hygiene Youth Personal Care School Stuff Dating All Categories Arts and Entertainment Finance and Business Home and Garden Relationship Quizzes Cars & Other Vehicles Food and Entertaining Personal Care and Style Sports and Fitness Computers and Electronics Health Pets and Animals Travel Education & Communication Hobbies and Crafts Philosophy and Religion Work World Family Life Holidays and Traditions Relationships Youth
- Browse Articles
- Learn Something New
- Quizzes Hot
- Happiness Hub
- This Or That Game
- Train Your Brain
- Explore More
- Support wikiHow
- About wikiHow
- Log in / Sign up
- Computers and Electronics
- Website Application Instructions
- Google Applications
How to Create a Presentation Using Google Slides
Last Updated: November 30, 2023
wikiHow is a “wiki,” similar to Wikipedia, which means that many of our articles are co-written by multiple authors. To create this article, 17 people, some anonymous, worked to edit and improve it over time. This article has been viewed 242,643 times. Learn more...
This tutorial will show you how to make a PowerPoint-like presentation using Google Slides. Presentations can be used for school, business, and so much more.

- You can also just type in https://slides.google.com , log in if you haven't already, and will be taken to the Slides page.
- If you don't have a Google account, learn to create one now!

- For more options, hover over the arrow on the right edge of the Google Slides option, where a smaller drop-down menu will appear. From here you can select to create a presentation from a template or a blank slide.

- Be sure to add a title and subtitle by clicking where you are prompted to add text.

- You can also change a pre-existing slide's layout by clicking the layout option on the upper editing bar.

- As you add animations to each element by clicking the blue "+ Select an object to animate", they will begin to pile up. Click on each one to edit it.
- Change the transition from slide to slide by clicking the default "Slide: No transition" at the top of the sidebar. You can choose whether to apply to all slides or just one.
- Preview your animations by clicking Play at the bottom of the sidebar.
- Remove an animation by clicking the small x on its rectangle, and drag each animation up or down to change the order.

Community Q&A
wikiHow Video: How to Create a Presentation Using Google Slides
- If you have a pop-up blocker, make sure to disable it so Slides can work properly. Thanks Helpful 0 Not Helpful 0
- Hover over each tool to see its keyboard shortcut and function. Thanks Helpful 0 Not Helpful 0
- Remember, these are the basic functions- Google Slides contains many more tools that you can work with as you explore the creator. Thanks Helpful 0 Not Helpful 0

You Might Also Like

About This Article
To create a new Google Slides presentation, open a web browser and go to Slides.Google.com. If you want to start from a template, you can choose one from the template gallery. Otherwise, click "Blank" to create a new blank presentation. Your blank presentation starts with a single simple slide with space to enter a title and subtitle. You can personalize this slide, as well as other slides you add, by editing the placeholder text, as well as choosing a slide theme from the panel to the right. To insert another slide, click the "Insert" menu and select "New Slide," or press "Control M" for a quick keyboard shortcut. You'll also find other things you can add to your slide on the Insert menu, including the option to add an image, a text box for typing, videos, shapes, charts, and other features. After adding a new slide, click the "Layout" menu to choose a slide layout—you can give each slide its own layout or reuse the same layout as much as necessary. Edit the placeholder text, and then insert objects from the Insert menu. To move an object, click the arrow in the toolbar, hover the mouse cursor around the object's border line until it turns to a 4-point arrow, and then click and drag it. Each slide you add will have a thumbnail in the left panel—click a slide's thumbnail to open that slide for editing. To see your presentation as a viewer would, click your first slide in the left panel, and then click "Present" at the top corner. Click the Escape key to go back to editing. Google Slides also has some built-in effects you can access from the "Transition" menu—here you can animate a slide's transition into the next slide, as well as animate individual objects. To apply an effect, background, theme, layout, or any other setting to more than one slide at once, select the slides in the left panel by holding down the Control key as you click each thumbnail. Your presentation will automatically save to your Google Drive as you work—type a name for the presentation in the top-left corner so you can easily find the file when you need it. Did this summary help you? Yes No
- Send fan mail to authors
Is this article up to date?

Featured Articles

Trending Articles

Watch Articles

- Terms of Use
- Privacy Policy
- Do Not Sell or Share My Info
- Not Selling Info
wikiHow Tech Help Pro:
Level up your tech skills and stay ahead of the curve
- Slidesgo School
- Google Slides Tutorials
What is Google Slides and what it is used for

Are you familiar with the name Google Slides ? Of course, you are! And we are pretty sure that before you have used a Google Slides template for your presentations. However, do we really know what it is and what it is used for?
It is a question that may seem difficult to answer. For that reason, Slidesgo wants to explain what Google Slides is and what it is used for so that from now on, you'll never doubt it again. Here we go!

Google Slides is a titan of editing and creating presentations. This online and offline platform (you have the advantage of being able to continue editing even without an internet connection) is part of the Google Drive suite along with other services such as Google Docs or Google Sheets. Nowadays, it is very common to have a Google account, being the only thing you will need to edit in Google Slides, a completely free service!
What is Google Slides: Definition
What is google slides used for, what is a slide in google slides.
"An online presentation editor" would be a good way to pick up the Google Slides concept.

It works similarly to editing in PowerPoint, only in the cloud, where all the changes you make will be saved. You can edit a previously designed template or create a new one from scratch.
If you have doubts about what resources and design options are available for you, at Slidesgo School we have a section completely dedicated to Google Slides tutorials .

A Google Slides presentation has the same purpose as a PowerPoint presentation: to serve as visual support in an oral presentation. However, Google Slides offers different advantages such as being able to have your presentation in the Google cloud and have access to it from anywhere and from any device, that several users can modify the same presentation at the same time or that all changes are automatically saved thanks to the auto-save feature.

Finally, we are going to explain what is a slide in Google Slides, you are about to get a Master's degree in Google Slides knowledge!
The slides in Google Slides are all the sheets that you can edit to put your content on them. You can modify and make all the changes you want. Add text, images, transitions, change the background color, add links to other pages... Google Slides has endless editing possibilities at your disposal.

This is the end of the lesson on Google Slides. Surely your presentations look great with all the new information you have. If you want to know more about this topic, you can read this article from Slidesgo School about the advantages of Google Slides and PowerPoint .
Do you find this article useful?
Related tutorials.

How to Download Google Slides Templates
When preparing a presentation, many people start panicking because they realize how much time it will take to edit each and every slide. Creating them from scratch, filling them in, looking for pictures, moving the elements...How stressful! But there is a solution that saves you a lot of time. We're sure that you've browsed the internet for templates, or basically, pre-established designs and elements, that can be downloaded for free and can be edited to your liking. Are we right? Then, we have some good news for you!

Discover our collection of printable templates
With the advance of technology, printing has become something that is no longer a necessity. Smartphones have made the paper format less and less frequent, but there are still certain cases in which having physical resources is much more convenient. Whether it's for taking notes, handing out assignments, making worksheets or handing out business cards or invitations, it's necessary to print your customized designs.From now on, in every Slidesgo printable presentation that you download, you will find the instructions for printing on the third slide. Depending on the style, colors or format of each presentation, we will tell you if you can...

How to Add Superscript and Subscript in Google Slides
Let’s take the most famous formula: E=mc^2, Einstein’s relativity equation. It wouldn’t be the same if it was E=mc2, right? Okay, yes, some people write it like that because it’s very famous and it won’t be misunderstood. But technically… It can! This is where the sophistication of superscript or subscript enters the room! Do you know how to write them in equations, copyright brands or even footnotes in your presentations? Let’s figure out how.

How to Add Superscript and Subscript in PPT
It can be a registered brand, a footnote or a math formula that you need to properly write. “2^2+2” is not the same as “22+2”, is it? Using superscript or subscript in a proper way makes a whole difference in texts. If it’s for your mathematical or physics complex formulas or just an anecdotic footnote, let’s figure out how to write them in a powerpoint presentation!

- Get started with computers
- Learn Microsoft Office
- Apply for a job
- Improve my work skills
- Design nice-looking docs
- Getting Started
- Smartphones & Tablets
- Typing Tutorial
- Online Learning
- Basic Internet Skills
- Online Safety
- Social Media
- Zoom Basics
- Google Docs
- Google Sheets
- Career Planning
- Resume Writing
- Cover Letters
- Job Search and Networking
- Business Communication
- Entrepreneurship 101
- Careers without College
- Job Hunt for Today
- 3D Printing
- Freelancing 101
- Personal Finance
- Sharing Economy
- Decision-Making
- Graphic Design
- Photography
- Image Editing
- Learning WordPress
- Language Learning
- Critical Thinking
- For Educators
- Translations
- Staff Picks
- English expand_more expand_less
Google Slides - Getting Started with Your Presentation
Google slides -, getting started with your presentation, google slides getting started with your presentation.

Google Slides: Getting Started with Your Presentation
Lesson 8: getting started with your presentation.
/en/googleslides/converting-and-printing-docs/content/
Getting started with your presentation
Google Slides allows you to create dynamic slide presentations. These presentations can include animation, narration, images, videos, and much more. In this lesson, you'll learn about the Google Slides interface and the basics of setting up your document, including the menu and shortcut toolbars , zoom settings , and choosing a theme .
Watch the video below to learn more about using Google Slides.
The Google Slides interface
When you create a new presentation in Google Slides, the interface for Slides will appear. This interface displays the toolbar , along with the main view of your presentation. It allows you to create and modify slides , choose a theme , and share the presentation with others.
Click the buttons in the interactive below to learn about the interface for Google Slides.

Presentation Title
Google Drive displays the title of your presentation here and in the View pane of your Google Drive homepage. By default, new presentations are named Untitled presentation . Click the title to change the name.
Google Slides Home Screen
This icon indicates that you are in the Google Slides interface. Click the icon to navigate back to your Google Slides home screen.
Menu Toolbar
Various menus for working with your presentation can be found on the menu toolbar . Click a menu to see available commands and options .
Collaboration Options
Click Share to share your spreadsheet, as well as to allow others to edit it and collaborate on it. Click Comments to add comments or change notification settings.
Shortcut Toolbar
This toolbar provides convenient shortcut buttons for formatting your presentation.
Slide Navigation Pane
The Slide Navigation pane allows you to view and organize the slides in your presentation.
Here, you can view and edit the selected slide.
Click here to add notes to your current slide. Often called speaker notes , they can help you deliver or prepare for your presentation.
Click this button to play your presentation.
Choosing a theme
When you first create a new presentation, Google Slides will prompt you to choose a theme . Themes give you a quick and easy way to change the overall design of your presentation. Each theme has a unique combination of colors , fonts , and slide layouts . Select a theme from the panel on the right side of the window, and it will be applied to your entire presentation.

You can choose from a variety of new themes at any time, giving your entire presentation a consistent, professional look. If you want to change your theme, you can open the Themes panel again by clicking the Theme command on the shortcut toolbar .

Working with the Google Slides environment
Here, we'll show you how to navigate the Google Slides environment. You'll learn how to use the menu and shortcut toolbars , zoom in and out, and play your presentation .
The menu and shortcut toolbars
The Google Slides interface uses a traditional menu system with a s hortcut toolbar . The menus contain commands grouped by function. The shortcut toolbar has buttons for some frequently used commands.

Showing and hiding the menus
You can choose to minimize the menu bar to free up more space to display your slides. Click the Hide the menus command to hide the menu bar, leaving only the shortcut toolbar at the top of the window. Click it again to show the menu bar again.

Zooming in and out
You can zoom in and out of your presentation with the Zoom shortcut. Click Zoom on the shortcut toolbar, then move the mouse cursor over your slide. The cursor will change to a magnifying class with a plus sign inside of it. Now you can left-click to zoom in or right-click to zoom out. Press Escape on your keyboard to return your cursor to normal.

Within the View drop-down menu, hover over Zoom and there you will see options to set the zoom more precisely.

Playing the presentation
When you are ready to show your presentation—or if you want to see what it will look like during a presentation—click the Present button to the right of the menus. You can also click the drop-down arrow for additional presentation options.

- Open Google Slides and create a blank presentation.
- Change the presentation title from Untitled Presentation to Practice Presentation .
- Choose a theme for your presentation.
- Use the View menu to set the zoom to 50%.

/en/googleslides/slide-basics/content/
Unsupported browser
This site was designed for modern browsers and tested with Internet Explorer version 10 and later.
It may not look or work correctly on your browser.
- Learning Guides
How to Use Google Slides (Ultimate Tutorial Guide)
If you're just getting started with making presentations in Google Slides, then this ultimate beginner tutorial guide is for you. Google Slides is a powerful alternative to PowerPoint . It's great for designing and sharing your presentations online. It's freely available, easy to start using, and packed with powerful tools.

Google Slides has the benefit of being integrated into Google Drive and GSuite. So, if you're already using Gmail, Docs, Sheets and other Google software, then it will fit right into your workflow.
There are also plenty of professional Google Slides presentations themes you can use to make a great presentation design quickly:

How to Use Google Slides: To Make Great Presentations Quickly
Creating a presentation takes quite a bit of work. You want to use a toolset that's intuitive and allows you to design quickly. Get a better grasp of Google Slides in this tutorial series and start making your own presentations.
Learn the details of how to use google slides, from setting up your slide designs, to working with text, bullet points, adding images, other media, and more. You'll learn all the core Google Slides presentation tools, discover how to make great presentations using Google Slides, and an efficient presentation design workflow.
Jump into one of these comprehensive beginner tutorials. Or bookmark this Google Slides guide to start working through each tutorial at your own pace.

What Is Google Slides? Great (Free) Online Presentation Software
How to Use Google Slides in 2024 (Quick Start Guide)

12+ Google Slides Presentation Tools: To Learn How to Use (Now)

Should Google Slides Replace PowerPoint in Your Workflow?

How to Convert PowerPoint (PPT) to Google Slides Presentations on Import (+Video)

How to Convert Google Slides to PowerPoint Presentations on Export
.jpeg)
How to Quickly Change Themes For Google Slides (Download & Import)

30+ Cool Google Slides Themes (With Aesthetic Slide Design Ideas for 2024)
.jpg)
How to Add Text & Bullet Points in Google Slides Presentations

How to Create Google Slide Layouts (Dimensions, Sizes, and Design)
.jpg)
How to Add Music & Sound to Google Slides Presentations
.jpg)
How to Add YouTube Video to Google Slides Presentations
.jpg)
How to Use Google Slides Animations and Timed Transitions
.jpg)
How to Make a Timeline on Google Slides With Templates

20+ (Quick) Tips & Tricks to Use Google Slides Like a Professional in 2024

How to Create Professional Google Slideshows for Business Presentations

How to Present Your Google Slides Slideshow Presentation

How to Run Presentations on Google Slides Remotely (With Phone App)
.jpg)
How to Publish & Embed Google Slides Presentations Online
.jpg)
How to Use Google Slides Offline When the Internet Is Down (+Video)

How to Make Your Own Google Slides Presentation Template in 2024
.jpg)
How to Use Google Slides Presentation Collaboration Tools Online
- Google Classroom
- Google Workspace Admin
- Google Cloud
Get started with Google Slides
Learn how to use Google Slides to create engaging presentations, make fewer class copies, and more.
Find tips and tricks from teachers like you
Explore topics one-by-one.
- What is Google Slides
- Accessing Google Slides
- Creating a presentation in Google Slides
- Adding and editing content
- Presenting Google Slides
- Sharing Google Slides
Discover training lessons and related resources to accelerate your learning
Error loading content :( Please try again later
- {[ item.label ]}
{[ collectionContentCtrl.activeTopic.label ]} All resources ({[ collectionContentCtrl.totalItemsCount ]})
{[ item.eyebrow ]}
{[ item.name ]}
{[ item.description ]}
{[ item.featured_text ]}
No results matching your selection :( Clear filters to show all results
Begin your training with Google Slides
Get support from our help center, you're now viewing content for united states..
For content more relevant to your region, choose a different location:
- Grades 6-12
- School Leaders
Easy Classroom Set Up With our Free Email Course!
Google Slides 101: Tips and Tricks Every Teacher Needs To Know
Everything you need to become an expert in no time!

Google Slides is a favorite teaching tool for many educators, both in person and online. With a huge selection of free features and options, this powerhouse allows teachers to create dynamic, interactive presentations that really engage their students. Whether you’re new to Google Slides or are looking to up your game, these resources will help you make the most of it.
Start with the basics
If this is all new to you, watch this video to see how to create simple Google Slides. It walks you through the process one step at a time. Plus, grab a free Google Slides Cheat Sheet from Shake It Up Learning .
Share slides with your students

You aren’t limited to using slideshows to accompany in-class presentations. Share them with students to use when studying, assign them as homework or for asynchronous learning, or create interactive slides (more on that below). Assigning Google Slides to your students is easy in Google Classroom. Teaching With Jennifer Findlay shows you how it’s done.
Use themes and templates

Jeoparty! Theme from SlidesCarnival
Google Slides themes are a pre-set group of colors, fonts, backgrounds, and layouts. You may sometimes see themes called “templates”—these two terms are interchangeable and work in the same way. Themes/templates allow you to enter your own information but save you a lot of time by taking care of the overall look and layout for you.

Doodles Theme from SlidesMania
You’ll find a variety of themes built into the program itself (watch the Google Basics video above to see how to use them). You’ll also find thousands more available for free or purchase online. Using them is generally as simple as clicking a link and then choosing “Use Template” to customize.
Add sounds to Google Slides

Adding sounds like music or narration can make your slide presentation a lot more interesting. Play bird songs in a lesson on ornithology, listen to a concerto as you discuss Mozart, or even create your own read-aloud. Narrated slides are terrific for asynchronous learning situations too. Learn how to add audio from Fluxing Well.
Don’t forget video
The nice thing about embedding a video directly in your Google Slides presentation is that you (or your students) don’t have to worry about clicking over to another window or website. Instead, you can simply set the video to play automatically (or once the Play button is clicked). You can use YouTube videos, videos from other sites, or those you’ve created yourself. (Pro tip: You can set a video to start and stop at any time you like !)
Make your Google Slides interactive
If you think a slideshow is something for students to sit and watch passively, Google Slides is here to prove you wrong. Have kids click on correct answers, type in text, and a whole lot more. This in-depth video demonstrates the entire process. Get more info from Super Sass and Science Class.
Choice boards are a popular way to make slides interactive. This video has the quick how-to.
Drag-and-drop slides are another terrific way to draw learners into a slide presentation. It’s amazing how much of a difference this makes in student engagement!
Link to internal slides and external sites
Adding links really ups the interactivity of your slides and turns them into self-directed activities in a snap. You can link kids to other pages in the slides for self-checking assessments or to external sources like websites or Google Classroom docs. This is one (easy) skill every teacher should master.
Check out Google Slides add-ons
Google Slides itself has lots of features, but you can also get lots of (often free) add-ons to make certain tasks easier. Add-ons are available to make diagrams, find better images, and display math equations … just to name a few. Ditch That Textbook has a list of 20 add-ons all teachers should try here.

Source: Maneuvering the Middle
One add-on teachers swear by is Pear Deck . It makes it easy to drop in formative assessments and evaluate student progress. The basic program is free for all users; learn how it works here .
Get in on the Bitmoji classroom trend
Those Bitmoji classrooms that are all the rage are right at home on Google Slides. Learn more about these virtual classrooms here, including how to make your own.
If you’re really ambitious, you can “animate” your Bitmoji to create a cool effect that kids will enjoy. It takes a bit of time, but as this video shows, it’s really not that hard to do.
Teach students to use Google Slides

Once students know how to use the program, there are all sorts of awesome assignments they can take on. Even elementary kids can learn how it works. Two Boys and a Dad has an awesome free project to get them started. Once they’ve got the basic skills, here are a few ideas to try.
Challenge your students to create an e-book using slides. Have them illustrate their creative writing, or try it for a different twist on a standard report. Get the quick tutorial from Shake Up Learning.
Digital interactive notebooks make it easy for you to monitor student progress, online or in-person. Plus, no more worries about kids “forgetting” to bring their notebook! Two Boys and a Dad shows you how they work. Make your own, or find ready-to-use templates on the web like this one from Student Savvy .
Looking for more ways to use Google Slides? Learn How Teachers Can Plan and Use Virtual “Stations” Online.
Plus, 30+ Virtual Learning Platforms and Tools for Teachers and Kids .

You Might Also Like

18 Free, Fun, and Interactive Google Slides for Teaching Phonics and Sight Words
Find lots of online fun for early readers. Continue Reading
Copyright © 2024. All rights reserved. 5335 Gate Parkway, Jacksonville, FL 32256

- SUGGESTED TOPICS
- The Magazine
- Newsletters
- Managing Yourself
- Managing Teams
- Work-life Balance
- The Big Idea
- Data & Visuals
- Reading Lists
- Case Selections
- HBR Learning
- Topic Feeds
- Account Settings
- Email Preferences
How to Make a “Good” Presentation “Great”
- Guy Kawasaki

Remember: Less is more.
A strong presentation is so much more than information pasted onto a series of slides with fancy backgrounds. Whether you’re pitching an idea, reporting market research, or sharing something else, a great presentation can give you a competitive advantage, and be a powerful tool when aiming to persuade, educate, or inspire others. Here are some unique elements that make a presentation stand out.
- Fonts: Sans Serif fonts such as Helvetica or Arial are preferred for their clean lines, which make them easy to digest at various sizes and distances. Limit the number of font styles to two: one for headings and another for body text, to avoid visual confusion or distractions.
- Colors: Colors can evoke emotions and highlight critical points, but their overuse can lead to a cluttered and confusing presentation. A limited palette of two to three main colors, complemented by a simple background, can help you draw attention to key elements without overwhelming the audience.
- Pictures: Pictures can communicate complex ideas quickly and memorably but choosing the right images is key. Images or pictures should be big (perhaps 20-25% of the page), bold, and have a clear purpose that complements the slide’s text.
- Layout: Don’t overcrowd your slides with too much information. When in doubt, adhere to the principle of simplicity, and aim for a clean and uncluttered layout with plenty of white space around text and images. Think phrases and bullets, not sentences.
As an intern or early career professional, chances are that you’ll be tasked with making or giving a presentation in the near future. Whether you’re pitching an idea, reporting market research, or sharing something else, a great presentation can give you a competitive advantage, and be a powerful tool when aiming to persuade, educate, or inspire others.
- Guy Kawasaki is the chief evangelist at Canva and was the former chief evangelist at Apple. Guy is the author of 16 books including Think Remarkable : 9 Paths to Transform Your Life and Make a Difference.
Partner Center
- Help Center
- Google Docs Editors
- Privacy Policy
- Terms of Service
- Submit feedback
- Present or print slides
Present slides
Want advanced Google Workspace features for your business?
Try Google Workspace today!
You can present Google Slides so they show on a full screen.
View a presentation
To present a full-screen presentation in Google Slides:
- Open a presentation in Google Slides .
- From the current slide, the presentation will become full screen. To change slides, use the arrow keys on your keyboard or click the arrows at the bottom of the presentation.
- To exit full-screen, press the Esc key.
Present with notes, auto-advance slides & more
View a presentation with speaker notes.
- Click Presenter view .
- Click Speaker notes .
Advance slides automatically
- You present your presentation.
- Someone clicks on a link to your published presentation.
- Someone views your published presentation that's embedded in a website.
Advance slides automatically while you present
- Open a presentation in Google Slides.
- Choose how quickly to advance your slides.
Advance slides automatically for a published presentation
- If you use Google Slides through work or school, you can only share the link with people within your organization.
- After you publish your presentation, anyone with the link will be able to see your presentation.
- Choose Link or Embed .
- Under "Auto-advance slides," choose how much time you want to add between slides.
Stop publishing
Highlight & annotate as you present.
When you present, you can use a pen tool to draw or make annotations. Annotations stay during your presentation, but disappear after you end your slideshow.
Use the pen tool during a slideshow
- On your browser, open a presentation in Google Slides .
- To draw or annotate, click and drag on your slide.
Other actions while presenting
When you present, you can choose more options from the toolbar at the bottom of the presentation window:
- Select slides to present from a list
- Open "Presenter" view
- Turn on laser pointer
- Print the presentation
- Download the presentation in PDF or PPTX format
PC keyboard shortcuts
| Stop presenting | |
| Next | → |
| Previous | ← |
| Go to specific slide (7 followed by Enter goes to slide 7) | |
| First slide | |
| Last slide | |
| Open speaker notes | |
| Open audience tools | |
| Toggle laser pointer | |
| Toggle captions (English only) | |
| Toggle full screen | |
| Show a blank black slide | b |
| Return to the presentation from a blank black slide | Press any key |
| Show a blank white slide | |
| Return to the presentation from a blank white slide | Press any key |
Mac keyboard shortcuts
| Stop presenting | |
| Next | → |
| Previous | ← |
| Go to specific slide (7 followed by Enter goes to slide 7) | |
| First slide | |
| Last slide | |
| Open speaker notes | |
| Open audience tools | |
| Toggle laser pointer | |
| Toggle captions (English only) | |
| Toggle full screen | |
| Show a blank black slide | b |
| Return to the presentation from a blank black slide | Press any key |
| Show a blank white slide | |
| Return to the presentation from a blank white slide | Press any key |
Chrome keyboard shortcuts
Need more help, try these next steps:.
Using Google products, like Google Docs, at work or school? Try powerful tips, tutorials, and templates. Learn to work on Office files without installing Office, create dynamic project plans and team calendars, auto-organize your inbox, and more.
Crea presentazioni fantastiche in collaborazione
Crea e presenta slide d'effetto nel browser, ovunque tu sia. Non devi installare nulla.

Crea immagini accattivanti con Gemini in Presentazioni
Genera immagini uniche in modo facile con un semplice prompt e dai vita a contenuti completamente nuovi. Scopri cos'altro puoi fare con l'aiuto di Gemini provando Gemini per Google Workspace .
Presentazioni raffinate, con semplicità
Rendi vive le tue presentazioni Google affinandole con video, animazioni, transizioni fluide e molto altro.

Inizia a utilizzare i modelli
Scegli tra vari modelli predefiniti di alta qualità con differenti layout, immagini, colori e caratteri.

Rispecchia il brand
Questa funzionalità è disponibile in alcuni piani di Google Workspace Business e Google Workspace Grandi aziende .
Crea in modo coerente utilizzando modelli a livello di dominio, che possono essere applicati all'intera organizzazione con pochi clic.

Aggiungi un tocco di stile con GIF e adesivi
Dai alle tue slide una spinta di creatività con GIF e adesivi, disponibili direttamente in Presentazioni.

Collaborazione flessibile
Sincronizzati con i commenti e le modifiche in tempo reale, che tu stia collaborando a una presentazione con un partner commerciale, l'intero team o persino contatti esterni.
Utilizza Meet direttamente dai documenti
Collabora in contesto partecipando alle riunioni in Presentazioni, Documenti o Fogli Google.

Controlli di condivisione semplici
Le autorizzazioni di condivisione facili da gestire ti offrono un controllo granulare su chi può modificare, commentare o visualizzare le tue slide.

Cursori in tempo reale
Segui i tuoi collaboratori e individua le informazioni importanti mentre lavorate insieme.

Connettiti con il pubblico
Trasmetti il tuo messaggio in totale tranquillità, con la flessibilità necessaria per poter scegliere se presentare dal vivo o registrare direttamente all'interno di Presentazioni.

Queste funzionalità sono disponibili in alcuni piani di Google Workspace Business e Google Workspace Grandi aziende .
Presenta in modo professionale, direttamente da Google Meet
Accedi a tutti i controlli di Presentazioni e Meet in un unico posto e lasciati coinvolgere da presentazioni più fluide ad alta risoluzione.

Mostra chi presenta, in primo piano
Concentra l'attenzione su di te con Presentazione in evidenza, che inserisce il tuo video direttamente nella presentazione.

Registra facilmente la tua presentazione
Registra e condividi le presentazioni in modo che il tuo pubblico possa guardarle nel momento più opportuno.
La sicurezza, sempre
I tuoi dati vengono criptati per impostazione predefinita e grazie a una serie di misure di sicurezza, come la crittografia lato client avanzata , le misure antiabuso e i controlli per la privacy, restano privati .

Compatibile con altri strumenti
Importa le presentazioni Microsoft PowerPoint o Canva online e migliora la collaborazione con le funzionalità di Presentazioni come commenti, attività e controlli di condivisione granulari.
Fai di più con Presentazioni Google

Lavora ovunque ti trovi
Visualizza, presenta o collabora nell'app Presentazioni sul tuo smartphone o tablet (disponibile nell' App Store e nel Play Store ) oppure connettiti da computer.

Mantieni la produttività, anche offline
Apri, crea e modifica le presentazioni anche senza connessione a internet, per la massima produttività ovunque ti trovi.

Integra i tuoi flussi di lavoro
Sfrutta tutta la potenza di Presentazioni ottimizzando i tuoi flussi di lavoro con i componenti aggiuntivi di Presentazioni . Puoi anche creare i tuoi propri componenti grazie a una serie di strumenti per sviluppatori.
Vuoi saperne di più su Presentazioni Google?
Dai un'occhiata alle Domande frequenti per conoscere altri dettagli.
Chiunque abbia un Account Google può creare presentazioni Google. Tuttavia, alcune funzionalità di Presentazioni come Registrazione e Presentazione in evidenza sono disponibili solo nei piani di Google Workspace, mentre le funzionalità di Gemini per Workspace come Aiutami a visualizzare sono disponibili come componenti aggiuntivi. Consulta piani e prezzi per le organizzazioni o Google Workspace Individual .
Sì. Puoi convertire presentazioni Microsoft PowerPoint nel formato Presentazioni Google o modificare direttamente le presentazioni PowerPoint, senza dover creare una copia. Il file originale resterà invariato.
La modifica simultanea consente a più persone di collaborare alla medesima slide nello stesso momento, senza che debbano scambiarsi continuamente le diverse versioni. Le impostazioni di condivisione ti permettono di controllare chi può visualizzare e modificare una slide, mentre la cronologia delle revisioni ti consente di ripristinare le versioni precedenti. Disponibile anche in Documenti Google e Fogli Google.
Crea, collabora e presenta con Presentazioni Google
IMAGES
VIDEO
COMMENTS
How to Create a Blank Presentation. Now that you have a Google account, it's time to create your first presentation. Head over to Google Slides and place the cursor on the multicolored "+" icon in the bottom-right corner. The + turns into a black pencil icon; click it. Pro Tip: Type.
Ppt for presentation on google inc. Google is an American multinational technology company that specializes in internet-related services and products. It has become the world's largest search engine due to its innovative products and strong engineering capabilities. The presentation provides an overview of Google's history, mission, products ...
Aug 4, 2015 • Download as PPTX, PDF •. Google is an American multinational company founded in 1998 by Larry Page and Sergey Brin built around its popular search engine. It has since expanded to offer over 151 products and services including Gmail, YouTube, Android, Google Maps, Google Chrome, and more. The company's mission is to organize ...
Google is an American multinational technology company founded in 1998 by Larry Page and Sergey Brin. It invests heavily in research and development to produce internet-based products and services. Google has grown significantly over the years and now employs over 53,000 full and part-time employees worldwide.
Create stunning presentations with Google Slides. Discover slide templates for every use case, use AI to generate unique visualizations, and more.
This Google Slides tutorial for beginners is a complete crash course, taking you by the hand and showing you step by step how to make some amazing and mesmer...
Use a private browsing window to sign in. Learn more about using Guest mode. Next. Create account. Access Google Slides with a personal Google account or Google Workspace account (for business use).
To create a new presentation, you will either need to click on "Blank" or choose a pre-existing template from the "Template Gallery". Clicking on blank will open up a new blank presentation on Google Slides. All the presentation that you have created previously will be visible under the "Recent Presentation" section (as indicated in the image above).
Tip #2: Use plenty of images. Presentations need to be visual. We remember images, we understand images, we recognize and associate with images, and we are brief visual creatures. You need to use images, but we wish it was that simple. don't just throw them in for the sake of it! The images you use have a huge effect.
Google Slides is a presentation program included as part of the free, web-based Google Docs suite offered by Google.Google Slides is available as a web application, mobile app for: Android, iOS, and as a desktop application on Google's ChromeOS.The app is compatible with Microsoft PowerPoint file formats. The app allows users to create and edit files online while collaborating with other users ...
You can even search the web and Google Drive for relevant content and images directly from Slides. Extend collaboration and intelligence to PowerPoint files Easily edit Microsoft PowerPoint presentations online without converting them, and layer on Slides' enhanced collaborative and assistive features like comments, action items, and Smart ...
To create a new Google Slides presentation, open a web browser and go to Slides.Google.com. If you want to start from a template, you can choose one from the template gallery. Otherwise, click "Blank" to create a new blank presentation. Your blank presentation starts with a single simple slide with space to enter a title and subtitle.
Switch from Microsoft PowerPoint to Google Slides. Google Slides cheat sheet. Tips for great presentations. Use Google Workspace keyboard shortcuts. Print, save, or customize Learning Center guides. Learn how to print Learning Center guides, save them as PDFs, or customize them for your organization. On this page Slides quick start guides.
A Google Slides presentation has the same purpose as a PowerPoint presentation: to serve as visual support in an oral presentation. However, Google Slides offers different advantages such as being able to have your presentation in the Google cloud and have access to it from anywhere and from any device, that several users can modify the same presentation at the same time or that all changes ...
Google Slides is an online presentation app that lets you create and format presentations and work with other people. Step 1: Create a presentation. To create a new presentation: Open the Slides home screen at Google Slides. In the top left, under "Start a new presentation," click New . This will create and open your new presentation.
The Google Slides interface. When you create a new presentation in Google Slides, the interface for Slides will appear. This interface displays the toolbar, along with the main view of your presentation. It allows you to create and modify slides, choose a theme, and share the presentation with others.. Click the buttons in the interactive below to learn about the interface for Google Slides.
If you're just getting started with making presentations in Google Slides, then this ultimate beginner tutorial guide is for you. Google Slides is a powerful alternative to PowerPoint. It's great for designing and sharing your presentations online. It's freely available, easy to start using, and packed with powerful tools.
Rename your presentation—Click Untitled presentation and enter a new name.. Add images—Click Insert Image to add images from your computer, the web, Google Drive, and more. You can also move, delete, or resize images. Add text—Click Insert Text box to add new text boxes. Then, click a text box to enter text. You can move, delete, or re-size text boxes.
Get started with Google Slides. Learn how to use Google Slides to create engaging presentations, make fewer class copies, and more. Watch video.
Google Slides itself has lots of features, but you can also get lots of (often free) add-ons to make certain tasks easier. Add-ons are available to make diagrams, find better images, and display math equations … just to name a few. Ditch That Textbook has a list of 20 add-ons all teachers should try here. Source: Maneuvering the Middle.
Presenteren als een professional, rechtstreeks vanuit Google Meet. Toegang tot alle functies van Presentaties en Meet op één plek, met soepelere presentaties in een hoge resolutie. Premium functie. Deze functie is beschikbaar voor bepaalde Google Workspace Business - en Google Workspace Zakelijk -abonnementen.
Go to Google Classroom. 2. Click on the plus sign in the right hand corner. 3. Click join class. 4. Then type in the classroom code and click join. Google Classroom. HTML view of the presentation.
A strong presentation is so much more than information pasted onto a series of slides with fancy backgrounds. Whether you're pitching an idea, reporting market research, or sharing something ...
On your browser, open a presentation in Google Slides. At the top right corner, click Slideshow . At the bottom left, click Options Enable pen tool. To draw or annotate, click and drag on your slide. Optional: To change the pen color, at the bottom, click Pen tool Select a color. To erase annotations on the current slide, at the bottom, click ...
Crea presentazioni sbalorditive con Presentazioni Google. Scopri i modelli di slide per ogni caso d'uso, utilizza l'IA per generare visualizzazioni uniche e molto altro.
There's a growing base of Google Slides presentation templates on Envato, with more added regularly. The Best Source for Presentation App Templates (With Unlimited Downloads) No matter which presentation app you use, Envato is a subscription with everything you need. One subscription gives you access to a wide selection of templates for ...
I f you're looking to create a compelling presentation to showcase a new idea or persuade others, Google Slides may be the first option that comes to mind. But with few built-in templates, basic ...